
How Do You Open a Dyson V7 Vacuum Without Snapping the Tabs?

Most people assume opening the dirt cup requires prying the bottom door loose by hand. Forcing that flap usually cracks the delicate plastic hinge, but pulling the red top lever straight up firmly lifts the inner cone and releases the bottom latch automatically. When you need to wash the clear bin, a small secondary catch underneath lets you slide the canister off its track.
The exact steps change depending on your goal and how dirty the machine is inside. Fine drywall dust or pet hair often chokes the sliding runners, causing the lever to stick and tempting people to yank too hard. Opening the motorized floor head also works differently, requiring a coin to unlock the side cap rather than working any plastic clips. Knowing how to ease these stiff parts lets you clear jams while keeping every seal airtight and intact.
Pull the Top Red Latch Straight Up to Empty Dirt
Emptying the clear plastic dirt cup takes a single smooth motion once you know which way to pull. Before you begin, switch the vacuum off and detach the long metal wand or any handheld tools from the main body. Removing the long wand keeps the machine balanced in your hands and stops you from accidentally bumping the floor nozzle against the rim of your trash can.
Hold the vacuum handle firmly in your primary hand while positioning the bottom of the canister deep inside your trash can. This keeps loose dust clouds contained as the bottom door opens. Locate the bright red catch on top of the machine, positioned directly between the handle grip and the center cone piece that separates dust.
- Place your fingers under the lip of the top red release catch.
- Pull the red catch straight up toward the ceiling with steady, firm pressure. Do not pull the lever backward toward the battery or forward toward the nozzle opening.
- Continue pulling upward until the entire center cone piece slides up along its internal runners. As the metal shroud clears the top of the canister, the bottom trapdoor drops open automatically on its spring hinge.
- Gently shake the body up and down inside the bin to loosen packed clumps of pet hair and carpet fuzz.
Many people snap the top plastic clip because they yank it backward at an angle, treating it like a trigger. The red lever is attached to a sliding track that only moves on a vertical path. Pulling back twists the plastic arms off their guides, leaving the vacuum unable to release the bottom flap.
Clear Trapped Grit When the Red Lever Feels Stuck
If you pull the top red latch and it refuses to budge, do not force it. Forcing a stuck lever will bend or crack the thin hinge pins beneath the plastic collar. The sliding track usually locks up because fine debris, like drywall dust, fireplace ash, or packed pet hair, has wedged itself into the narrow space between the clear plastic dirt cup and the inner metal shroud.
Work through these simple steps to free up the mechanism safely:
- Tap the canister walls: Use the heel of your hand to tap firmly around the outside of the clear plastic dirt cup. This vibration dislodges compacted dirt resting against the inner rubber seals.
- Remove suction tube tension: Confirm that the front inlet is completely bare. If an extension tube is wedged tight into the vacuum mouth, it can twist the plastic housing just enough to pinch the sliding runners.
- Lift from beneath the red collar: Instead of pulling solely on the small top finger tab, cup your fingers under both sides of the red collar beneath the cyclone. Applying upward pressure evenly across both sides lifts the track without tilting it sideways.
- Wiggle the center piece: Take hold of the center cone piece and gently twist it a fraction of an inch to the left and right while lifting upward. This breaks the friction hold of fine powder.
Never spray liquid lubricants or household penetrating oils into the sliding tracks. Petroleum-based lubricants melt and weaken polycarbonate plastic, making the canister brittle enough to shatter under regular suction pressure. Also, oils attract fine dust, which forms a thick paste that permanently jams the internal tracks.
The handle holds both the motor and the power pack, which gives the machine its back-heavy feel while you wrestle with a stuck latch. If you often struggle with arm strain during maintenance, you can check what is the lightest cordless vacuum cleaner to see how different builds compare in day-to-day handling.
Press the Red Track Catch to Slide the Canister Off
Washing fine dust out of the clear plastic dirt cup requires sliding the bin completely off the main body. You should never run water over the center cone piece that separates dust, because trapped moisture inside the small cyclones will ruin the internal motor. Detaching the clear cup lets you rinse the plastic thoroughly without risking moisture damage to electrical contacts.
- Pull the top red lever upward to open the bottom trapdoor, exactly as you would for normal emptying. Keep the center cone piece extended in its raised position.
- Turn the vacuum around so you are looking at the base of the machine, right along the underside runner track where the clear cup joins the handle frame.
- Look for a small red plastic release tab located on the base rail near the metal electrical pins.
- Press this secondary red catch inward toward the vacuum body.
- While holding the tab down, slide the clear plastic dirt cup straight down and forward along the runner rails. The canister will slide off the front of the handle assembly cleanly.
Once removed, wash the clear plastic dirt cup using cold water and a soft microfiber cloth. Avoid dish soap and abrasive scouring pads, which scratch the clear surface and degrade the front latch lip. Let the canister air dry completely for at least 24 hours before reattaching it. Snapping a damp bin onto the motor frame can pull water into the electrical contacts, which can damage your power cell. If an electrical short ever ruins your battery pack, you can review how much is a new battery for a cordless vacuum to plan your repair budget.
Twist the Side Dial With a Coin to Free Hair
Hair, carpet fibers, and loose threads inevitably wrap around the spinning brush roller inside your floor roller nozzle. When hair builds up around the drive bearing, it creates friction that bogs down the motor, causing the head to cut out after a few seconds of cleaning. Opening the floor nozzle takes less than a minute and requires no power tools.
Always release the floor nozzle from the vacuum wand before servicing it. Lay the floor head upside down on a flat table or over a towel so you do not scratch the plastic casing. Look at the side edge of the nozzle housing to find the round locking end cap.
You will see a wide, shallow slot in the center of the side cap with two small indicator icons molded into the plastic: a locked padlock and an unlocked padlock. Take a wide coin, such as a US quarter, and insert it firmly into the slot. Avoid using a narrow flat-head screwdriver or a table knife. Thin metal blades concentrate force on the soft plastic groove, stripping the slot and permanently locking the roller inside.
Turn the coin a quarter-turn counterclockwise until the raised indicator dot on the cap lines up with the unlocked icon. Slide the round end cap straight out from the housing. Grasp the end of the spinning brush roller and pull it straight out of the nozzle body.
Use a pair of scissors to slice along the grooved channel on the brush bar, then peel away tangled hair by hand. Check the drive cog inside the housing cavity for wrapped carpet threads before sliding the roller back onto the drive spindle. Align the end cap, insert your coin, and turn it a quarter-turn clockwise until it clicks into the locked position.
Push the Base Gate Firmly Until the Latch Clicks
Closing the vacuum after emptying or washing confuses many owners because it requires two distinct, separate movements. Trying to slam the bottom door shut while the center cone piece is still raised is the quickest way to snap the front catch.
First, push the center cone piece back down into the clear canister. Place your palm flat across the top exhaust surface and press straight down toward the battery base. You will feel the assembly slide down its runner tracks until it sits completely flush with the top lip of the dirt cup. The sliding tracks must drop into their home position before the lower gate can latch.
Next, swing the clear bottom door upward toward the base of the canister. Rather than pinching the red latch tab with your fingers, place your thumb in the center of the door frame and press upward firmly until you hear a sharp, solid click. This click indicates that the spring-loaded plastic tooth has locked securely over the catch lip.
If the door refuses to latch shut, stop immediately and check the red rubber gasket that runs along the inner rim of the base door. Fine grit or trapped carpet threads often wedge underneath the rubber lip, preventing the flap from closing far enough for the tooth to catch. Wipe the rubber ring clean with a damp cloth and confirm that the seal is seated evenly in its groove. A smooth, even seal protects the internal airflow paths and maintains strong suction across your floors.
Choose Sturdy Replacement Parts If Your Plastic Tabs Break
When a plastic tab snaps on your dirt bin or floor nozzle, the vacuum loses its airtight seal and cleaning suction drops sharply. You do not need to discard the entire machine if a hinge pin splits or a locking catch cracks off. Standard wear parts can be swapped out individually at home using direct replacement components.
If your bottom trapdoor swings loose and will not click shut, check for a replacement bin door lid. Look for replacement lids that come pre-fitted with fresh rubber sealing rings and reinforced hinge joints. Make sure the replacement door specifically matches your exact generation of canister, as hinge post widths vary slightly between stick vacuum lines.
If the long side runners on the canister crack from being pulled off-track, an entire clear plastic dirt cup replacement will restore the machine. Replacing the whole clear cup is also the best move if fine scratches have clouded the plastic or if the bottom latch socket has worn smooth over years of use.
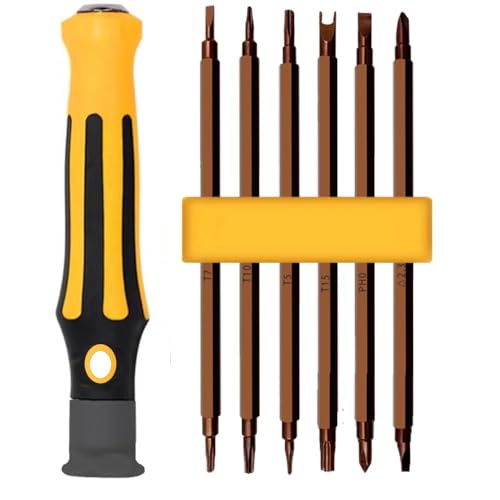
When working on deeper maintenance, such as loosening the internal handle housing or replacing drive motors, avoid using standard hardware screwdrivers. The screws holding the internal frames together use soft alloys and non-standard recessed drives. Using the wrong bit will strip the shallow screw heads instantly. A specialized vacuum disassembly tool set with extended-length shafts and correct drive profiles allows you to loosen and tighten internal fasteners safely without stripping the heads.
For damaged cleaner heads where the roller bearing has seized or the side coin slot has completely stripped out, replacing the spinning brush roller or the entire lower floor nozzle restores full agitation. When sourcing a complete replacement floor head, check the electrical connector pins inside the neck socket to ensure they match the pin spacing on your extension wand.

- VC Score9.4
BCP Score is a ranking system developed by bestcleanerproducts.com. BCP Score has no relationship or impact from any manufacturers or sales agent websites. Learn more
- Branduwant

- VC Score9.2
BCP Score is a ranking system developed by bestcleanerproducts.com. BCP Score has no relationship or impact from any manufacturers or sales agent websites. Learn more
- BrandWYWY.Wide

- VC Score9.2
BCP Score is a ranking system developed by bestcleanerproducts.com. BCP Score has no relationship or impact from any manufacturers or sales agent websites. Learn more
- Brandhedonlee

- VC Score9.0
BCP Score is a ranking system developed by bestcleanerproducts.com. BCP Score has no relationship or impact from any manufacturers or sales agent websites. Learn more
- BrandHather

- VC Score9.0
BCP Score is a ranking system developed by bestcleanerproducts.com. BCP Score has no relationship or impact from any manufacturers or sales agent websites. Learn more
- BrandWYWY.Wide
- VC Score8.6
BCP Score is a ranking system developed by bestcleanerproducts.com. BCP Score has no relationship or impact from any manufacturers or sales agent websites. Learn more
- BrandSKZIRI

- VC Score8.6
BCP Score is a ranking system developed by bestcleanerproducts.com. BCP Score has no relationship or impact from any manufacturers or sales agent websites. Learn more
- BrandDyson

- VC Score8.4
BCP Score is a ranking system developed by bestcleanerproducts.com. BCP Score has no relationship or impact from any manufacturers or sales agent websites. Learn more
- BrandDyson

- VC Score8.4
BCP Score is a ranking system developed by bestcleanerproducts.com. BCP Score has no relationship or impact from any manufacturers or sales agent websites. Learn more
- BrandDyson

- VC Score8.0
BCP Score is a ranking system developed by bestcleanerproducts.com. BCP Score has no relationship or impact from any manufacturers or sales agent websites. Learn more
- BrandCandgFun

- VC Score7.8
BCP Score is a ranking system developed by bestcleanerproducts.com. BCP Score has no relationship or impact from any manufacturers or sales agent websites. Learn more
- BrandDyson

- VC Score7.2
BCP Score is a ranking system developed by bestcleanerproducts.com. BCP Score has no relationship or impact from any manufacturers or sales agent websites. Learn more
- BrandZynet
Last update on 2026-10-26 / Affiliate links / Images, Product Titles, and Product Highlights from Amazon Product Advertising API


How to Refinish a Fiberglass Pool

How Do You Keep Raccoons Out of Your Pool?

How to Fix Cyanuric Acid in Your Pool

How to Shape a Pool Cue Tip to Stop Miscues

Best Far Infrared Sauna Sauna Heats: Top Picks of 2026

11 Best Far Infrared Sauna Carbon Fiber Heaters of 2026 For Balanced Full-Body Heat

11 Best Carbon Far Infrared Sauna of 2026 For Even Heat

10 Best Bluetooth Speaker For Sauna of 2026 For Heat and Steam


