
How to Open a Dyson V15 Vacuum Without Breaking It?

Hold the machine directly over a trash can and push the red lever firmly down along the side of the clear dust bin. Taking this step first lets the canister slide forward so the bottom lid pops open on its own. Forcing the plastic handle when it resists is what usually cracks the hinge, so steady pressure along the slide track is all it takes.
The exact steps shift depending on what needs cleaning. Dumping everyday dust takes one quick push, but taking the bin all the way off requires pressing a second hidden red tab on the metal slide track. Clearing tangled hair out of the floor head means turning a separate latch on the side cap. Packed pet hair or trapped grit can also wedge the rubber seals tight. Here is how to unlock each section cleanly without damaging any parts.
Emptying the Dust Bin and Taking the Canister Off
Emptying the clear dust bin on a Dyson V15 uses a two-stage sliding action. The motion pushes the debris out and wipes the internal shroud clean at the same time, but you must move the parts in the right order. Forcing the handle when a latch is half-engaged is the most common way homeowners snap the red plastic slide lever.
Always disconnect the extension wand or cleaning tool before opening the dust container. Removing the wand balances the machine in your hand and prevents accidental leverage that could crack the neck joint. Once the machine is stripped down to the handheld body, carry it straight to your trash can before touching any release tabs.
- Hold the vacuum body upright by the main handle so the base of the clear dust bin points straight down into the trash can. Position the bottom rim several inches down inside the trash bag to stop fine dust clouds from rising back into your face.
- Locate the red slide lever on the side of the clear dust bin. Place your thumb or the heel of your hand firmly against the textured red pad.
- Push the red lever straight down toward the bottom of the bin in one firm, continuous stroke. Do not wiggle the lever sideways. As the clear dust bin moves along the metal slide track, the cone-shaped inner filter body (cyclone) stays in place while a red silicone wiper pushes pet hair and fuzz off the inner metal screen.
- When the bin reaches the very end of the metal track, a secondary mechanical catch triggers the bottom flap. The hinged lid clicks open automatically and drops the debris out the bottom.
- To close the machine, push the hinged bottom flap upward until the plastic latch clicks shut against the rim. Then, push the clear dust bin straight back up along the metal track toward the handle until the red lever clicks back into its resting position.
Sometimes you need to take the clear dust bin completely off the vacuum body. This is necessary if fine plaster dust jams the slider, if long hair gets trapped behind the rubber wiper, or if you want to wash the clear plastic shell. Dyson hides the release mechanism for this second stage along the guide rails.
- Follow the steps above to push the red lever all the way down so the bottom flap opens completely.
- Look at the underside of the vacuum where the bin slides along the metal slide track (runner). You will see a small, secondary red tab marked with a white or raised arrow.
- Press and hold this secondary red tab down firmly against the metal rail. Keep that button pressed while gently pulling the clear dust bin forward and off the track.
- The clear plastic bin will slide completely off the main body, leaving the cone-shaped inner filter body exposed.
- To slide the bin back on, align the plastic guide rails on the clear bin with the metal slide track on the main motor housing. Slide the bin smoothly upward until the secondary red latch clicks into place. Finish by swinging the bottom flap closed until it latches tightly.
If you find that holding the vacuum while juggling the bin causes wrist strain, balance is often a factor. You can compare the weight balance of different stick designs by looking at the lightest cordless vacuum cleaner models to see how canister placement changes everyday handling.
Opening the Cleaner Heads to Free Wrapped Hair
The V15 cleaner heads require a different technique than the main dust bin. Depending on which package you have, your vacuum came with either the Digital Motorbar floor nozzle (which has plastic detangling teeth) or the Laser Slim Fluffy head (which uses a soft woven nylon roller for hard surfaces). Both heads open from the side to let you remove the spinning brush roller, but their latches work differently.
The Digital Motorbar head uses a locking end cap (roller brush side latch) held in place by a quarter-turn dial. Do not use a sharp screwdriver to turn this dial. Soft household plastic strips easily under a narrow metal blade, leaving you with a rounded slot that is impossible to unlock. A wide coin, such as a US quarter, or a flat plastic pry tool spreads the force evenly across the entire channel.
Insert your coin into the curved slot on the side of the floor nozzle casing. Turn the coin a quarter-turn counterclockwise until the slot points to the unlocked padlock icon stamped into the plastic. Once unlocked, pull the round end cap straight out from the housing. The spinning brush roller will slide out with it. Slide the brush bar off the end cap spindle, pull away wound threads or hair clumps, and check the brass drive cog inside the housing for caught debris.
The Laser Slim Fluffy head does not require a coin. Instead, inspect the back or side of the floor nozzle for a red sliding toggle switch. Push this red switch upward toward the joint neck. The spring-loaded end cap will pop open instantly, allowing you to lift the soft roller bar straight out of the casing. Check the recessed cavity behind the brush for stuck grit that can grind down the drive motor over time.
Use this quick checklist whenever you reassemble either cleaner head to prevent mechanical wear:
- Wipe all loose dirt and hair away from the internal drive cogs before sliding the roller back in.
- Line up the keyed plastic splines inside the roller with the matching motor gear inside the housing.
- Seat the end cap completely flush with the outer shell before turning the locking dial.
- Rotate the brush roller two full turns by hand to confirm it spins freely before attaching the head to the vacuum wand.
Fixing a Stuck Slide Lever and Caring for Internal Gaskets
A red slide lever that refuses to push down is almost always jammed by packed debris rather than a broken spring. When pet hair, carpet fibers, and fine drywall dust fill the space between the clear bin and the inner cyclone shroud, the mixture acts like a wedge. The red silicone wiper ring swells against this dirt plug, locking the bin tightly to the metal track.
Never hit the red lever with a hard object or throw your full body weight into pushing it down. The lever connects to a small internal plastic hook that transfers your push into downward motion. Excessive force snaps this hook off the slide carriage, turning an ordinary blockage into a major repair. Instead, hold the vacuum handle securely with one hand and tap the outside of the clear plastic bin with the heel of your other hand. This vibrations break up packed dirt plugs without damaging the plastic.
If tapping does not free the slider, grasp the bottom edge of the clear bin with your fingers. Gently wiggle the bin a fraction of an inch side to side while applying steady downward pressure on the red lever. If the bin moves even a quarter of an inch, reach into the gap with a narrow plastic tool or an old blunt butter knife to flick out trapped hair clumps. Once the pressure on the internal silicone ring drops, the lever will glide smoothly down the runner track.
Water damage is another major risk when maintaining a V15. While the clear dust bin can be rinsed under cold running water once it is separated from the vacuum, the rest of the machine must stay dry. Never rinse the cone-shaped inner filter body, the handle assembly, or the cleaner head bodies with water. These sections contain sensitive motor wiring, electronic piezo sensors, and electrical terminal pins that power the motorized brush heads.
If you wash the clear bin, wipe away excess water and let it air-dry in a warm, well-ventilated spot for at least 24 full hours before clicking it back onto the metal slide track. Reinstalling a damp bin creates a muddy sludge with the next batch of household dust. That paste dries inside the slide grooves and permanently cements the runner tracks shut. When checking your machine components, also inspect the battery seat for any loose dust; if you ever encounter electrical failure or runtime drops, you can review how much a new battery for a cordless vacuum costs before replacing mechanical latches.
Choosing the Right Replacement Parts and Cleaning Attachments
Keeping a stick vacuum running smoothly often requires specific accessories and replacement hardware. Because the sliding bin mechanism and floor nozzles rely on molded plastic latches, repeated drops or forceful cleanouts can wear down release tabs over time. Knowing what to look for in replacement parts saves you from buying incompatible hardware.
If the main bin lever snaps, look for upgraded replacement triggers that feature reinforced plastic along the primary stress ribs. Standard factory latches rely on a narrow hinge that carries all downward force; aftermarket replacements often widen this contact area to distribute pushing pressure across the metal runner track. Check that any replacement latch lists exact compatibility with the V15 click-in bin track, as earlier stick models use different rail widths and screw placements.
For clearing deep clogs inside the bin shroud or behind radiator covers, narrow flexible crevice attachments are far more effective than rigid plastic tubes. A slim nozzle with a slender profile reaches directly into the tight cavity between the clear bin wall and the cyclone cones, dislodging packed pet hair before it jams the rubber wiper. When choosing these nozzles, verify that the attachment features a dedicated quick-release button that locks firmly into the vacuum neck without leaking suction.
If you plan to service internal parts or swap out worn runner seals, purchase a dedicated cordless vacuum repair screwdriver set. These sets include extended-shaft drivers that reach deeply recessed screws without stripping the soft plastic housings. Using standard household bits often rounds off the screw heads, making future maintenance impossible.
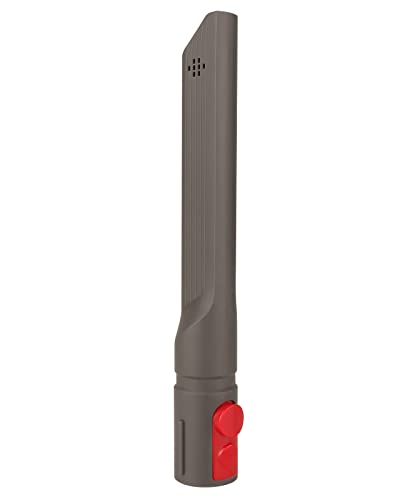
- VC Score9.4
BCP Score is a ranking system developed by bestcleanerproducts.com. BCP Score has no relationship or impact from any manufacturers or sales agent websites. Learn more
- BrandFullclean
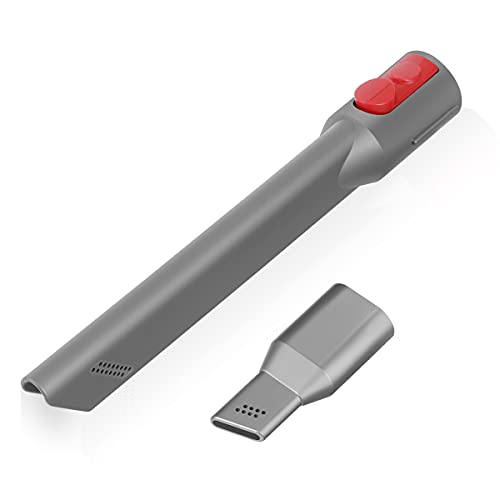
- VC Score9.4
BCP Score is a ranking system developed by bestcleanerproducts.com. BCP Score has no relationship or impact from any manufacturers or sales agent websites. Learn more
- BrandLANMU

- VC Score9.0
BCP Score is a ranking system developed by bestcleanerproducts.com. BCP Score has no relationship or impact from any manufacturers or sales agent websites. Learn more
- BrandHather

- VC Score9.0
BCP Score is a ranking system developed by bestcleanerproducts.com. BCP Score has no relationship or impact from any manufacturers or sales agent websites. Learn more
- BrandSealegend

- VC Score8.6
BCP Score is a ranking system developed by bestcleanerproducts.com. BCP Score has no relationship or impact from any manufacturers or sales agent websites. Learn more
- BrandYUYUEMI

- VC Score8.6
BCP Score is a ranking system developed by bestcleanerproducts.com. BCP Score has no relationship or impact from any manufacturers or sales agent websites. Learn more
- BrandDyson

- VC Score8.6
BCP Score is a ranking system developed by bestcleanerproducts.com. BCP Score has no relationship or impact from any manufacturers or sales agent websites. Learn more
- BrandWYWY.Wide

- VC Score8.2
BCP Score is a ranking system developed by bestcleanerproducts.com. BCP Score has no relationship or impact from any manufacturers or sales agent websites. Learn more
- BrandLANMU

- VC Score8.0
BCP Score is a ranking system developed by bestcleanerproducts.com. BCP Score has no relationship or impact from any manufacturers or sales agent websites. Learn more
- BrandGeneric

- VC Score7.8
BCP Score is a ranking system developed by bestcleanerproducts.com. BCP Score has no relationship or impact from any manufacturers or sales agent websites. Learn more
- BrandWYWY.Wide
Last update on 2026-10-28 / Affiliate links / Images, Product Titles, and Product Highlights from Amazon Product Advertising API
FAQs
How do you wash the clear bin without ruining the seals?
Remove the clear dust bin completely from the metal slide track before cleaning. Rinse the bin with cold tap water only, without dish soap, harsh detergents, or abrasive sponges that could scratch the plastic or dry out the rubber. Allow the bin to air-dry completely for at least 24 hours in a warm room before sliding it back onto the vacuum body.
Why won't the bottom flap stay closed after emptying?
The bottom flap usually fails to latch because fine grit, pet hair, or lint is packed inside the small plastic catch on the rim of the bin. Inspect the square latch recess and clear away any trapped debris using an old toothbrush or a dry cloth. Push the lid firmly until you hear a sharp mechanical snap, confirming the spring-loaded tooth has engaged fully.
Can you take apart the cyclone cones to clean fine dust inside?
You should not dismantle the cone-shaped inner filter body assembly during routine maintenance. The internal cyclone chambers contain delicate rubber seals and alignment clips that are difficult to reseat properly without specialist repair tools. To clean fine dust out of the cyclone cones, wipe the exterior mesh shroud with a dry microfiber cloth and tap the assembly gently over a trash can.


How to Refinish a Fiberglass Pool

How Do You Keep Raccoons Out of Your Pool?

How to Fix Cyanuric Acid in Your Pool

How to Shape a Pool Cue Tip to Stop Miscues

Best Far Infrared Sauna Sauna Heats: Top Picks of 2026

11 Best Far Infrared Sauna Carbon Fiber Heaters of 2026 For Balanced Full-Body Heat

11 Best Carbon Far Infrared Sauna of 2026 For Even Heat

10 Best Bluetooth Speaker For Sauna of 2026 For Heat and Steam


