
How to Open a Vacuum Cleaner Head Without Breaking It

A jammed floor nozzle looks intimidating, but opening the housing is a routine fix that anyone can handle safely. Start by unplugging the machine, flipping the base upside down, and releasing the bottom plastic cover by turning the coin slots, sliding the tabs, or backing out the screws. Once that plate lifts away, gently slide the spinning roller bar out of its rubber belt loop to clear out packed hair and grit.
The exact steps vary slightly depending on how the base was assembled. Some floor heads snap shut with simple sliding latches, while others use deep screws that require a star-shaped driver. A few models even conceal extra fasteners under tiny corner wheels or soft rubber bumpers, and motorized rollers require slipping off a tight rubber belt. Finding every hidden latch first protects the brittle plastic from cracking while you follow the steps below.
Preparing Your Workspace and Identifying the Lock System
Working on a vacuum floor nozzle is much easier when you are not wrestling with the entire vacuum body. Start by disconnecting the floor head completely. If you have an upright vacuum, release the lower hose latch or foot pedal and detach the head from the main spine. If you are cleaning up after pets with a lightweight cordless vacuum cleaner, disconnecting the floor head from the extension wand takes just a second with a quick-release button. Always unplug the power cord from the wall outlet before touching any moving parts. For cordless models, take out the battery pack to prevent the motor from starting by accident while your fingers are near the roller. Safe handling is always the priority, especially because replacing a cordless vacuum battery is an added expense if an electrical short occurs during maintenance.
Set up your work area on a flat, solid surface. A kitchen table or hard floor covered with an old bath towel works best. The towel keeps the vacuum plastic from getting scratched and stops small screws from rolling onto the floor. Good lighting is critical because many vacuum makers bury fasteners deep inside narrow plastic tunnels. Keep a small dish, a cup, or a magnetic tray within arm's reach to hold every screw you take out.
Before you grab a tool, gather a few basic supplies so you do not have to walk away mid-job:
- A clean towel or rubber work mat to protect your surfaces and catch loose dirt.
- A small cup or magnetic parts tray to keep track of tiny screws and washers.
- A sturdy coin, like a quarter or nickel, or a wide flathead screwdriver for turning twist locks.
- A standard cross-head (Phillips) screwdriver in size number one or number two.
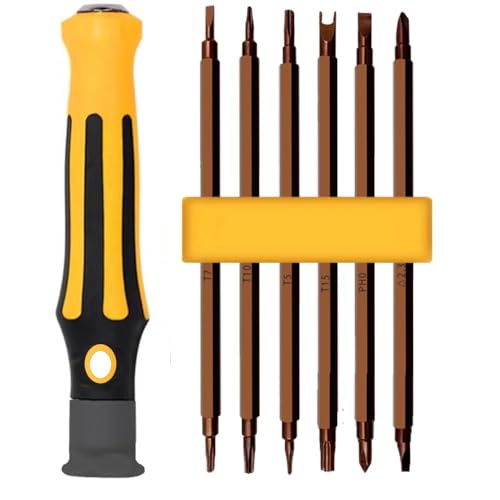
- A precision star-shaped screw (Torx) driver, often size T8, T10, or T15, for newer cordless models.
- A pair of heavy household scissors or a seam ripper to slice through tangled threads.
Now flip the floor nozzle upside down so the bottom plastic cover faces upward toward you. Vacuum manufacturers secure this cover in one of three main ways. The easiest style uses tool-free slide latches. These are colored plastic sliders on the sides or front edge of the nozzle that you push with your thumbs to pop the cover free. The second style uses coin-turn locks. These look like round plastic dials with a straight slot cut across the middle. You insert a coin or flat tool and rotate each dial one quarter turn counterclockwise to unlock it.
The third common style uses traditional threaded screws. Older upright cleaners usually rely on standard Phillips screws. Many modern stick vacuums, however, use star-shaped screws called Torx fasteners. Look closely at the screw heads inside the recessed holes. If the slot looks like a six-pointed star rather than a cross, do not force a Phillips driver into it. Using the wrong driver will strip the soft metal edges and permanently trap the screw inside the housing.
Removing the Bottom Plastic Cover Without Cracking Clips
The bottom plastic cover, often labeled as the soleplate in user manuals, seals suction against the carpet and protects the internal belt. Taking this cover off requires patience rather than brute force. Plastic vacuum parts become brittle over time as they heat up during use and cool down in storage closets. Prying too hard on a stuck edge can snap retaining tabs that cannot be glued back together.
Follow these steps to safely lift off the bottom cover:
- Turn every coin-lock dial a quarter turn counterclockwise until you feel a soft click or see the unlock icon line up. If your model uses screws, back out every visible fastener and set them into your parts dish. Keep track of which hole each screw came from, as center screws are frequently shorter than perimeter screws.
- Inspect the outer edges for hidden fasteners. If you removed all visible screws but the cover refuses to budge, stop pulling immediately. Vacuum builders frequently hide extra screws beneath tiny edge wheels, under sticky manufacturer specification labels, or behind soft felt bumper strips. Gently roll small front wheels to the side or lift the edge of felt pads with your fingernail to check for concealed screw holes.
- Grasp the rear edge of the bottom cover with both hands. Wiggle it gently from side to side while lifting upward. Most bottom plates use hinge tabs along the front edge and locking latches along the back. Lift the rear edge up to roughly a 30-degree angle first.
- Slide the entire plate slightly backward or downward to release the front hooks from their slots. The cover should pull away smoothly without bending or bowing the plastic.
If you encounter heavy resistance in one specific corner, never insert a metal putty knife or crowbar to pry it open. Metal tools will gouge the sealing edges, causing air leaks that permanently reduce your vacuum suction power. Instead, use a plastic pry tool or your fingertips to gently flex the perimeter. If one spot feels rock-solid, shine a flashlight directly into that area. In almost every case, a stubborn corner means a missed screw is still holding the two halves of the housing together.
Freeing the Spinning Roller Bar and the Drive Belt
With the bottom cover set aside, you can see the spinning roller bar and the mechanism that drives it. In traditional upright and canister vacuum heads, a heavy rubber drive belt connects the roller to an electric motor shaft. This drive belt is the rubber loop that turns the roller at high speeds. In smaller cordless stick vacuums, the motor is often built directly into the side of the housing or inside the roller bar itself, eliminating the long rubber loop.
Removing the spinning roller bar without damaging the belt or motor housing requires a steady hand:
- Identify the belt side and the idle side. The belt side has the thick rubber loop wrapped around a geared or smooth track on the roller bar. The idle side sits in a simple molded plastic cradle with a rubber or metal bearing.
- Grasp the idle end of the roller bar first. Lift this end straight up out of its plastic channel. The idle side should lift out freely because it has no tension holding it down.
- Angle the roller bar slightly upward and slide it backward toward the belt end. This movement creates slack in the rubber drive belt.
- Gently slide the rubber drive belt off the roller bar pulley. Avoid using sharp screwdrivers or pliers to stretch the belt. Pinching or nicking the rubber creates weak spots that cause the belt to snap under high heat while vacuuming.
- Pull the roller bar completely out of the floor nozzle and set it down on your towel.
If your vacuum uses a direct-drive roller with a side-release latch instead of an open belt bay, the process is slightly different. On these models, turn the end cap on the outer edge of the nozzle a quarter turn counterclockwise. Once the lock clicks open, slide the entire cylindrical roller bar out from the side of the housing like a drawer. You do not need to fight belt tension on these direct-drive heads.
Take this moment to examine the rubber drive belt while it is off the roller. Check the surface for hairline cracks, fraying along the edges, or shiny smooth spots caused by friction. If the belt feels loose, greasy, or stiff, replace it with a fresh one. A stretched rubber drive belt slips against the motor spindle, which stops the spinning roller bar from turning when it meets the resistance of thick carpet fibers.
Clearing Hair, Checking Bearings, and Snapping It Back Together
Once the roller bar is out on your work surface, focus on clearing packed debris. Human hair, pet fur, and sewing thread wrap tightly around the cylinder and migrate outward toward the sides. When hair reaches the plastic tip on the roller ends, known as the end cap, it packs into a dense knot inside the bearing cavity. This friction creates extreme heat that can melt the plastic housing and lock the roller completely.
Clean the roller assembly and prepare it for reinstallation with these steps:
- Pull the end caps off both ends of the roller bar. Most end caps slide straight off a central metal axle pin. If hair is tightly wound around the axle, use tweezers or the tip of a seam ripper to cut and remove it. Make sure the small metal washers underneath remain in place on the shaft.
- Cut away hair along the main cylinder. Most roller bars feature a shallow groove running down their length between the bristle rows. Slide the tip of your scissors down this guide groove to slice through hair knots cleanly without clipping the nylon bristles. Peel the hair off in sheets and discard it.
- Spin the metal bearings at each end between your fingertips. They should turn smoothly, quietly, and without catching. If a bearing feels gritty or resists turning, wipe away loose dust with a dry cloth. Never spray liquid lubricants like penetrating oils into vacuum roller bearings, because wet oils attract fine carpet dust and turn into a sticky grinding paste that destroys the bearing within weeks.
- Reattach the end caps firmly onto the roller axle. Slip the rubber drive belt over the motor spindle inside the head first, then stretch the other end over the roller bar pulley.
- Lower the roller bar back into its mounting channels. Make sure the belt aligns straight and is not twisted. Seat the belt-side end cap firmly into its molded slot, then press the idle side down until it rests completely flat in its cradle.
- Rotate the roller bar forward by hand for three complete turns. This manual rotation centers the rubber drive belt on the motor spindle and ensures nothing binds against the outer casing.
- Reinstall the bottom plastic cover. Hook the front hinge tabs into their slots first at that same 30-degree angle you used during disassembly. Lower the back edge flat against the floor nozzle. Secure the coin locks with a quarter-turn clockwise, or reinstall the screws. Tighten screws until they are snug against the plastic, but do not overtighten them, or you will strip the soft plastic threads.
Choosing the Right Cleaning Tools and Replacement Floor Heads
Keeping a floor nozzle running smoothly is much easier when you have the right tools on hand. Regular maintenance requires dealing with tight plastic spaces and deeply recessed screw shafts. Standard household toolboxes often lack the slim profiles and specialized heads needed for modern floor attachments.
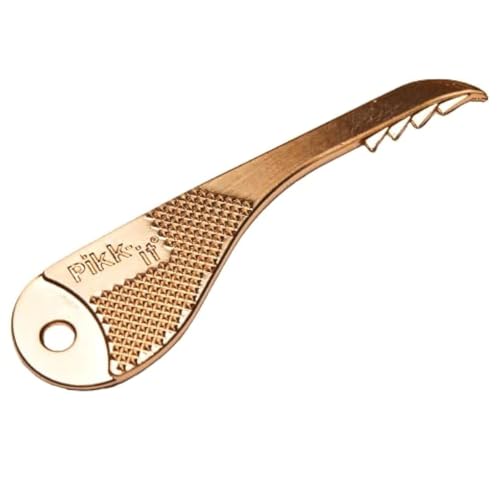
When selecting maintenance accessories, look for precision driver sets that feature long, narrow shafts. Thick multi-bit screwdriver handles frequently get stuck in the narrow access tunnels on vacuum housings, preventing the bit from reaching the screw head. A set that includes standard Phillips heads alongside small star-shaped Torx bits will cover both older uprights and modern cordless stick designs. Dedicated cleaning hook tools with guarded cutting blades are also valuable additions. These tools allow you to slice away bound pet fur and carpet fibers along the roller cylinder without scratching the roller body or cutting your fingers.
If your floor nozzle suffers from stripped internal screw posts, melted roller cradles, or cracked clear plastic lids, a replacement head is often the most practical solution. Before choosing a new floor attachment, check the connection style and diameter of your vacuum wand. Standard household vacuums and utility canister models typically use friction-fit pipes measured at 1-1/4 inches (32mm) or 1-3/8 inches. Heavy shop-style vacuums often use larger 2-1/2-inch hoses that require stepped adapters to connect smaller floor heads.
Make sure to match the head style to your flooring needs and machine design. Standard friction-fit wands without electrical contacts require air-driven turbo heads, which use vacuum suction to spin an internal turbine. Vacuums with motorized heads rely on electrical pins inside the wand neck to supply power directly to an internal roller motor. If your home features delicate hardwood or tile floors, choosing a non-motorized head with natural horsehair bristles prevents surface scuffs, while plush carpets demand an active roller bar to comb through deep fibers.

- VC Score9.4
BCP Score is a ranking system developed by bestcleanerproducts.com. BCP Score has no relationship or impact from any manufacturers or sales agent websites. Learn more
- BrandDetetap

- VC Score9.4
BCP Score is a ranking system developed by bestcleanerproducts.com. BCP Score has no relationship or impact from any manufacturers or sales agent websites. Learn more
- BrandKEEPOW

- VC Score9.4
BCP Score is a ranking system developed by bestcleanerproducts.com. BCP Score has no relationship or impact from any manufacturers or sales agent websites. Learn more
- BrandRosyOcean

- VC Score9.0
BCP Score is a ranking system developed by bestcleanerproducts.com. BCP Score has no relationship or impact from any manufacturers or sales agent websites. Learn more
- BrandTweruna

- VC Score8.6
BCP Score is a ranking system developed by bestcleanerproducts.com. BCP Score has no relationship or impact from any manufacturers or sales agent websites. Learn more
- BrandGHAMADE
- VC Score8.6
BCP Score is a ranking system developed by bestcleanerproducts.com. BCP Score has no relationship or impact from any manufacturers or sales agent websites. Learn more
- BrandSKZIRI
- VC Score8.6
BCP Score is a ranking system developed by bestcleanerproducts.com. BCP Score has no relationship or impact from any manufacturers or sales agent websites. Learn more
- BrandPikk-it

- VC Score8.4
BCP Score is a ranking system developed by bestcleanerproducts.com. BCP Score has no relationship or impact from any manufacturers or sales agent websites. Learn more
- BrandQualtex

- VC Score8.2
BCP Score is a ranking system developed by bestcleanerproducts.com. BCP Score has no relationship or impact from any manufacturers or sales agent websites. Learn more
- BrandPortek

- VC Score8.2
BCP Score is a ranking system developed by bestcleanerproducts.com. BCP Score has no relationship or impact from any manufacturers or sales agent websites. Learn more
- BrandIOEALD
Last update on 2026-10-22 / Affiliate links / Images, Product Titles, and Product Highlights from Amazon Product Advertising API
FAQs
Why won't my vacuum bottom plate come off after removing all visible screws?
Manufacturers frequently place hidden screws underneath small edge wheels, behind soft felt bumper strips, or under serial number stickers. If the plastic plate flexes in some spots but feels anchored in one corner, check that specific area for concealed fasteners. Never pry a stuck corner with metal tools, because forcing the plate will break hidden retaining clips.
Can I wash the spinning roller bar with water after taking it out?
You can wash solid plastic rollers and soft microfiber bars with cool water, but you must remove the metal bearings and end caps first. Water trapped inside sealed bearings causes rust and destroys the internal steel balls. Always let the roller bar dry completely for at least 24 hours before reinstalling it, as running a damp roller will pull moisture into the vacuum motor.
How tight should the rubber drive belt feel when reinstalling the roller?
A healthy rubber drive belt should feel firm and snap back when you press it lightly with your thumb, deflecting no more than a half inch. If the belt feels completely limp, shows shiny glazed patches from slipping, or sags loosely off the motor shaft, it has lost its elasticity. Replace loose belts immediately to restore proper brush agitation on carpet.


How to Refinish a Fiberglass Pool

How Do You Keep Raccoons Out of Your Pool?

How to Fix Cyanuric Acid in Your Pool

How to Shape a Pool Cue Tip to Stop Miscues

Best Far Infrared Sauna Sauna Heats: Top Picks of 2026

11 Best Far Infrared Sauna Carbon Fiber Heaters of 2026 For Balanced Full-Body Heat

11 Best Carbon Far Infrared Sauna of 2026 For Even Heat

10 Best Bluetooth Speaker For Sauna of 2026 For Heat and Steam


