
How Do You Open a V10 Vacuum for Cleaning?

Slide the red release lever down along the body while holding the machine over a trash can. Doing this pops the bottom door open to dump loose grit and reveals the small red latch on the runner track. Pressing that hidden tab lets you slide the clear bin completely off the frame for a full wash without snapping any delicate plastic clips.
How far you need to take things apart depends on the buildup inside. A fast empty requires no extra steps, but trapped dust along the track can make the slider stick and risk cracked plastic if yanked. The clear plastic canister and the rear filter can both be washed, but water must stay far away from the electrical motor housing. The guide below walks through freeing stuck tracks and cleaning each piece safely.
What should you do before opening your vacuum?
Before touching any latches or pulling parts loose, take a moment to prepare your workspace. Fine dust flies everywhere during canister cleaning, and rushing the process is how delicate plastic tabs break.
First, unplug the machine from any charging cables or wall docks. Never work on the unit while it connects to electrical power. Keep your fingers completely off the power trigger during disassembly so the motor does not start unexpectedly.
Next, remove the long extension wand and any cleaning heads. Press the red quick-release catch where the wand connects to the main body, then pull the wand straight out. If you have the floor nozzle attached (the wide floor head that holds the spinning brush roller), take that off as well. Removing heavy attachments makes the motor body easier to balance and prevents awkward twisting on the neck joint. For easier handling, learning what is the lightest cordless vacuum cleaner in 2026 shows how modern stick vacuums compare in carrying weight.
Always move over to a large trash can before releasing any latches. If the weather is nice, working outside on a patio or in a garage keeps fine dust out of your home. Finally, spread an old towel over your work table to protect the plastic from scratches.
How do you slide the bin off the runner?
Taking the clear bin off is a two-step process. The first motion opens the bottom door to dump dirt, while the second release slides the cylinder completely off the main housing.
- Hold the vacuum handle firmly in one hand, keeping your index finger away from the power trigger. Point the front of the bin down into your trash can.
- Push the red bin release lever on the underside of the vacuum firmly forward and down toward the trash can in one smooth motion.
- As the canister slides forward, an internal rubber collar wipes down along the shroud (the perforated metal screen inside the bin). This sliding action pushes trapped pet hair and dust clumps downward.
- At the end of the stroke, the bottom base flap pops open on its spring hinge, letting loose debris fall into the trash.
- Look at the underside of the sliding track. You will see a small red latch (a small spring button that locks the bin) on the runner (the plastic sliding track under the canister).
- Press and hold this small red latch upward with your thumb.
- While holding the latch down, slide the clear bin straight forward off the runner track.
Always pull the bin along a straight line. Do not twist the canister sideways or wiggle it up and down. The bin glides on thin rails, and twisting it can snap the plastic tabs off permanently.
Which vacuum parts can you wash with water?
Knowing what can get wet and what must stay dry protects the motor from fatal electrical damage. Some parts rinse clean easily, while others must never touch water.
You can wash the clear plastic bin with plain water, but treat it gently. Wipe the interior with a damp microfiber cloth to remove dust film. If sticky grime coats the bottom, rinse the shell under lukewarm tap water. Never use dish soap, degreasers, or harsh cleaners, which make clear plastic brittle or cloudy. Never place the bin in a dishwasher, as high heat warps the plastic and ruins the rubber seals. Ensure the bin is completely dry before reinstalling it.
The shroud (the perforated metal screen) and the cyclone (the cone-shaped dust separator) must stay dry. This section connects directly to internal air ducts leading to the motor. Washing this part turns dry dust into thick mud that clogs the cyclone funnels and damages wiring. Clean the shroud by wiping it with a dry cloth or sweeping the holes with a soft dusting brush.
The main motor handle and battery pack must never contact water. Water near the electronic board causes short circuits. If you notice your vacuum shutting down unexpectedly even after a full clean, checking how much is a new battery for a cordless vacuum in 2026 will help you decide if an aging power pack needs replacement. Always clean the motor housing with a dry cloth.
How do you remove and wash the filter?
The rear filter traps microscopic particles before air leaves the machine. Washing it restores strong suction and stops the vacuum from pulsing on and off.
- Grasp the purple filter cap at the very back of the vacuum handle. Turn it counterclockwise about a quarter turn to unlock it, then pull it straight back from the machine.
- Hold the filter over your trash can and tap the plastic rim gently against the side to shake out loose, powdery dust.
- Run cold tap water through the open top of the filter. Rotate it to flush trapped silt out through the paper pleats. Do not use warm water, dish soap, or detergents, as soap leaves a residue that blocks airflow.
- Fill the center of the filter with cold water, cover both ends with your hands, and shake it gently. Repeat this rinse until the water runs clear.
- Shake the filter firmly over the sink to remove standing water. Gently squeeze the foam layer with your fingers to press out trapped moisture, but do not twist the paper folds.
- Follow the strict 24-hour drying rule. Stand the filter upright on its wide end in a warm room with strong airflow. Let it air-dry for at least 24 full hours. Never place it in a clothes dryer, microwave, or on a heater, which warps the rubber seals. Inserting a damp filter pulls water into the digital motor, causing instant failure and foul odors.
How do you reattach the bin without breaking it?
Putting the clear bin back together is simple as long as you line up the rails properly. Forcing misaligned parts will crack the plastic housing.
- Inspect the runner (the plastic sliding track under the canister) on the motor housing. Wipe away any stray grit or pet hair caught inside the track grooves.
- Check that the bottom flap of the clear bin is still open so it does not strike the shroud while sliding into place.
- Line up the guide channels on the clear bin with the rails on the runner track. Keep the bin level with the body of the vacuum.
- Slide the bin backward toward the handle with steady, smooth pressure. If you feel hard resistance, stop immediately, slide the bin forward, check your alignment, and try again. It should glide smoothly against the rubber seals.
- Push the bin all the way back until you hear a sharp, solid click. This click confirms that the red release latch has locked the bin securely onto the runner.
- Close the bottom flap by pushing it upward until the plastic catch snaps shut. Tug lightly on the flap to confirm it is locked.
- Take your completely dry filter, push it onto the back of the handle, and turn it clockwise until the alignment marks match up.
Why is your bin release lever stuck?
If you press the red bin release lever and the canister refuses to move, do not force it. Forcing a stuck lever will snap the internal plastic mechanism or crack the clear bin.
The most common cause is fine grit wedged inside the runner track. Vacuuming up plaster powder, drywall dust, fireplace ash, or fine garden dirt pulls tiny abrasive particles into the sliding channels. This powder acts like a wedge between the clear bin and the runner, stopping the plastic from sliding forward.
Another frequent issue is packed hair jammed against the internal seals. When the bin gets filled past the maximum line, pet hair and carpet fuzz wrap tightly around the shroud (the perforated metal screen inside the bin). This hair forms a thick ring that wedges tightly against the canister wall when you attempt to slide it.
To safely free a jammed canister without breaking parts:
- Never use screwdrivers, knives, or pry bars to force the bin open. Sharp metal tools crack clear polycarbonate instantly.
- Tap the sides of the clear bin firmly with the palm of your hand to shake loose trapped grit in the track.
- Blow short bursts of dry compressed air along the runner tracks on both sides to clear out loose sand.
- Hold the handle firmly, press the red release lever, and gently wiggle the canister forward and backward until it clears the jam.
What tools help make vacuum cleaning easier?
Maintaining a stick vacuum goes much smoother when you have the right cleaning tools. Improvised household tools often scratch plastic or bend metal screens, so using purpose-built accessories protects your vacuum over the long haul.
Small multi-style cleaning brushes with soft nylon bristles are ideal for regular maintenance. Their gentle bristles let you scrub fine dust off the metal shroud and sweep grit out of the runner track without scratching the clear canister. Many brush tools feature built-in safety cutters that slice tangled hair away from the spinning brush roller inside your floor nozzle without damaging the bristles.
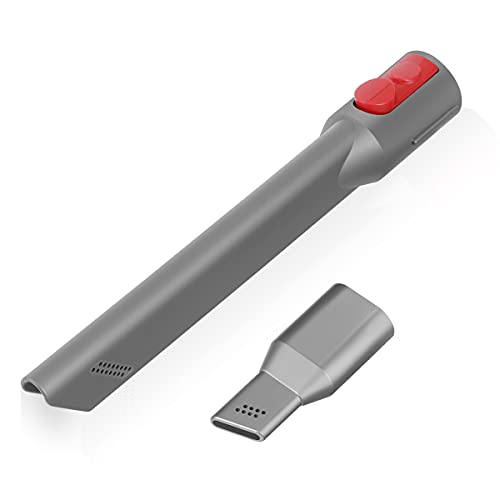
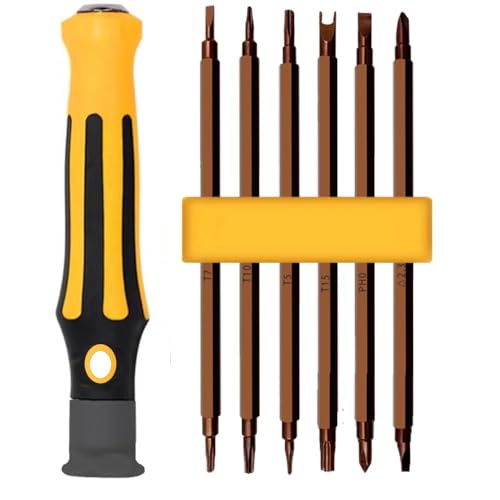
Narrow, flexible crevice tools also help you reach into deep internal ports and lint traps where stray fluff collects. If routine wear ever breaks your sliding trigger, upgraded replacement bin release levers with widened stress points can restore smooth opening action. For deeper maintenance, specialized screwdriver sets with long Torx bits prevent stripped screws on the motor casing.
When selecting maintenance tools or vacuum head accessories, always verify compatibility with your specific vacuum series. Make sure clip attachments match your model exactly so they lock in place without suction leaks.

- VC Score10.0
BCP Score is a ranking system developed by bestcleanerproducts.com. BCP Score has no relationship or impact from any manufacturers or sales agent websites. Learn more
- BrandEiodoni
- VC Score9.4
BCP Score is a ranking system developed by bestcleanerproducts.com. BCP Score has no relationship or impact from any manufacturers or sales agent websites. Learn more
- BrandLANMU

- VC Score9.2
BCP Score is a ranking system developed by bestcleanerproducts.com. BCP Score has no relationship or impact from any manufacturers or sales agent websites. Learn more
- BrandBahuun

- VC Score9.0
BCP Score is a ranking system developed by bestcleanerproducts.com. BCP Score has no relationship or impact from any manufacturers or sales agent websites. Learn more
- BrandSealegend

- VC Score9.0
BCP Score is a ranking system developed by bestcleanerproducts.com. BCP Score has no relationship or impact from any manufacturers or sales agent websites. Learn more
- BrandTweruna

- VC Score9.0
BCP Score is a ranking system developed by bestcleanerproducts.com. BCP Score has no relationship or impact from any manufacturers or sales agent websites. Learn more
- BrandHather
- VC Score8.6
BCP Score is a ranking system developed by bestcleanerproducts.com. BCP Score has no relationship or impact from any manufacturers or sales agent websites. Learn more
- BrandSKZIRI

- VC Score8.6
BCP Score is a ranking system developed by bestcleanerproducts.com. BCP Score has no relationship or impact from any manufacturers or sales agent websites. Learn more
- BrandVataim

- VC Score8.4
BCP Score is a ranking system developed by bestcleanerproducts.com. BCP Score has no relationship or impact from any manufacturers or sales agent websites. Learn more
- BrandTweruna

- VC Score7.8
BCP Score is a ranking system developed by bestcleanerproducts.com. BCP Score has no relationship or impact from any manufacturers or sales agent websites. Learn more
- BrandWYWY.Wide
Last update on 2026-10-27 / Affiliate links / Images, Product Titles, and Product Highlights from Amazon Product Advertising API
FAQs
Can you put the clear V10 dust bin in a dishwasher?
No, you should never place the clear dust bin in a dishwasher. Dishwasher detergents contain harsh chemicals that turn clear plastic cloudy, while high water heat will warp the cylinder. A warped bin will no longer slide on its runner track or create an airtight seal.
How often should you wash the V10 filter?
Wash the filter at least once a month under typical household use. If you have shedding pets or vacuum fine dust regularly, rinse the filter every two to three weeks. Regular washing keeps airflow strong and prevents the motor from cutting out due to clogs.
What should you do if your vacuum smells musty after cleaning?
A musty odor means the filter was reinstalled while still damp inside. Remove the filter right away and let it dry completely in a warm, airy spot for another 24 hours. Running the vacuum with a damp filter risks motor failure and traps sour odors in the internal foam.
Can you use compressed air to clean out the cone cyclones?
Yes, blowing dry compressed air through the cyclone cones is an effective way to remove trapped dust without using water. Direct short bursts of air into the perforated shroud holes over an outdoor trash can. Always wear eye protection to shield against flying dust.


How to Refinish a Fiberglass Pool

How Do You Keep Raccoons Out of Your Pool?

How to Fix Cyanuric Acid in Your Pool

How to Shape a Pool Cue Tip to Stop Miscues

Best Far Infrared Sauna Sauna Heats: Top Picks of 2026

11 Best Far Infrared Sauna Carbon Fiber Heaters of 2026 For Balanced Full-Body Heat

11 Best Carbon Far Infrared Sauna of 2026 For Even Heat

10 Best Bluetooth Speaker For Sauna of 2026 For Heat and Steam


