
How to Safely Open an Upright Vacuum for Cleaning

Opening an upright vacuum is a routine task that anyone can handle without breaking fragile plastic parts. All it takes is unplugging the cord, pressing the release buttons to lift off the dirt container, and flipping the base over to remove the bottom cover plate. That quick process gives you clear access to the spinning roller brush and suction airways so you can clear out wrapped hair and trapped debris.
How you proceed depends on whether the unit uses a click-on plastic bin or a hinged door hiding a paper bag. Some models let you remove the floor head plate by turning simple thumb latches, while others use recessed screws that need a standard screwdriver. The location of the clog also changes where you open the vacuum, from the lower neck to the detachable stretch hose. Learning where to push and what to turn keeps every plastic latch safe as you work.
What should you do before opening your vacuum?
Unplugging the vacuum is the first and most critical safety step. Never rely on the power switch alone, as switches can fail or be bumped while your hands are inside the floor head. Pull the plug from the wall outlet and wrap the cord loosely on the storage hooks so it does not trip you while you work. If your upright vacuum turned off by itself during your last cleaning session, the thermal switch likely tripped from overheating. Give the unit 30 to 45 minutes to cool down completely before touching the lower housing or opening any panels.
Set up a clear workspace on a hard floor or a sturdy workbench. Lay down an old bath towel or flattened cardboard to catch loose dirt and protect your flooring from scratches. Keep a trash can, a damp cloth, and a few basic household tools nearby:
- A standard number two Phillips screwdriver to loosen the bottom cover plate screws.
- A pair of household scissors or a seam ripper to slice tangled hair off the roller.
- A trash bin to catch loose clumps of dust and packed lint right away.
- A clean, dry microfiber cloth to wipe down dusty channels and plastic housings.
- A flashlight or phone light to peer down dark suction tubes and spot hidden clogs.
How do you remove the dust cup and filters?
Emptying the dust bin and removing the filters gives you direct access to the main intake airway. Doing this first also makes the upright vacuum much lighter and easier to tilt or flip over when you work on the lower floor head.
- Release the dust cup or open the bag door. On a bagless vacuum, locate the main release latch (a large push button or plastic clip usually placed on the carry handle or the upper spine). Press the button firmly and pull the canister outward and away from the vacuum body. If you have a bagged vacuum, press the front door release clip or unzip the outer cloth cover to reach the dust bag.
- Empty the debris into the trash. Take the bagless dust cup directly to your trash can. Lower the bottom of the canister deep inside the bin before pressing the trap door release button. This keeps fine dust clouds from billowing out across your clean room. If using a bagged machine, slide the cardboard collar off the intake tube and replace the bag if it feels packed.
- Take out the pre-motor filters. Most upright bagless vacuums store two filters directly beneath the dust cup or under a hinged lid on the canister. Lift out the plastic bracket to find the washable foam sponge and thin felt disc. Note which side faces up so you can reinstall them in the exact same position later.
- Access the exhaust filter. Look near the base of the vacuum body or behind a lower front vent for the exhaust filter grille. Press the small plastic clip on the side of the grille and pull the cover off. Pull the pleated filter cartridge straight out.
- Wipe down the mounting cradle. Use your dry cloth to clear loose debris from the rubber seals and latch slots where the dust cup seats against the vacuum frame.
How do you take off the bottom cover plate?
The bottom cover plate shields the spinning roller brush and protects your floors from direct contact with internal drive parts. Opening this plate is necessary whenever hair strangles the roller or debris jams the intake throat.
- Lay the vacuum flat on its back. Step on the handle release pedal to recline the machine completely, then flip the vacuum over so the bottom cover plate faces upward toward you. Rest the handle on your towel or cardboard pad to prevent scuffs.
- Check the fastener style on the plate. Upright vacuums generally secure the bottom cover plate using either tool-free cam locks or recessed screws. Look closely at the plate to see if there are plastic dial tabs with arrows or small screw holes sunk into the plastic.
- Unlock the bottom cover plate. If your model uses tool-free cam locks, turn each dial a quarter turn counterclockwise using a coin or your thumb until the slot lines up with the unlock icon. If your vacuum uses screws, remove each one with your Phillips screwdriver and set them in a small cup. Check carefully for hidden screws tucked right behind the small front roller wheels.
- Lift the bottom cover plate free. Grip the front edge of the plate and gently lift it upward and toward the back wheels. If you feel resistance, stop pulling immediately. Never pry hard against stubborn plastic, because brittle retaining tabs snap easily. Check again for any overlooked screws along the center ribs.
- Slide the belt off the roller. Once the plate is off, you will see the spinning roller brush connected to a thick rubber band turning the roller. Lift the non-belt end of the roller first, then angle the roller toward the center of the housing to slip the drive belt off the roller pulley. Leave the other end of the belt looped over the steel motor spindle for now.
- Cut away tangled hair and thread. Lay the roller on your workspace. Slide the tip of your scissors or seam ripper down the narrow groove running along the length of the roller. Cut through the hair along this guide channel, then peel the matted hair away in sheets. Pull the plastic end caps off both ends of the roller to clear hair wound tightly around the steel axle pins.
How do you unlock the hose and suction ducts?
When an upright vacuum runs with full motor power but picks up nothing from the floor, a clog is almost always lodged in the flexible hose or the lower suction duct.
- Unhook the lower hose cuff. Trace the ribbed hose down to where it enters the base of the vacuum near the floor head. Locate the connection cuff, which usually features two push buttons or plastic clips on opposite sides. Press both tabs simultaneously and pull the hose neck firmly backward out of the inlet port.
- Remove the wand from the upper clip. Unsnap the rigid cleaning wand from the back of the upright spine. Press the upper wand release lever to disconnect the rigid extension tube from the flexible hose handle.
- Inspect the lower floor duct. Look down into the open plastic hole at the back of the floor head where the lower hose was plugged in. Many upright vacuums feature a short, clear plastic elbow or a small hinged access door on the bottom of the base. Shine a flashlight directly into this throat to check for packed carpet fibers, small toys, or stuck coins.
- Check for clogs through the airway. Look through the open hose toward a light source. If you cannot see light through the other end, drop a small metal nut or a coin into the top opening. If the coin does not fall straight out the bottom end, you have confirmed the exact spot where the debris is wedged.
- Push out the clog gently. Lay the hose straight on the floor. Take a long, blunt household item like the handle of a wooden broom and carefully slide it into the hose from the opposite end of the clog. Push slowly to nudge the blockage free. Avoid using sharp wire clothes hangers, as the pointed tips can easily tear the flexible vinyl skin of the ribbed hose.
Which vacuum parts can you wash with water?
Knowing what can touch water and what must stay dry prevents costly electrical short circuits and ruined motors. Upright vacuums combine mechanical airways with live electrical wiring, making strict moisture boundaries essential.
Plastic dirt tanks, cyclone separation cones, and pre-motor foam filters can be washed thoroughly with water. Rinse them under a warm running tap to remove fine silt and dust buildup. If the inside of the dust bin has greasy grime or pet odors, use a couple of drops of mild dish soap and a soft sponge to wash the plastic surfaces. Rinse away all soap residue until the water runs completely clear.
Never submerge or rinse any component that contains an electrical motor, wiring, or non-washable media. The sealed motor casing, the motorized floor head with spinning brush motors or headlights, and the main vacuum body must stay bone dry. Wiping these areas with a slightly damp, well-wrung microfiber cloth is safe, but never spray water or cleaner into their vents. Also, pleated exhaust filters made of dense paper media should never be washed; running water through standard paper HEPA filters collapses the delicate fibers and permanently blocks airflow.
Upright vacuums are built strictly for dry pickup. Sucking up wet spills or saturated carpet stains can draw water into the motor windings, causing immediate motor burnout or shock hazards. When handling wet carpet spills or stubborn stains, switch to a dedicated portable machine built for wet extraction, such as a specialized carpet cleaner for stubborn stains.
Always follow the 24-hour drying rule without exception. Every single washable piece must dry completely before you reassemble your vacuum. Place the foam sponge, felt disc, and plastic dust canister in a warm, dry room with good air circulation for at least 24 hours. Placing even slightly damp filters back into your machine draws moisture into the high-speed motor, leading to rusted internal bearings, electrical failure, and foul mildew smells.
What parts should you never try to open?
Routine vacuum maintenance has clear safety boundaries. Crossing into internal mechanical or electrical assemblies creates serious injury risks and can permanently ruin the appliance.
Never open the sealed motor casing. The motor housing holds the high-voltage armature, electrical carbon brushes, and the high-speed suction fan. These components run at speeds exceeding 20,000 revolutions per minute. Taking apart the sealed motor casing exposes you to sharp metal fan blades and live electrical connections. It also breaks the factory acoustic seals, resulting in an ear-splitting whining noise if you ever manage to put it back together.
Avoid opening the spring-loaded housing on models equipped with an automatic cord rewind. Inside that round plastic housing is a heavy steel recoil spring wound under extreme tension. If you remove the retaining screws or pry the housing open, the spring can violently unwind like a released metal whip, causing severe cuts to your hands or face.
Follow this simple reassembly checklist once your parts are dry and clean:
- Confirm that all washable foam and felt filters are completely dry to the touch with zero damp spots.
- Slide the pre-motor filters back into their housing in the correct order, ensuring the edges sit flat against the perimeter gasket.
- Loop the rubber band turning the roller around the motor shaft spindle, then hook the other side around the grooved pulley on the spinning roller brush.
- Slide the ends of the roller brush down into their mounting slots on the floor head, rotating the brush three full turns by hand to ensure the rubber belt stays centered.
- Align the rear hinge tabs of the bottom cover plate first, swing it closed over the roller, and tighten the screws until snug without over-torquing the plastic threads.
- Click the hose neck back into the lower floor head port and make sure both side release buttons snap fully outward into their locked position.
If you notice a sharp burning plastic smell coming from the sealed motor casing, see sparks through the vent grilles, or find that the motor shaft will not turn freely by hand, stop immediately. These symptoms indicate an electrical failure or melted bearings that require attention from a professional appliance technician rather than routine home cleaning.
What tools make cleaning your vacuum head easier?
Maintaining an upright vacuum head becomes much faster and safer when you use the right maintenance tools. Struggling with kitchen steak knives or dull household scissors often leads to sliced bristles, scratched roller housings, or accidental cuts to your fingers.
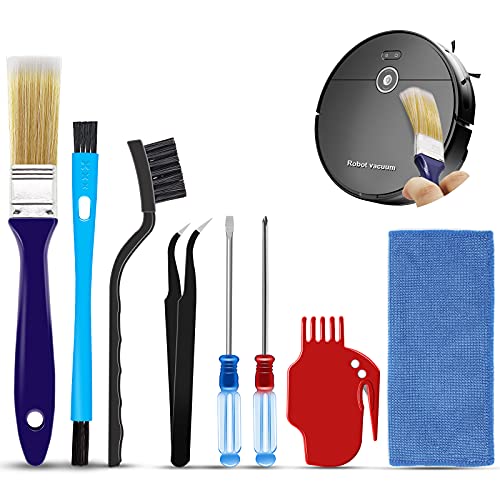
A dedicated vacuum head maintenance kit provides specialized accessories tailored for tight plastic chambers. These sets typically include a small hooked cutting tool featuring a safely recessed blade. The slim hook slips effortlessly underneath wound pet hair, carpet fibers, and tangled strings wrapped around the spinning roller brush. Pulling the hook across the roller slices the tangle in a single motion without nicking the nylon bristles or gouging the plastic axle.
Narrow detailing brushes with stiff synthetic bristles are equally valuable for cleaning out awkward spots. These small brushes reach deep into the suction neck, the recessed belt channel, and the tiny crevices around the side edge bristles where heavy lint and gritty sand collect. Having a pair of fine-point tweezers or small hobby pliers also lets you quickly pluck stubborn hair threads out from between the roller end caps and the internal ball bearings before they cause friction and melt the plastic hub.
When looking for maintenance accessories to service your vacuum, check that the tools feature durable nylon bristles and comfortable grip handles. Compact tools that combine a bristle brush on one end and a shielded cutting hook on the other take up almost no storage space. If you also use a lightweight stick machine for daily surface sweeps, such as finding what is the lightest cordless vacuum cleaner to pair with your heavy upright, these universal cleaning brushes work across both machine types to keep your cleaning heads spinning smoothly.

- VC Score9.0
BCP Score is a ranking system developed by bestcleanerproducts.com. BCP Score has no relationship or impact from any manufacturers or sales agent websites. Learn more
- BrandBissell
- VC Score9.0
BCP Score is a ranking system developed by bestcleanerproducts.com. BCP Score has no relationship or impact from any manufacturers or sales agent websites. Learn more
- BrandMidukit

- VC Score8.8
BCP Score is a ranking system developed by bestcleanerproducts.com. BCP Score has no relationship or impact from any manufacturers or sales agent websites. Learn more
- BrandEureka

- VC Score8.8
BCP Score is a ranking system developed by bestcleanerproducts.com. BCP Score has no relationship or impact from any manufacturers or sales agent websites. Learn more
- BrandShark

- VC Score8.6
BCP Score is a ranking system developed by bestcleanerproducts.com. BCP Score has no relationship or impact from any manufacturers or sales agent websites. Learn more
- BrandOreck

- VC Score8.6
BCP Score is a ranking system developed by bestcleanerproducts.com. BCP Score has no relationship or impact from any manufacturers or sales agent websites. Learn more
- BrandVataim
- VC Score8.6
BCP Score is a ranking system developed by bestcleanerproducts.com. BCP Score has no relationship or impact from any manufacturers or sales agent websites. Learn more
- BrandSIRUITON
- VC Score8.6
BCP Score is a ranking system developed by bestcleanerproducts.com. BCP Score has no relationship or impact from any manufacturers or sales agent websites. Learn more
- BrandKenmore

- VC Score8.4
BCP Score is a ranking system developed by bestcleanerproducts.com. BCP Score has no relationship or impact from any manufacturers or sales agent websites. Learn more
- BrandcaSino187

- VC Score8.4
BCP Score is a ranking system developed by bestcleanerproducts.com. BCP Score has no relationship or impact from any manufacturers or sales agent websites. Learn more
- BrandKenmore

- VC Score8.2
BCP Score is a ranking system developed by bestcleanerproducts.com. BCP Score has no relationship or impact from any manufacturers or sales agent websites. Learn more
- BrandEureka
Last update on 2026-10-30 / Affiliate links / Images, Product Titles, and Product Highlights from Amazon Product Advertising API
FAQs
How often should you open your vacuum for cleaning?
You should open the bottom cover plate to check the spinning roller brush once every month if you have pets or long hair in your home. Homes without pets can usually go three to four months between roller inspections. The dust cup should be emptied after every two to three uses, while washable pre-motor filters require a water rinse every month to maintain proper suction.
Why does the roller brush refuse to spin after cleaning?
A roller brush that fails to spin usually means the rubber band turning the roller slipped off the motor spindle or was routed incorrectly during reassembly. Recline the vacuum, unplug the unit, and open the bottom cover plate to verify that the belt sits securely in the roller groove and around the metal motor shaft. Also confirm that the brush roller end caps are seated down completely into their matching side slots on the floor head.
Can you use a butter knife to pry open clips?
You should avoid using metal knives or rigid metal tools to pry open plastic vacuum latches. Vacuum housings are made from molded plastic that can easily snap, bend, or turn white from stress when forced with hard metal edges. Use firm thumb pressure on the release buttons instead, and if a joint feels stuck, check thoroughly for an overlooked retaining screw before applying gentle leverage with a wide, flat plastic pry tool.
What should you do if a plastic screw hole strips?
If a screw spins freely without tightening into the bottom cover plate, the plastic threads inside the screw post have stripped out. You can restore grip by inserting a wooden toothpick into the stripped hole, snapping it off flush with the top edge, and driving the screw back into the hole alongside the wood splinter. The wood compresses against the plastic walls and provides immediate bite for the metal screw threads without cracking the casing.


How to Refinish a Fiberglass Pool

How Do You Keep Raccoons Out of Your Pool?

How to Fix Cyanuric Acid in Your Pool

How to Shape a Pool Cue Tip to Stop Miscues

Best Far Infrared Sauna Sauna Heats: Top Picks of 2026

11 Best Far Infrared Sauna Carbon Fiber Heaters of 2026 For Balanced Full-Body Heat

11 Best Carbon Far Infrared Sauna of 2026 For Even Heat

10 Best Bluetooth Speaker For Sauna of 2026 For Heat and Steam


