
How to Open a Vacuum Canister Without Breaking the Latch

Most people assume that a stuck vacuum canister just needs a firm yank to pull open. Forcing the plastic usually cracks a clip, because the right step is to press the main release button to detach the container before touching the door catch. Once the bucket is free, pressing the lower flap latch over a trash can lets the bottom swing open and drop the dirt.
The exact steps depend on the style of your machine. Bagless uprights use separate clips to lift the bucket away and empty it, while bagged canister models have a front hood latch that pops the body open. Slender stick cleaners often rely on a sliding lever, and packed pet hair or a sticky rubber seal can jam the door shut. Taking a moment to spot the right catch prevents broken plastic and messy spills on your floor.
Your Vacuum Uses Either a Bin or Hood
People use the word canister to describe two completely different vacuum designs. Understanding which one sits in front of you is the first step to opening it without snapping fragile plastic parts.
The first design is a bagless clear dirt bin attached to an upright or cordless stick machine. You can look directly through the transparent plastic shell to see pet hair, dust, and crumbs collecting inside. Opening this style usually involves pressing a release button near the handle to detach the bin, followed by triggering a spring latch at the base to swing open a hinged bottom door.
The second design is a traditional bagged canister vacuum. This is a wheeled machine body that rolls along behind you on the floor while you steer a long hose and floor nozzle. On these cleaners, the canister is the entire main tub. Opening it means lifting a wide latch on the outer shell to raise a hinged hood, much like popping the hood of a car, to expose the sealed bag chamber inside.
Take a second to check your machine before applying any force. If your vacuum has a clear plastic cylinder, you are dealing with a bagless dirt bin that empties directly into the trash. If your machine rolls on wheels and hides its debris inside a solid plastic body, you are opening a hooded bag compartment. Applying pressure to the wrong joint can crack a pivot pin or snap a locking tab, leaving the unit unable to hold suction.
Empty Bagless Bins by Pressing the Base Latch
Opening a clear dirt bin requires steady hands so you do not dump a cloud of dust across your clean floor. Always switch the machine off and unplug it from the wall outlet before touching any latch. If you clean with a cordless vacuum cleaner, take your hand completely off the power trigger or slide off the battery pack so the motor cannot start while your fingers are near moving parts.
Follow these steps to detach and empty your clear dirt bin safely:
- Locate the bin release tab on the spine. Most upright and stick vacuums place a colored button near the top handle or right where the clear bin connects to the motor housing. Press this button inward while tilting the container away from the vacuum body. The entire clear cylinder should unhook smoothly without needing heavy force.
- Carry the bin deep inside your trash can. Never open the bin while holding it high in the air. Lower the bottom edge of the plastic cylinder several inches below the rim of your wastebasket. Keeping the container down inside the trash bag prevents fine dust particles and pet dander from drifting back into your room air.
- Press the lower trapdoor latch. Look near the bottom rim of the cylinder for a small release tab or locking clip, which is often colored red or gray. Press this latch with your thumb. The bottom lid will swing open on its hinge, allowing the collected dirt, lint, and hair to drop straight down into the trash.
- Operate the slide-eject collar if debris is stuck. Some modern stick vacuums do not use a separate bin removal step. Instead, they feature a red lever on the side or back of the cylinder. Pushing this lever downward forces the inner plastic cone filter (the perforated cyclone screen that separates heavy dirt from fine dust) downward through the cylinder. This scraping action pushes compacted dog fur and lint off the walls while simultaneously popping open the bottom door.
- Close the lid until you hear a distinct click. Push the swinging bottom door upward against the base of the cylinder until the release tab snaps firmly over the catch. Listen for that crisp snap. If the latch does not lock completely, the door will fall open the moment you reattach the bin to the vacuum frame. Reconnect the bin to the machine by sliding the bottom alignment tabs into place first, then rocking the top neck forward until the main catch locks tight.
Lift the Main Body Latch for Bagged Canisters
Opening a wheeled canister cleaner gives you access to the internal bag chamber and motor filter. Because these machines rely on an airtight internal seal to maintain cleaning power, their hoods fit tightly against rubber gaskets around the rim.
Park the vacuum body flat on the floor so it cannot roll or slide while you work. Switch off the power and disconnect the cord from the wall. You can usually leave the flexible suction hose attached to the front intake, but uncoupling the hose gives you more room to work if the hood feels stiff.
Follow these steps to open the canister body and replace a full bag:
- Find the front hood release latch. Look at the front edge of the vacuum body or directly underneath the main carrying handle. The release is typically a wide plastic paddle or recessed lever designed for your fingers to grip from underneath.
- Lift the latch smoothly upward. Pull the release paddle up toward you until you feel the internal clamp let go. The top lid should pop upward slightly under gentle spring pressure. Lift the hood fully open on its rear hinges until it balances in the open position. Never force the hood past its natural stopping point, as overextending the plastic hinges will crack the pivot mounts.
- Slide the bag collar from the dock. Look inside the open tub to find the square collar of the dust bag, which is made of thick cardboard or stiff plastic. Grip the collar edges and slide it straight out of the plastic docking frame. Most bags have a small cardboard or plastic slide tab that pulls shut automatically as you remove the collar, trapping dust inside so none escapes into the room.
- Slide a fresh bag into the guide tracks. Take a new bag and align its rigid collar with the guide rails on the docking frame. Push the collar down firmly until it seats all the way into the bottom of the slot. Gently spread out the cloth or paper folds inside the chamber with your hand so the bag can expand evenly as it fills.
- Close the hood and check the safety lock. Lower the lid slowly, watching the edges to ensure no loose bag fabric is pinched between the plastic rims. Many wheeled models feature a mechanical safety lockout that blocks the hood from closing if a bag is missing or seated crookedly. If the lid meets stiff resistance halfway down, stop immediately. Check that the bag collar sits flush in its tracks, then press the hood down until the main latch clicks shut.
Clear Trapped Dirt to Loosen a Stuck Release Latch
When a vacuum release button will not push down, or a trapdoor refuses to swing open, yanking on the plastic is the quickest way to snap a latch. Latches and buttons usually jam because fine grit works into the moving seams, or because a packed wad of hair creates heavy outward pressure against the locking catch.
Work through this simple checklist to loosen a stuck canister latch safely:
- Press inward on the door to relieve latch tension. When a bagless bin is packed past the maximum fill line, springy carpet fibers and pet fur press outward against the bottom door. This outward pressure binds the plastic hook against its catch. Push upward on the bottom lid with one hand while pressing the release button with your other hand. Taking the weight off the catch allows the button to slide open freely.
- Tap the container shell to dislodge fine dust. Vacuuming fine powder, such as drywall sanding dust or baking soda, forces microscopic grit into the tiny gap around the release button. Tap the side of the plastic bin firmly with the palm of your hand. The gentle vibration helps dislodge powder trapped around the internal spring.
- Inspect the rubber sealing ring for sticky buildup. Bagless doors use a rubber sealing ring (a soft rubber gasket seated around the rim) to prevent air leaks. If damp dirt, spilled liquid, or sticky residue was vacuumed up, that rubber gasket can glue itself to the plastic rim. Work a thin plastic tool, like the edge of a credit card or an old guitar pick, around the door seam to break the sticky seal. Never use metal screwdrivers or kitchen knives, which gouge the plastic and slice the rubber.
- Blow clean air around the button housing. If a push button stays stuck down inside its socket, blow a few short bursts of clean air around the perimeter of the button. You can use a can of compressed air or blow through a drinking straw to direct airflow right into the seam. Once the loose dust clears, the internal return spring can pop the button back out.
- Clear wrapped hair from the hinge pins. Hair can wrap tightly around the tiny pivot pins at the back of the bottom door, locking the hinge in place even after the front latch disengages. Use tweezers to snip and unwind any threads or pet hair binding the hinge joint, then wipe the plastic with a damp cloth.
Replace Broken Release Catches and Lids to Restore Suction
If a locking clip snaps off or a hinge breaks, the vacuum will quickly lose its ability to clean. When the canister door cannot clamp shut against its rubber sealing ring, air leaks straight into the chamber through the crack. This bypasses the suction path entirely, meaning the floor nozzle cannot lift dirt from carpets and the spinning brush roller simply scatters debris across the floor instead of pulling it up.
You do not need to replace the entire vacuum cleaner if a single plastic tab breaks. Most upright, stick, and wheeled canister vacuums use modular parts that can be swapped out in a few minutes using simple hand tools.
Keep these points in mind when checking for replacement parts to fix your canister latch:
Always locate the exact model number on the rating label, which is usually stamped on a silver or white sticker on the underside of the vacuum base. Release clips and door hinges often look identical across different vacuum models, but tiny variations in latch width or screw locations mean parts from one series will rarely lock into another.
For bagless cleaners, decide whether you need an individual door catch or a complete bottom lid assembly. Many brands offer replacement bottom covers that come with a fresh latch, hinge pin, and rubber sealing ring already assembled. Swapping the entire bottom lid requires removing only a single hinge pin or small retaining screw, making it far simpler than trying to thread a tiny replacement spring into an old, worn latch housing.
If you are maintaining a cordless stick vacuum and noticing weak runtimes or failing suction, it is also worth checking how much a new battery costs so you can weigh simple maintenance against the cost of a new unit. Replacing a broken five-dollar latch or cracked dust lid restores airtight suction instantly, keeping your vacuum running properly for years without unnecessary expense.

- VC Score9.6
BCP Score is a ranking system developed by bestcleanerproducts.com. BCP Score has no relationship or impact from any manufacturers or sales agent websites. Learn more
- BrandFunmit

- VC Score9.4
BCP Score is a ranking system developed by bestcleanerproducts.com. BCP Score has no relationship or impact from any manufacturers or sales agent websites. Learn more
- BrandHcxvtyx

- VC Score9.4
BCP Score is a ranking system developed by bestcleanerproducts.com. BCP Score has no relationship or impact from any manufacturers or sales agent websites. Learn more
- BrandClean Obsessed

- VC Score9.0
BCP Score is a ranking system developed by bestcleanerproducts.com. BCP Score has no relationship or impact from any manufacturers or sales agent websites. Learn more
- BrandWYWY.Wide

- VC Score8.8
BCP Score is a ranking system developed by bestcleanerproducts.com. BCP Score has no relationship or impact from any manufacturers or sales agent websites. Learn more
- BrandWYWY.Wide

- VC Score8.6
BCP Score is a ranking system developed by bestcleanerproducts.com. BCP Score has no relationship or impact from any manufacturers or sales agent websites. Learn more
- BrandEureka

- VC Score8.6
BCP Score is a ranking system developed by bestcleanerproducts.com. BCP Score has no relationship or impact from any manufacturers or sales agent websites. Learn more
- BrandGastrivo

- VC Score8.6
BCP Score is a ranking system developed by bestcleanerproducts.com. BCP Score has no relationship or impact from any manufacturers or sales agent websites. Learn more
- BrandSuperDi
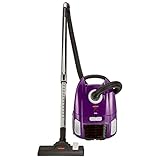
- VC Score8.6
BCP Score is a ranking system developed by bestcleanerproducts.com. BCP Score has no relationship or impact from any manufacturers or sales agent websites. Learn more
- BrandBissell

- VC Score8.4
BCP Score is a ranking system developed by bestcleanerproducts.com. BCP Score has no relationship or impact from any manufacturers or sales agent websites. Learn more
- BrandSuperDi
Last update on 2026-10-19 / Affiliate links / Images, Product Titles, and Product Highlights from Amazon Product Advertising API


How to Refinish a Fiberglass Pool

How Do You Keep Raccoons Out of Your Pool?

How to Fix Cyanuric Acid in Your Pool

How to Shape a Pool Cue Tip to Stop Miscues

Best Far Infrared Sauna Sauna Heats: Top Picks of 2026

11 Best Far Infrared Sauna Carbon Fiber Heaters of 2026 For Balanced Full-Body Heat

11 Best Carbon Far Infrared Sauna of 2026 For Even Heat

10 Best Bluetooth Speaker For Sauna of 2026 For Heat and Steam


