
How to Open the Bottom of a Vacuum Without Breaking Plastic

Cut the power completely by pulling the wall plug or sliding out the battery pack before touching any latches. This keeps the motor from suddenly spinning while hands are near the roller. To reach the brush, flip the floor head over and release the bottom cover by sliding the lock tabs, turning the coin slots a quarter turn, or loosening a few recessed screws.
The exact steps shift depending on which part needs clearing and how the frame locks together. Emptying packed debris means pressing a latch to swing open the dust cup door, while clearing tangled hair means removing the flat floor plate entirely. Lightweight stick models favor tool-free sliders, whereas heavier uprights often hide screws near the wheels. Spotting the exact fastener style first protects the thin plastic from snapping under pressure.
Which bottom part do you need to open?
When people want to open the bottom of a vacuum, they usually mean one of two completely different parts. The first is the clear dirt canister, which uses a swinging trapdoor at its base to dump collected debris. The second is the bottom cover over the roller, also called the soleplate, which protects the spinning roller brush underneath the floor head. Knowing which part you are trying to reach saves you time and keeps you from twisting the wrong release clip.
If your vacuum has lost suction, makes a high-pitched whine, or smells like hot rubber, you almost certainly need to open the floor head. Hair, thread, and carpet fibers wrap tightly around the spinning roller brush over time, locking the bearings and stalling the motor belt. To fix that issue, you must turn the floor head upside down and remove the protective bottom cover.
If you simply need to empty out dust, lint, and crumbs, you do not need to touch the floor nozzle at all. You only need to open the lower lid of the dirt cup. Both assemblies use plastic latches that can snap if you pull them in the wrong direction, but each uses a completely different locking mechanism.
What safety steps must you take before starting?
Before you touch any latches or turn any screws, disconnect the machine from all power sources. If you have an upright or canister vacuum, pull the plug out of the wall outlet. Never work on the underside of a vacuum while the power cord is connected, because accidentally hitting the power switch while your fingers are near the spinning roller brush can cause severe pinching or cuts.
If you use a battery-powered stick vacuum, shut off the power switch and remove the battery pack completely. Cordless stick cleaners are very convenient to maneuver around furniture, and many people compare what is the lightest cordless vacuum cleaner in 2026 to find a unit that is effortless to carry. But because these compact machines place the power trigger right next to your hand, taking out the battery prevents any accidental starts. It also protects the sensitive electronics inside the handle, which matters because researching how much is a new battery for a cordless vacuum in 2026 shows that replacing an electrical pack is an expense worth avoiding.
Once the machine is fully powered down, prepare your work area by following this quick checklist:
- Lay an old towel or a flattened cardboard box across a sturdy table or on the floor to catch loose dirt.
- Ensure you have bright overhead lighting or a small flashlight so you can spot hidden catches.
- Grab a small dish or cup to hold any tiny screws you take out so they do not roll away.
- Keep a quarter, a flat-blade coin, or a standard Phillips-head screwdriver nearby.
How do you release the bottom roller cover?
Flip the vacuum head over so the spinning roller brush faces up toward you. Look closely at the outer edges of the plastic bottom cover. Vacuum makers use three primary methods to hold this plate in place: sliding lock clips, coin-turn dials, or recessed screws. Determine which style your model has, then follow the matching steps below.
- Releasing tool-free sliding clips: Many stick vacuums and modern uprights feature sliding release clips on the left and right sides of the floor head. These clips are often molded in a contrasting color like red or gray, and they usually display tiny locked and unlocked padlock symbols. Place your thumb against the raised ridge on the clip and push it toward the unlocked icon. Once both clips are slid into the open position, lift the rear edge of the bottom plate upward and unhook it from the front casing.
- Turning coin-slot dials: Many heavy-duty upright models secure the bottom cover with two or three plastic dials that feature a wide center groove. Take a quarter, a nickel, or a wide flat washer and insert it into the slot. Turn the dial a quarter turn counterclockwise until you feel a soft click. The groove will now point toward the unlock marking. Once all dials are turned, grasp the back edge of the cover and pull it gently up and toward you.
- Removing recessed screws: If you see round, deep screw wells along the perimeter of the floor nozzle, your cover is held on by screws. Use a Phillips-head screwdriver that fits the screw head snugly to avoid stripping the metal. Turn each screw counterclockwise until it lifts free, and place it in your small container. Check the corners near the small front wheels, as brands frequently hide one or two screws underneath rubber wheel flaps or behind the front bumper trim. Once every screw is out, wiggle the cover gently to separate it from the housing.
If the cover resists lifting after you unlock the fasteners, do not force it. Run your finger along the entire edge to check for a missed screw or a secondary center latch. Forcing the plate when a single screw remains hidden will snap the brittle plastic mounting post beneath it.
How do you open the dust cup trapdoor cleanly?
Emptying the dirt bin is straightforward, but doing it wrong creates a huge cloud of dust or bends the delicate hinge pin at the bottom of the canister. The trapdoor relies on a spring-loaded catch that releases a swinging base plate.
- Detach the bin from the main body: Press the canister release button on the handle or spine of the vacuum, then lift the dirt cup completely away from the motor frame. Trying to open the trapdoor while the bin is still mounted to the wand or motor makes the unit awkward to balance.
- Lower the canister into a trash can: Hold the dirt bin deep inside your trash can, several inches below the rim. This simple step stops fine dust particles from floating back into the air and settling on your clean counters or floors.
- Locate the door release clip: Look for a distinct trigger or sliding clip located near the lower third of the canister. This clip is usually marked with an icon of a trash bin. Do not confuse it with the canister-removal button on the top handle.
- Press the latch and let the door swing: Press the latch firmly with your thumb. The spring will release, and the hinged bottom door will drop downward under the weight of the dirt. Tap the outside of the canister gently with your knuckles to knock loose any compacted pet hair or clinging debris.
- Inspect the rubber sealing ring: Before snapping the door shut, glance at the thin rubber gasket running along the inner rim of the trapdoor. If hair or coarse grit is sitting on that rubber ring, wipe it away with a dry cloth. Leaving grit on the seal prevents an airtight lock and causes your vacuum to lose suction power.
Why is the release clip stuck or jammed?
Vacuum latches often freeze up and refuse to budge. This happens because vacuums pull in microscopic dust, powdered carpet fresheners, and fine pet dander. When this fine grit finds its way into the tiny gaps around plastic sliding clips, it acts like sandpaper, binding the sliding tracks.
If a latch will not move, your first instinct might be to grab a flat screwdriver or a butter knife and pry it open. Never do this. Vacuum casings are made from rigid plastic that cracks easily when subjected to sharp point pressure. A cracked latch prevents the cover from sealing, which ruins the suction of the floor head entirely.
Instead, use gentle movement to clear the channel. Take a dry, stiff toothbrush and scrub vigorously around the edges of the stuck latch to dislodge caked dust. Next, tap the plastic housing gently with the wooden handle of a spoon. The light vibration helps shake loose deep grit trapped inside the slider channel.
Another reliable trick is relieving the mechanical tension on the latch hook. Push down lightly on the door or bottom plate directly above the latch with one hand, then try sliding the release clip with your other hand. Relieving that outward pressure allows the plastic catch to slip smoothly out of its groove without snapping.
Never spray liquid lubricants like standard multi-purpose oil or greasy penetrating sprays into vacuum latches. Liquid oil attracts fine dust like a magnet, creating a sticky paste that permanently gums up the mechanism. It can also degrade certain types of consumer plastics, turning them gummy or brittle over time.
How do you lock the cover back safely?
Most broken vacuum tabs do not break when the bottom is opened. They break when someone tries to force the bottom cover back on backwards or crooked. Putting the bottom cover back on requires patience and proper tab alignment.
- Seat the spinning roller brush correctly: Before touching the cover, make sure the roller brush is sitting properly in its side slots. Slip the drive belt over the motor spindle and the roller end cap, then slide the roller bearings down into their guide tracks. Spin the roller with your hand to confirm it turns freely without rubbing against the outer walls.
- Locate the front alignment tabs: Examine the bottom cover plate. The front edge almost always features two to four small plastic hooks or teeth that must seat into matching rectangular slots on the front of the floor head nozzle.
- Hook the front edge first: Hold the bottom cover at a forty-five-degree angle. Slide the front tabs completely into their receiving slots on the front bumper. You must engage these front hooks before lowering the back of the plate.
- Lower the cover flush: Swing the rear of the cover down flat against the base of the floor head. It should settle smoothly into place without requiring heavy downward pressure. Look around the entire seam to verify there are no uneven gaps or pinched wiring.
- Engage the locks: Slide the locking clips back to the locked padlock symbol, turn your coin dials a quarter turn clockwise until they sit flat, or replace the screws. Tighten the screws until they are snug, but stop the moment you feel firm resistance to avoid stripping the soft plastic threads.
If the cover sits tilted or leaves a visible gap along the edge, do not try to squeeze it shut with brute force. Lift the plate back off, check that the spinning roller brush has not popped out of its cradle, realign the front tabs, and lower it again gently.
What tools make clearing brush rollers easier?
Once you successfully open the bottom cover of your vacuum head, you will usually find human hair, pet fur, and string tightly wound around the roller brush. Trying to pull these strands off with your bare fingers is frustrating, and using large kitchen scissors can nick the roller core or accidentally snip off rows of brush bristles.
A specialized handheld cleaning tool makes this job much simpler and faster. These compact accessories feature a small plastic handle equipped with a recessed, hook-shaped safety blade on one end and a stiff bristle comb on the other. You simply slide the pointed hook under the wound hair and pull along the built-in groove on the roller brush. The protected blade slices cleanly through the tangled fibers in a single stroke, allowing you to peel the hair away in one clean mat without damaging the spinning mechanism.
When selecting a cleaning tool for maintaining your floor head, look for models constructed with durable ABS plastic handles and shielded steel cutting edges. A dual-purpose design with comb teeth on the opposite end is especially helpful, as it lets you comb out ground-in lint and debris from the roller bristles after the hair is cut free. Keeping one of these small tools in your cleaning closet makes regular roller maintenance quick and effortless whenever you release the bottom plate.

- VC Score10.0
BCP Score is a ranking system developed by bestcleanerproducts.com. BCP Score has no relationship or impact from any manufacturers or sales agent websites. Learn more
- BrandMajosta

- VC Score10.0
BCP Score is a ranking system developed by bestcleanerproducts.com. BCP Score has no relationship or impact from any manufacturers or sales agent websites. Learn more
- BrandEiodoni

- VC Score9.0
BCP Score is a ranking system developed by bestcleanerproducts.com. BCP Score has no relationship or impact from any manufacturers or sales agent websites. Learn more
- BrandTweruna

- VC Score8.4
BCP Score is a ranking system developed by bestcleanerproducts.com. BCP Score has no relationship or impact from any manufacturers or sales agent websites. Learn more
- BrandTweruna

- VC Score8.2
BCP Score is a ranking system developed by bestcleanerproducts.com. BCP Score has no relationship or impact from any manufacturers or sales agent websites. Learn more
- BrandEureka

- VC Score8.0
BCP Score is a ranking system developed by bestcleanerproducts.com. BCP Score has no relationship or impact from any manufacturers or sales agent websites. Learn more
- BrandVacmaster
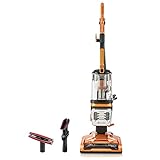
Kenmore DU4080 Featherlite Lift-Up Bagless Upright Vacuum 2-Motor Power Suction Lightweight
View on Amazon- VC Score8.0
BCP Score is a ranking system developed by bestcleanerproducts.com. BCP Score has no relationship or impact from any manufacturers or sales agent websites. Learn more
- BrandKenmore

Vacmaster UB0402 Commercial Vacuum Cleaner Ultra-Lightweight 14L Capacity Bagged Upright
View on Amazon- VC Score8.0
BCP Score is a ranking system developed by bestcleanerproducts.com. BCP Score has no relationship or impact from any manufacturers or sales agent websites. Learn more
- BrandVacmaster

- VC Score8.0
BCP Score is a ranking system developed by bestcleanerproducts.com. BCP Score has no relationship or impact from any manufacturers or sales agent websites. Learn more
- BrandKenmore

- VC Score6.4
BCP Score is a ranking system developed by bestcleanerproducts.com. BCP Score has no relationship or impact from any manufacturers or sales agent websites. Learn more
- BrandSHLYBRZLJ
Last update on 2026-10-26 / Affiliate links / Images, Product Titles, and Product Highlights from Amazon Product Advertising API
FAQs
Can you wash the bottom plate with soap and water once it is removed?
You can wash the plastic bottom cover with warm water and mild dish soap as long as it contains no electrical wires, headlights, or circuit boards. Rinse the plate thoroughly and let it air dry completely for at least twenty-four hours before reinstalling it. Putting a damp cover back on your vacuum head can trap moisture inside the motor compartment and cause rust or electrical damage.
What should you do if a plastic tab breaks off while opening the bottom?
If a small alignment tab snaps off, do not use standard craft glue, because it lacks the strength to withstand vacuum vibration. Use a two-part plastic epoxy, clamp the broken tab firmly in place, and let it cure for a full day before using the machine. If the tab that broke is a main locking latch, check the model number on the rating label underneath the vacuum and order an inexpensive replacement bottom plate online.
How often should you open the bottom of your vacuum for cleaning?
You should inspect and open the bottom plate every three to four weeks in homes with pets or long hair. In homes without shedding animals, checking the spinning roller brush once every two to three months is usually enough to maintain proper airflow. If you notice the floor head dragging heavily or see the roller brush warning light illuminate, open the bottom immediately to prevent burning out the drive belt.
Why does the vacuum make a rattling noise after putting the bottom plate back on?
A loud rattling or vibrating sound usually means the spinning roller brush is seated slightly crooked in its side notches. It can also happen if the front alignment tabs of the bottom cover were not fully tucked into their slots, allowing the spinning brush to vibrate against the loose plastic plate. Turn off the power immediately, take the cover off, verify that both ends of the roller sit firmly in their tracks, and snap the cover back into place.


How to Refinish a Fiberglass Pool

How Do You Keep Raccoons Out of Your Pool?

How to Fix Cyanuric Acid in Your Pool

How to Shape a Pool Cue Tip to Stop Miscues

Best Far Infrared Sauna Sauna Heats: Top Picks of 2026

11 Best Far Infrared Sauna Carbon Fiber Heaters of 2026 For Balanced Full-Body Heat

11 Best Carbon Far Infrared Sauna of 2026 For Even Heat

10 Best Bluetooth Speaker For Sauna of 2026 For Heat and Steam


