
How to Open and Clean a Vacuum Without Breaking It

Taking apart a vacuum starts with unplugging the electrical cord, pressing the push-button release clip to empty the dirt container, and unlocking the bottom cover plate to slide out the spinning bristle bar. The exact steps shift depending on whether the unit uses a disposable bag or a clear plastic dust bin. Foam filter inserts can then be rinsed under cool water, but every washed part must air-dry for a full day before reassembly so moisture never ruins the motor.
A few details change the job from one model to the next. Some floor heads open with tool-free clips, while others use small twist screws that turn with an ordinary coin. Filter materials vary as well, since foam pads wash clean easily, but pleated fine-dust filters will tear and ruin if they touch water. Checking these connection points before pulling keeps brittle latches from snapping as you take each section apart.
Safety and Prep Before Opening Your Vacuum
Taking apart a vacuum cleaner takes only a few minutes, but rushing into it can crack thin plastic tabs or send clouds of trapped dust across your room. Setting up your workspace first keeps the job quick and mess-free.
Work on an uncarpeted floor like a kitchen tile, garage, or patio. If you must work indoors over carpet, lay down an old towel or a flattened trash bag first to catch loose grit. Before touching any latches, go through this quick preparation checklist:
- Disconnect electrical power: Unplug corded machines from the wall outlet. If you have a cordless model, slide the battery pack off the handle completely so the motor cannot start by accident while your hands are inside the floor head.
- A pair of household scissors or a seam ripper: This lets you slice through wound-up carpet strings, threads, and pet hair without tugging on the spinning brush roller.
- A coin or flat-head screwdriver: Many upright and canister floor heads use quarter-turn plastic locks instead of standard metal screws to hold the bottom cover plate.
- Two clean microfiber cloths: Keep one slightly damp with warm tap water to wipe dirt bins, and keep the other completely dry to wipe electrical housing seams.
- A large trash can or garbage bag: Keep your waste bin right beside your knees so you can empty dust chambers without walking across the room.
Opening the Canister and Cleaning the Dust Bin
The clear dust canister on bagless vacuums takes the brunt of everyday debris. Over time, fine silt settles into the cyclonic chambers, cutting off suction and creating stale exhaust odors. Follow these numbered steps to open and clean the dirt cup without cracking the plastic frame.
-
Press the push-button release clip near the carry handle: Most canister assemblies release by pressing a single colored button near the top spine of the machine.
Reason: Supporting the base of the canister with one hand while pressing the push-button release clip prevents the bin from dropping onto the floor and snapping the bottom hinge pins. -
Lower the canister deep into your trash can before opening the bottom flap: Hold the dirt bin several inches down inside your garbage bag, then press the trapdoor release button.
Reason: Emptying the bin inside the trash container stops fine dust from billowing into the room and settling back onto your clean floors. -
Separate the inner cyclone shroud from the clear outer bin: Grasp the top handle and turn the clear plastic bin a quarter-turn counterclockwise until the unlock icon lines up with the guide arrow.
Reason: Pet dander, lint, and hair get wedged behind the metal or plastic cyclone screen, and you cannot clean that trapped ring of debris while the parts stay locked together. -
Tap the plastic shroud lightly against the inner wall of the trash can: Use gentle taps with the palm of your hand to dislodge stuck dust clumps from the tiny mesh holes.
Reason: Banging hard plastic chambers against hard trash rims can chip the locking tabs or crack the clear acrylic walls. -
Wipe the inside of the bin with a damp microfiber cloth: Rub away the gray static haze along the plastic interior walls using plain water, avoiding any motorized connectors.
Reason: Many modern vacuums put electrical wiring pins on the outside rim of the bin to power the floor nozzle, and submerging these contacts in a sink will ruin the internal wiring.
Washing and Drying Vacuum Filters Safely
Dirty filters are the number one reason a vacuum cleaner loses suction or begins to whistle. When the pores in the filter clog with fine powder, the motor has to work twice as hard to pull air through the machine. This extra strain overheats the motor and can trigger the automatic shutoff switch.
Most bagless vacuums contain two distinct filters. The first is a pre-motor filter, which sits directly above or inside the dust canister. This is usually a washable sponge, foam disc, or thick felt pad. The second is a post-motor pleated fine-dust filter, often called a HEPA filter, which sits near the exhaust vent or inside the wheel assembly to catch microscopic dust before the exhaust air returns to your room.
Check the filter frame for a small faucet symbol or the word "Washable." Foam and felt pre-motor filters can be rinsed under a steady stream of cold or lukewarm tap water. Squeeze the foam gently between your palms until the runoff water turns clear. Never use laundry detergent, dish soap, or hot water, as harsh chemicals break down the delicate foam cell structure and melt the glue holding the seals together.
Pleated fine-dust filters require more caution. If the frame does not clearly state that it is washable, do not expose it to water. Wetting a paper-based pleated filter turns the dust into thick mud that permanently seals the paper fibers, ruining airflow. Instead, gently tap the plastic frame against the inside of an outdoor trash bin to shake the loose powder free.
The most critical rule of vacuum maintenance is drying time. Never reinstall a filter while it has any dampness left inside. Foam filters hold water deep inside their center core even when the surface feels dry to the touch. Lay the washed filters flat on a clean towel in a warm, well-ventilated room for at least 24 to 48 hours. Putting a damp filter back into the vacuum will pull moisture directly into the high-speed electric motor, causing rust, electrical shorts, and a foul mildew odor that is nearly impossible to remove.
Opening the Floor Head and Freeing the Spinning Brush Roller
When the floor nozzle struggles to pick up surface litter or makes a loud rattling sound, tangled hair is usually wrapped around the roller bar. If hair gathers tightly around the rotating ends, it acts like a brake, heating up the bearings and stretching the drive belt. Use these steps to remove the bottom cover plate safely.
-
Detach the floor nozzle from the extension wand: Press the foot pedal or wand release latch and pull the motorized floor head away from the main vacuum body.
Reason: A loose floor head is easy to flip over on a table or counter, preventing the wand from swinging down and striking your hands. -
Inspect the bottom cover plate for locking mechanisms: Turn the head upside down and locate the fasteners holding the flat bottom plate in place.
Reason: Different models use tool-free slide latches, coin-turn slots, or small screws, and trying to pry the plate without unlocking all fasteners will snap the plastic hinges. -
Turn the coin-turn locks a quarter-turn counterclockwise: Insert the edge of a coin or a wide flat screwdriver into each slot and twist until the slot points to the unlock symbol.
Reason: Using a coin prevents stripping the soft plastic edges of the lock, which often happens when using narrow kitchen knives or the wrong screwdriver size. -
Lift the bottom cover plate off and set it aside: Pull the front edge of the plate upward, then slide the rear retaining tabs out from the bumper slots.
Reason: The rear tabs must slide out at a slight angle to clear the bumper track without snapping off. -
Lift the spinning brush roller and slip off the rubber drive belt: Grasp the roller bar on the side opposite the belt, pull it upward, and slip the black rubber drive band off the gear cog.
Reason: Easing the roller out slowly keeps the rubber drive belt from overstretching or flying off the motor spindle deep inside the housing. -
Slice wrapped fibers along the roller groove: Slide the tip of your scissors into the molded channel that runs the length of the spinning bristle bar, cutting through the hair in one straight line.
Reason: Cutting along this built-in guide lets you pull the hair off cleanly with your fingers without snipping or pulling out the brush bristles. -
Pop off the end caps to remove hidden hair rings: Pull the plastic end caps off both ends of the roller bar to pull out the compressed hair spools hidden next to the metal bearings.
Reason: Hair wrapped behind the end caps creates high friction that can melt the plastic roller tips during regular use.
Clearing Stubborn Blockages in the Hose and Neck
If you have cleaned the dust bin, washed the filter, and freed the spinning brush roller, but your vacuum still lacks suction, there is almost certainly a clog inside the internal airways. Debris often jams at the narrowest points: the flexible neck joint right behind the floor head, or the bend where the hose enters the main body.
To inspect the flexible hose, disconnect both ends from the machine. Stretch the hose out straight and look through it toward a bright ceiling light or window like a telescope. If you cannot see light coming through the other side, drop a heavy coin or a metal butter knife handle-first down the hose. The coin will slide freely until it hits the blockage, telling you exactly where the clog is trapped.
To dislodge the blockage, work the hose with your fingers from the outside to break up the clump. If it refuses to budge, push the rounded wooden handle of a broom gently through the hose to slide the mass out the opposite end. Never use metal wire coat hangers with sharp cut ends, as they can easily punch a hole through the thin ribbed plastic walls of the hose, causing a permanent air leak.
On upright vacuums, also check the lower duct hose. This short, flexible rubber tube connects the back of the floor head to the upright body. Drop the handle flat to the floor and inspect this lower rubber neck. Clumps of pet hair and toothpicks frequently get wedged here. You can usually pinch the flexible neck to crush the clump so the vacuum can pull it through on its next run.
If you use a cordless stick vacuum and it shuts off after only a few seconds even with clean airways, the problem might be electrical rather than a physical clog. Cordless motors shut down if the battery cannot supply steady current under load. Reviewing how much is a new battery for a cordless vacuum will help you decide whether a worn-out power pack is causing your machine to cut out unexpectedly.
Remember that dry vacuums are strictly designed for dry household dust. If your vacuum picked up damp dirt or wet carpet spills, that moisture will mix with dry lint inside the airway, creating a hard, cement-like plug that smells like stagnant water. For wet pet messes, mud, or food spills, using a dedicated extraction machine like a carpet cleaner for tough stains and odors prevents wet debris from ruining your regular vacuum cleaner.
Reassembling Your Vacuum to Ensure Full Suction Power
Putting your vacuum back together correctly is just as important as taking it apart. A single loose latch or twisted rubber seal allows outside air to bleed into the system, drastically dropping suction at the floor nozzle. Run through this reassembly checklist before turning the machine back on:
- Confirm all filters are bone-dry: Press a paper towel against the center of your foam and felt filters. If the paper picks up any dampness, let them dry longer.
- Seat filters firmly in their housings: Align the notches on the filter frame with the grooves in the housing. A filter sitting crooked will prevent the cover lid from sealing.
- Check rubber gaskets for flat placement: Run your finger along the black silicone sealing rings on the dust bin trapdoor and canister rim. Make sure the gasket is not pinched or twisted.
- Loop the drive belt correctly over the brush roll: Slip the drive belt over the motor spindle first, then thread it around the brush roller cog. Slide the roller into its side slots and rotate it by hand two or three full turns to ensure the belt tracks centrally without slipping off.
- Lock the bottom cover plate securely: Seat the rear hooks of the bottom plate first, press the front edge down flat against the bumper, and turn the coin-turn locks back to the locked position.
- Listen for the distinct click: When snapping the dust bin, floor nozzle, and hose back onto the main body, listen for a sharp, audible click from every push-button release clip. If a seam feels spongy or loose, pull it apart and realign the plastic guide rails.
Choosing Attachments and Tools to Keep Deep Airways Clean
Keeping a vacuum operating smoothly is much easier when you have the right accessories to reach tight spaces. Standard floor heads are great for broad rugs, but their wide openings lose air velocity when trying to pull deep debris out of narrow joints, slider tracks, or dryer exhaust lines.
When selecting maintenance tools or replacement nozzles, look for narrow crevice wands and flexible lint brushes that feature universal connection collars. Many household vacuums share standard fitting sizes, such as a 1-1/4-inch inner diameter hose connection. Checking your vacuum wand diameter before picking up an attachment set ensures the pieces slide on snugly without air leaks.
Long, narrow flexible tubes made of bendable rubber are especially helpful for deep cleaning. Unlike rigid plastic wands, these flexible extensions can snake through the internal ducts of your vacuum, reach down refrigerator coils, or pull packed lint from laundry dryer housings. Pairing your vacuum with specialized cleaning rakes also makes brush maintenance easier, allowing you to slice hair away from your spinning brush roller without needing to disassemble the floor nozzle every week.

- VC Score9.2
BCP Score is a ranking system developed by bestcleanerproducts.com. BCP Score has no relationship or impact from any manufacturers or sales agent websites. Learn more
- BrandN/A

- VC Score9.0
BCP Score is a ranking system developed by bestcleanerproducts.com. BCP Score has no relationship or impact from any manufacturers or sales agent websites. Learn more
- BrandPetOde

- VC Score8.8
BCP Score is a ranking system developed by bestcleanerproducts.com. BCP Score has no relationship or impact from any manufacturers or sales agent websites. Learn more
- BrandBLACK+DECKER

- VC Score8.8
BCP Score is a ranking system developed by bestcleanerproducts.com. BCP Score has no relationship or impact from any manufacturers or sales agent websites. Learn more
- BrandHolikme
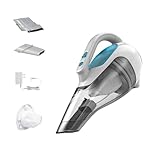
- VC Score8.8
BCP Score is a ranking system developed by bestcleanerproducts.com. BCP Score has no relationship or impact from any manufacturers or sales agent websites. Learn more
- BrandBLACK+DECKER

- VC Score8.6
BCP Score is a ranking system developed by bestcleanerproducts.com. BCP Score has no relationship or impact from any manufacturers or sales agent websites. Learn more
- BrandEureka
- VC Score8.6
BCP Score is a ranking system developed by bestcleanerproducts.com. BCP Score has no relationship or impact from any manufacturers or sales agent websites. Learn more
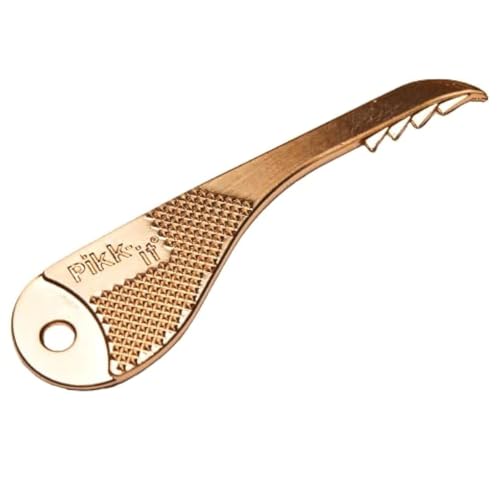
- BrandPikk-it
- VC Score8.4
BCP Score is a ranking system developed by bestcleanerproducts.com. BCP Score has no relationship or impact from any manufacturers or sales agent websites. Learn more
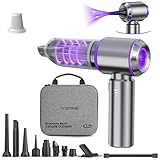
- BrandIYOFINE

- VC Score8.2
BCP Score is a ranking system developed by bestcleanerproducts.com. BCP Score has no relationship or impact from any manufacturers or sales agent websites. Learn more
- BrandKMM

- VC Score8.0
BCP Score is a ranking system developed by bestcleanerproducts.com. BCP Score has no relationship or impact from any manufacturers or sales agent websites. Learn more
- BrandEZ SPARES
Last update on 2026-10-18 / Affiliate links / Images, Product Titles, and Product Highlights from Amazon Product Advertising API
Frequently Asked Questions
How do I know if my vacuum filter can be washed with water?
Look closely at the plastic frame or the filter edge for a stamped faucet icon or the word "Washable." Most foam sponges and felt pads can be rinsed under cool water, but pleated paper fine-dust filters should only be tapped clean unless the manual explicitly says otherwise. When in doubt, check the manufacturer model label on the base of your machine.
What should I do if a plastic latch is stuck and will not open?
Never force or pry a stuck latch with a screwdriver, because vacuum body plastics crack easily under bending pressure. Check around the seam for a second hidden release catch, a slide lock, or packed grit wedged inside the latch spring. Wiggle the bin gently while pressing directly on the center of the push-button release clip to free the catch.
Why does my vacuum still smell bad after emptying the dust cup?
A lingering bad smell usually means fine organic dust or pet dander is trapped inside the foam filter, or damp dirt has caked onto the internal cyclone shroud. If washing the foam filter and wiping the bin does not clear the odor, replace the exhaust fine-dust filter with a fresh one. Trapped pet dander inside paper filters will smell whenever warm exhaust air blows across it.
How often should I take my vacuum apart for a deep clean?
Empty the dust bin after every two or three uses, or whenever dirt reaches the maximum fill line. The foam filters should be rinsed once a month, while the spinning brush roller should be checked for tangled hair every couple of weeks if you have pets. Giving the entire machine a thorough teardown and airway check twice a year keeps suction strong and extends motor life.


How to Refinish a Fiberglass Pool

How Do You Keep Raccoons Out of Your Pool?

How to Fix Cyanuric Acid in Your Pool

How to Shape a Pool Cue Tip to Stop Miscues

Best Far Infrared Sauna Sauna Heats: Top Picks of 2026

11 Best Far Infrared Sauna Carbon Fiber Heaters of 2026 For Balanced Full-Body Heat

11 Best Carbon Far Infrared Sauna of 2026 For Even Heat

10 Best Bluetooth Speaker For Sauna of 2026 For Heat and Steam


