
How to Clean an Air Fryer Without Peeling the Coating

The safest way to clean an air fryer is to soak the removable parts in warm soapy water and wipe the interior housing with a damp cloth once the unit cools down. How much effort that takes depends on whether dinner left behind a light layer of crumbs or stubborn, baked-on grease. Keeping the smooth non-stick finish intact simply means using a soft sponge and skipping metal scrubbers that scratch the surface down to bare metal.
Cleaning steps also shift depending on the appliance style on the counter. Pull-out baskets wash easily in the sink, while toaster-oven models with glass doors require careful wiping around interior seams and the heating coil (the metal coil that gets hot). Even when a manufacturer labels removable trays as dishwasher-safe, intense cycle heat can wear down the non-stick finish over time. Following a few simple steps will banish burnt odors, lift sticky residue, and protect every part of the appliance.
Safety Preparations and Essential Cleaning Tools
Cleaning an air fryer requires simple tools and safe habits. Before you begin scrubbing, you need to protect yourself from burns and protect the machine from electrical damage. Rushing into the job while the machine is still hot can warp the metal components or ruin the finish.
Sudden temperature shifts cause thermal shock. When cold tap water hits a scorching hot pan, the metal contracts faster than the non-stick coating (the smooth, slippery basket finish). That sudden shift causes micro-tears in the surface, which eventually leads to flaking and peeling. Giving the appliance time to cool down completely protects your hands and preserves the cooking surface.
- Unplug the power cord from the wall outlet and wait at least 30 minutes for the unit to cool down completely.
- Separate the removable basket from the outer drawer pan using the handle release button.
- Grab a soft microfiber cloth, a non-scratch sponge, and regular liquid dish soap.
- Keep steel wool, wire brushes, and metal scouring pads away from your kitchen counter.
If you carry a greasy basket across the kitchen and accidentally drip hot oil onto a runner rug, blot the spot immediately with a dry paper towel. For carpets and living room fabrics, knowing how to erase deep odors and stains prevents grease and food spills from permanently discoloring your floor.
Daily Washing Steps for the Basket and Crisper Plate
Washing your basket and tray right after dinner prevents old grease from cooking into hard carbon the next time you turn the unit on. A gentle, daily wash takes less than five minutes and keeps your appliance running efficiently without smoke or stale smells.
- Dump loose crumbs and pour standing oil out of the drawer pan into an empty tin can or disposable container. Never pour liquid cooking grease down your kitchen sink drain, because cooled animal fats and oils harden inside household plumbing lines and cause stubborn pipe clogs.
- Wipe out remaining loose oil from the bottom of the drawer pan with a dry paper towel. Removing this top layer of fat before introducing water makes washing much faster and keeps your sponge clean.
- Fill the basket with warm tap water and add two to three drops of liquid dish soap. Let the pieces sit on your counter for 10 minutes so the warm, soapy water softens any softened food residue.
- Scrub every surface gently using the soft foam side of a sponge or a microfiber cloth. Clean the bottom mesh, the sides of the basket, and both sides of the crisper plate (the slotted tray that sits at the bottom of the basket). Remove the small rubber or silicone bumper feet on the crisper plate, wash away grease trapped underneath them, and pop them back into place.
- Rinse the basket and drawer pan thoroughly under warm running water until all soap bubbles vanish. Dry every part with a clean cotton dishtowel before sliding the assembly back into the appliance housing. Leaving water inside the basket can cause mineral spots or promote rust on untreated screws and hinges.
Many user manuals state that baskets and trays are dishwasher-safe. While an occasional run through the dishwasher will not destroy the unit immediately, regular dishwasher use speeds up the breakdown of the non-stick finish. Dishwasher detergents rely on harsh alkaline salts and abrasive powders that scour away coatings. The extreme heat of the drying cycle also degrades the chemical bond holding the finish to the metal frame. Hand washing with mild soap remains the safest way to make your basket last for years.
Removing Baked-On Grease with Baking Soda Paste
When cooking oil heats to 400 degrees, it undergoes a chemical process called polymerization. The thin layer of oil cures and hardens into a tough, gummy varnish that bonds directly to the cooking surface. Standard dish soap slides right over this baked-on film. Scraping it off with a butter knife or scouring pad will permanently gouge the finish, leaving bare metal exposed. A homemade baking soda paste dissolves this tacky buildup without causing scratches.
- Mix three tablespoons of baking soda with one tablespoon of warm water in a small bowl until it forms a spreadable paste that looks like white toothpaste.
- Spread the paste evenly over the brown, sticky patches on your basket, crisper plate, and drawer pan using your fingers or the back of a silicone spoon.
- Allow a soak time of 15 to 20 minutes (letting the wet paste sit on the surface so it can dissolve the mess before wiping). As it sits, the mild alkalinity of the baking soda reacts with the acidic fatty acids in the grease, breaking down the stubborn bond.
- Scrub the treated areas using a soft-bristle nylon scrub brush or a damp microfiber cloth in small, gentle circles. The fine crystals in baking soda provide just enough mechanical friction to lift the softened film without etching into the delicate non-stick finish.
- Clear clogged vent holes and corners using a wooden toothpick or a soft silicone scraper wrapped in a damp cloth. Never use metal forks, skewers, or steel picks, which easily gouge protective coatings.
- Rinse the parts under warm running water. Feel the surface with your bare fingertips to verify that the tacky, rubbery sensation is completely gone. If sticky patches remain, reapply the paste for another 15 minutes before rinsing a final time.
Never reach for melamine foam sponges (often sold as magic erasing pads) to remove stubborn grease from non-stick baskets. Melamine foam is actually an extremely fine abrasive resin that acts like high-grit sandpaper. While it removes baked-on oil quickly, it also strips away the slick topcoat, ruining the non-stick properties of the basket in a single cleaning session.
Cleaning the Heating Coil and Interior Housing
White smoke pouring out of an air fryer vent usually means old grease has built up on the top heating element (the metal coil that gets hot). High-powered internal fans circulate air at rapid speeds, carrying tiny droplets of oil from pork chops, bacon, and burgers upward. This grease splatters against the hot metal coil and the surrounding ceiling, burning into a black crust that smokes whenever the appliance heats up.
The main body of your air fryer houses electrical wires, sensors, and the fan motor. This housing is never submersible (safe to dunk under water). Pouring water inside the chamber or placing the base unit into a filled sink creates an immediate shock hazard and destroys the internal circuitry permanently.
To clean the interior safely, unplug the cooled unit and remove the drawer assembly completely. Lay a soft bath towel flat on your kitchen counter, then gently turn the air fryer upside down or tilt it backward onto the towel. This gives you a clear, direct view of the heating coil and the interior ceiling.
Dampen a microfiber cloth with warm water and a single drop of liquid dish soap. Wring the cloth out thoroughly until it is barely damp. No water should ever drip from the cloth into the motor vents or electrical housings. Gently wipe down the metal walls, the ceiling panel, and the surface of the coil to lift loose grease film.
If hard carbon crust clings to the coil, dip an old soft-bristle toothbrush into warm water mixed with a pinch of baking soda. Gently brush the surface of the coil to loosen the crust. Do not bend the coil, force the heating tubes out of place, or scrub around the delicate temperature probe. Follow up by wiping the area with a clean cloth dampened only with plain water to remove any soap residue. Let the unit sit open on your counter to air-dry completely for at least one hour before turning it upright and plugging it into the wall.
Choosing a Safe Degreaser for Stubborn Oil Buildup
Sometimes routine soap and baking soda paste cannot fully cut through months of baked-on brown varnish. When regular pantry items fail, a dedicated kitchen degreaser (a spray that melts thick oil) helps dissolve heavy carbon without requiring aggressive manual scrubbing.
Before purchasing a specialized cleaning solution, check the label carefully to confirm it meets strict safety standards for small cooking appliances. Look for a ready-to-use spray that explicitly states it is fume-free and food-contact safe once thoroughly rinsed with clean water. Strong commercial degreasers often leave behind chemical odors that penetrate plastic parts and spoil the flavor of future meals.
Choose a foaming spray or a no-drip gel formula over thin, watery liquids. Foaming cleaners cling to the vertical interior walls and wire basket mesh, keeping the active ingredients in direct contact with sticky oil deposits. This allows sufficient soak time to liquefy heavy carbon instead of immediately draining to the bottom of the pan.
Make sure the product label explicitly states that the formula is safe for non-stick finishes, aluminum, and stainless steel. Avoid any cleaner containing harsh lye (sodium hydroxide) or strong acids. Lye chemically attacks bare aluminum, causing dark pitting, and rapidly destroys the bond beneath non-stick coatings. Always spot-check the spray on a hidden spot on the underside of your basket rim to confirm the liquid does not discolor or dull the surface before treating the entire appliance.

- VC Score9.4
BCP Score is a ranking system developed by bestcleanerproducts.com. BCP Score has no relationship or impact from any manufacturers or sales agent websites. Learn more
- BrandCleanair-Fry

- VC Score8.4
BCP Score is a ranking system developed by bestcleanerproducts.com. BCP Score has no relationship or impact from any manufacturers or sales agent websites. Learn more
- BrandGeneric
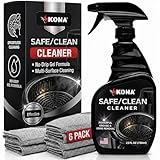
- VC Score7.9
BCP Score is a ranking system developed by bestcleanerproducts.com. BCP Score has no relationship or impact from any manufacturers or sales agent websites. Learn more
- BrandKona

- VC Score7.3
BCP Score is a ranking system developed by bestcleanerproducts.com. BCP Score has no relationship or impact from any manufacturers or sales agent websites. Learn more
- BrandEasy-Off

- VC Score7.2
BCP Score is a ranking system developed by bestcleanerproducts.com. BCP Score has no relationship or impact from any manufacturers or sales agent websites. Learn more
- BrandZep
Last update on 2026-10-26 / Affiliate links / Images, Product Titles, and Product Highlights from Amazon Product Advertising API
Frequently Asked Questions
Can you put air fryer baskets and trays in the dishwasher?
You can wash them in the dishwasher occasionally if the manufacturer manual lists them as dishwasher-safe, but regular machine cycles are not recommended. Dishwasher tablets contain harsh abrasive salts, and the high-temperature drying cycles make non-stick coatings brittle over time. Washing the basket by hand with mild dish soap and a soft sponge takes only a couple of minutes and preserves the slick finish much longer.
Can you use standard oven cleaner inside an air fryer?
No, you should never spray traditional oven cleaners inside an air fryer basket or cooking chamber. Most standard oven cleaners rely on caustic lye that chemically eats away non-stick finishes and corrodes aluminum housings. These chemicals also emit toxic fumes that cling to internal fans and heating elements, which can contaminate your food the next time you cook.
How do you remove burnt food odors from an air fryer?
Persistent burnt odors usually come from microscopic grease films clinging to the heating coil or housing walls. After completing a thorough wipe-down of the interior, place a small oven-safe dish containing two tablespoons of water and one tablespoon of lemon juice into the basket. Run the machine at 350 degrees for two to three minutes so the citrus steam circulates through the interior, neutralizes lingering smells, and leaves the chamber fresh.


How to Refinish a Fiberglass Pool

How Do You Keep Raccoons Out of Your Pool?

How to Fix Cyanuric Acid in Your Pool

How to Shape a Pool Cue Tip to Stop Miscues

Best Far Infrared Sauna Sauna Heats: Top Picks of 2026

11 Best Far Infrared Sauna Carbon Fiber Heaters of 2026 For Balanced Full-Body Heat

11 Best Carbon Far Infrared Sauna of 2026 For Even Heat

10 Best Bluetooth Speaker For Sauna of 2026 For Heat and Steam








