
How to Clean a Dyson V8 Animal Vacuum to Restore Suction

Most people assume that reviving a sluggish vacuum means soaking the whole machine or running soap through the dirty parts. Doing that ruins the internal electronics, because only the two removable filters can safely touch water. A proper clean simply means rinsing those filters until the runoff is clear, snipping tangled hair off the brush roller, and wiping down the dirt canister with a dry cloth.
What needs attention depends on how the vacuum is acting and where the dirt is trapped. A motor that pulses (cutting in and out rapidly) usually signals a choked filter or a hidden plug of pet fur inside the wand. Keeping electrical connections away from moisture is critical, and washed parts need at least twenty-four hours to air-dry before clicking back into place. Here is how to clean each section safely to get full airflow back.
Only Wash the Filters and Keep All Motors Completely Dry
Cleaning a cordless stick vacuum requires knowing what can get wet and what must stay dry. The machine uses delicate electrical wiring and motors to create suction. A motor sits in the main handle, and hidden wires run down the extension wand to power the motorized floor head. Exposing electrical components to running water causes permanent failure.
Keep this checklist in mind before carrying parts to the sink:
- Safe to wash: The long pointed top filter (pre-filter) and the round filter on the back of the handle (post-filter). The clear plastic dirt bin can be wiped with a damp cloth, but never submerged.
- Must stay dry: The main body with the motor handle and battery, the cyclone (cone-shaped metal dirt separator), the metal extension wand, and the motorized floor roller tool.
Stick vacuums are designed solely for dry debris. Sucking up wet pet spills or tracked-in mud pulls moisture directly into the high-speed motor fan, causing rust and electrical shorts. If a pet leaves a wet mess or carpet stain, leave the stick vacuum put away. Instead, treat those wet spots with a dedicated portable pet spot cleaner or a compact carpet stain extractor that handles liquids safely without risking your dry vacuum motor.
Rinse Both Filters With Cold Water and Dry Fully
Your vacuum uses two filters to trap pet dander and fine dust. The pre-filter is the long pointed top filter inside the center of the cyclones. The post-filter is the round filter on the back of the handle that cleans the exhaust air. When fine dust chokes these filters, airflow drops and suction fades.
- Unplug your vacuum from the charging cord. Keep your fingers off the power trigger so the motor cannot start by accident.
- Pull the long pointed top filter straight up out of the machine by its plastic rim.
- Twist the round filter on the back of the handle counterclockwise about a quarter turn until the dots align, then pull it off the motor housing.
- Hold the long pointed top filter under cold running tap water. Run water into the open top so it flows out through the tip. Squeeze the fabric gently to push out trapped dust until the runoff is clear. Never use warm water or dish soap, which can clog the microscopic pores.
- Fill the round rear filter with cold water. Cover both open ends with your hands and shake it firmly for ten seconds to loosen trapped dander. Empty the cloudy water and repeat until the rinse water runs clear.
- Tap both filters gently against the sink or a towel to knock out excess water droplets.
- Set both filters upright in a warm room with good airflow for at least 24 hours. A spot near an open window or a small fan works best.
Never rush drying with a hair dryer, radiator, or clothes dryer, which can warp the plastic and shrink the fibers. Never put damp filters back into the machine. Reinstalling wet filters pulls moisture straight into the motor, causing internal rust and a sour mildew smell that lingers every time you vacuum.
Wipe the Clear Bin and Shroud Using a Damp Cloth
Pet hair carries static charges and oils that make fur cling to the clear plastic dirt bin. Over time, hair also packs against the cyclone (cone-shaped metal dirt separator), covering the metal shroud and restricting airflow.
- Hold the vacuum over a trash can and pull the red top release catch firmly upward. The cyclone lifts up, and the bottom flap drops open to dump trapped debris.
- Find the small red release catch on the bottom runner track of the vacuum body. Press it and slide the clear bin down off the handle.
- Wipe the clear bin inside and out with a damp microfiber cloth. Never submerge the bin in water, because the internal springs and rubber seals can rust or lose their seal.
- Clean the cone-shaped metal dirt separator with a dry cloth or a soft bristle brush. Brush across the tiny holes on the shroud to clear away pet hair and fine dust flakes. Do not run water into the cyclone cones.
- Let the clear bin air-dry for thirty minutes. Slide the bin back up along the red tracks until it clicks. Push the cyclone down, then snap the bottom bin door shut.
Cut Tangled Pet Hair Free From the Spinning Brush Roller
Pet hair and rug threads wrap tightly around the spinning brush roller in the motorized floor roller tool. Hair collects around the roller ends, pressing into the drive bearings. This friction strains the brush motor, drains the battery faster, and can stop the roller from spinning.
- Press the red quick-release button on the floor nozzle to detach it from the wand.
- Turn the floor head upside down on a flat surface so the baseplate faces up.
- Locate the locking screw slot on the side of the housing. Use a coin or flat key to turn the slot a quarter turn counterclockwise until the end cap releases.
- Slide the end cap off and pull the spinning brush roller straight out of the housing.
- Find the shallow groove running along the brush bar. Slip scissors or a seam ripper along this groove and cut through the hair. Peel the hair strips away without cutting the colored bristles.
- Check both ends of the roller bar. Pull off any hair rings tightly wound around the metal spindle and end cap so the bearings spin freely.
- Clear any loose dust balls from inside the cleaner head cavity.
- Slide the roller back onto the drive axle, put the end cap on, and turn the screw a quarter turn clockwise until it clicks shut.
Clear Blockages From the Wand When the Motor Pulses Rapidly
When the motor starts pulsing (the motor cutting in and out rapidly in a rhythmic stutter), the vacuum is not broken. Pulsing is a built-in safety alert that warns you airflow is blocked. Removing the obstruction restores normal suction immediately.
Check these four common blockage spots:
- The cleaner head neck: Detach the floor nozzle and look into the flexible rubber elbow joint. Pet hair and debris often lodge right in this bend. Flex the rubber with your fingers to dislodge the clog.
- The metal extension wand: Unclick both ends of the wand and look down the pipe toward a light. If you cannot see light, push a long broom handle or wooden dowel through to slide the clump out. Avoid metal coat hangers that can scratch the tube or damage internal wiring.
- The bin inlet port: Look into the round opening on the clear bin where the wand connects. Check the small rubber flap inside. If pet fur binds the hinge, flick it with a finger to verify it swings open freely.
- The cyclone air vents: Fine powder and pet dander can settle in the cyclone chambers. Hold the motor body over a trash can with the bin open and tap the side of the cyclone with your palm to knock loose packed dust.
Wash Parts Monthly and Replace Filters Every Year
A steady cleaning routine keeps your vacuum running strong and stops pet odors from spreading. Adjust your routine based on how much your pets shed.
- Every use: Empty the clear bin when debris reaches the MAX fill line. Overfilling pushes hair back into the cyclone shroud, cutting off airflow.
- Weekly: Check the motorized floor roller tool. Snip away tangled hair before it forms tight bands around the end bearings.
- Monthly: Wash both the long pointed top filter and the round filter on the back of the handle with cold water. In homes with heavy-shedding pets, rinse them every two to three weeks.
- Every year: Replace both filters with a new set. Washing clears surface grime, but fine pet dander permanently embeds deep in the fiber mesh over time.
If your vacuum still pulses on max mode or smells like hot, sour dust after a thorough wash and a 24-hour dry, the filter material is saturated. Installing new filters restores full airflow and factory suction right away.
Choose Compatible Replacement Parts That Match Your Model
When deep cleaning no longer solves weak suction or a jammed brush roller, replacing worn parts is the most direct fix. Getting the right parts ensures a tight seal and smooth operation.
Keep these factors in mind when choosing replacement items:
- Model compatibility: Check your vacuum model name to make sure replacement filters or cleaner heads match your unit. Look for parts with quick-release red clip fittings that latch on firmly without air leaks.
- Paired filter sets: Buy replacement filters in complete sets that include both the pre-filter (the long pointed top filter) and the post-filter (the round filter on the back of the handle). Replacing both together balances airflow from intake to exhaust. A spare set also lets you vacuum while washed filters dry for a day.
- Brush roller design: If your floor head is worn out, pick a motorized head with stiff nylon bristles that lift stubborn pet hair from carpet and soft carbon fiber filaments that sweep hard floors. A small cleaning tool with an integrated cutting hook also makes weekly roller cleaning fast and simple.

- VC Score9.6
BCP Score is a ranking system developed by bestcleanerproducts.com. BCP Score has no relationship or impact from any manufacturers or sales agent websites. Learn more
- BrandHuxowni

- VC Score9.4
BCP Score is a ranking system developed by bestcleanerproducts.com. BCP Score has no relationship or impact from any manufacturers or sales agent websites. Learn more
- BrandHechuang

- VC Score9.2
BCP Score is a ranking system developed by bestcleanerproducts.com. BCP Score has no relationship or impact from any manufacturers or sales agent websites. Learn more
- BrandDyson

- VC Score9.0
BCP Score is a ranking system developed by bestcleanerproducts.com. BCP Score has no relationship or impact from any manufacturers or sales agent websites. Learn more
- BrandSealegend

- VC Score9.0
BCP Score is a ranking system developed by bestcleanerproducts.com. BCP Score has no relationship or impact from any manufacturers or sales agent websites. Learn more
- BrandPetOde

- VC Score8.8
BCP Score is a ranking system developed by bestcleanerproducts.com. BCP Score has no relationship or impact from any manufacturers or sales agent websites. Learn more
- BrandVACEXT

- VC Score8.8
BCP Score is a ranking system developed by bestcleanerproducts.com. BCP Score has no relationship or impact from any manufacturers or sales agent websites. Learn more
- BrandYurMemo
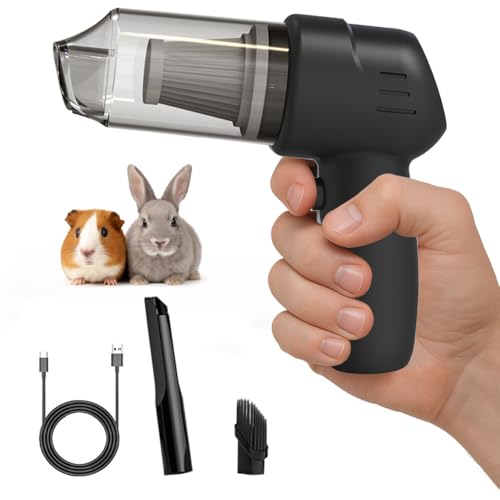
- VC Score8.6
BCP Score is a ranking system developed by bestcleanerproducts.com. BCP Score has no relationship or impact from any manufacturers or sales agent websites. Learn more
- BrandHicoolmam

- VC Score8.6
BCP Score is a ranking system developed by bestcleanerproducts.com. BCP Score has no relationship or impact from any manufacturers or sales agent websites. Learn more
- BrandVataim

- VC Score8.4
BCP Score is a ranking system developed by bestcleanerproducts.com. BCP Score has no relationship or impact from any manufacturers or sales agent websites. Learn more
- BrandcaSino187

- VC Score8.4
BCP Score is a ranking system developed by bestcleanerproducts.com. BCP Score has no relationship or impact from any manufacturers or sales agent websites. Learn more
- BrandDyson
Last update on 2026-10-02 / Affiliate links / Images, Product Titles, and Product Highlights from Amazon Product Advertising API


How to Refinish a Fiberglass Pool

How Do You Keep Raccoons Out of Your Pool?

How to Fix Cyanuric Acid in Your Pool

How to Shape a Pool Cue Tip to Stop Miscues

Best Far Infrared Sauna Sauna Heats: Top Picks of 2026

11 Best Far Infrared Sauna Carbon Fiber Heaters of 2026 For Balanced Full-Body Heat

11 Best Carbon Far Infrared Sauna of 2026 For Even Heat

10 Best Bluetooth Speaker For Sauna of 2026 For Heat and Steam


