
How to Clean a V7 Vacuum Cleaner and Restore Suction

Most people assume that rinsing the whole vacuum under a faucet is the best way to clear out heavy dust. That will ruin the motor, but washing the removable filters under a cold tap is completely safe and restores strong suction. The rest needs no soaking: empty the bin, wipe the clear canister with a damp cloth, and snip tangled hair off the brush. The most important step is letting wet parts air-dry for 24 hours before reassembly.
A few steps change depending on the exact setup. Certain versions use just a center wash stick, while others add a round rear cap filter behind the handle. The cleaning head also matters, since a carpet roller unlocks with a coin while a soft floor roller uses a slide switch. Humid rooms can also stretch out drying times. The steps below show how to clean every part safely.
The Short Version
- Wash the filters with cold water only: Rinse the center wash stick and the round rear cap filter under cold running tap water without soap until the water runs clear.
- Keep all electrical parts away from water: Never wash the motor handle, battery block, metal extension wand, or motorized floor nozzle under a faucet.
- Clean the bin and cyclone dry: Slide off the clear plastic dirt bin to wipe it down, and use a dry soft brush to clear lint from the cone-shaped dirt separator.
- Wait 24 full hours to dry: Let all wet parts air-dry completely in a well-ventilated spot before reassembling your vacuum.
What Can Get Wet and What Must Stay Completely Dry
The V7 cordless stick vacuum uses high-speed air and delicate electrical circuits to create strong suction in a lightweight frame. Small electrical wires run directly from the handle through the wand to power the motor inside the floor nozzle. Getting water into any of these electrical zones will cause short circuits, damage the battery, and ruin the machine.
Only two parts on your vacuum are designed for regular washing under running water: the center wash stick (the long tapered pre-filter resting inside the middle of the cyclone) and the round rear cap filter (the pleated post-filter cover on the back of the motor). Both of these capture fine dust particles before air leaves the machine, and both wash clean under a cold tap.
Everything else must stay dry. The motor body, the handle with the red trigger, the battery pack on the base, the metal wand, and the motorized cleaner heads should never be placed under a faucet or submerged. Even the cone-shaped dirt separator (the upper cyclone section attached to the motor body) must stay out of the sink. Running water through those tiny plastic air cones traps moisture inside hidden channels. That trapped water mixes with leftover dust, forms a dense mud that blocks airflow, and creates a sour, musty smell that is nearly impossible to eliminate.
Remember that your vacuum is strictly built for dry dirt. If you accidentally suck up puddles, wet mud, or damp pet messes, dirty water gets drawn straight past the dirt bin and directly into the motor fans. For wet spills, soggy carpets, or muddy paw tracks, use a dedicated carpet cleaner for pet stains and odors instead of putting your cordless stick vacuum at risk.
How to Wash the Filters Step by Step
Dirty filters are the most common reason a V7 loses suction or cuts out mid-clean. Fine dust fills the pores of the filter fabric over time, choking the airflow and triggering the vacuum safety sensors. Washing the filters once a month keeps the airflow smooth and protects the motor from overheating.
- Remove the center wash stick: Grip the small plastic rim at the top center of the cyclone unit. Pull straight up with a firm tug to slide the long filter out of the vacuum body.
- Remove the round rear cap filter: Locate the circular cap on the back of the motor housing. Turn the cap a quarter-turn counterclockwise to release the lock, then pull it straight back off the machine. Some standard V7 trims only feature the center stick, so if your machine has a solid plastic back with no twist cap, you only have one filter to wash.
- Tap out dry dust: Before adding any water, gently tap both filters against the inside edge of your trash can. This knocks loose thick cakes of surface dust so you do not wash dry debris deeper into the filter fabric.
- Rinse the center wash stick under cold water: Hold the stick under a cold running tap. Pour water directly into the open top opening so water flows outward through the foam sides. Gently squeeze the foam with your fingers while rinsing. Never use dish soap, laundry detergent, or hot water, as soap residues leave sticky coatings that attract dirt and clog the pores.
- Rinse the round rear cap filter: Hold the cap under cold tap water and let water fill the inside of the pleated ring. Swirl the water around, tip it out, and repeat. Gently tap the plastic rim against the side of the sink basin to dislodge embedded grit from the paper folds.
- Rinse until the water runs clear: Continue washing both pieces until the runoff leaving the filter fabric is completely transparent and free of gray tint.
- Shake out excess water: Shake both filters firmly over the sink several times to remove pooled water droplets. Give the center wash stick a gentle squeeze with an old towel to pull out leftover moisture.
Emptying and Cleaning the Canister and Shroud
Fine dust can coat the inside of the clear bin and wrap around the metal mesh shroud. This restricts the cyclone action and prevents heavy debris from dropping to the bottom of the bin.
- Disconnect the vacuum: Unplug the charging cable and press the red quick-release latch on the wand to detach the long tube and floor nozzle from the motor body.
- Open the bottom trapdoor: Hold the vacuum over a trash can. Pull the red release lever on top of the cyclone straight up until the red cyclone slides upward and the bottom trapdoor springs open, dropping the loose dirt into your bin.
- Separate the clear plastic bin: Look near the red track at the bottom front of the bin. You will see a small red release catch. Press this tab in while sliding the clear plastic bin down and off the metal guide track. Set the clear bin aside.
- Clean the mesh shroud and cyclone: Hold the motor handle firmly. Take a dry, soft-bristled brush or a dry microfiber cloth and wipe away lint, pet hair, and fine powder from the perforated metal mesh shroud. Brush out the tiny holes around the cone-shaped dirt separator. Do not use water or wet wipes on this section, as water can seep through the internal vents into the motor housing.
- Wipe out the clear bin: Wipe the inside and outside of the clear plastic canister using a dry or slightly damp cloth. If the bin is heavily caked with grime, you can rinse the detached plastic shell under cool water, but avoid scrubbing the flexible rubber seal along the bottom door.
Clearing the Floor Nozzle and Spinning Brush Roller
Long hair, thread, and carpet fibers naturally wrap around the rotating bristle roller inside the floor nozzle. When hair builds up around the roller bearings, it bogs down the drive motor, overheats the belt, and stops the brush from spinning on carpets.
- Remove the floor nozzle: Press the red button on the bottom of the extension wand and pull the motorized floor head away from the pipe. Never work on the roller while the head is connected to the vacuum handle.
- Locate the end cap lock: Turn the floor nozzle upside down so the spinning brush roller faces you. Look on the side of the housing for a round plastic plug with a wide slot across the center.
- Unlock the end cap: Insert a coin, a flat washer, or a wide screwdriver into the slot. Turn the coin a quarter-turn counterclockwise until the slot aligns with the unlock symbol and clicks free.
- Slide out the roller: Pull the end cap outward and slide the rotating bristle roller out of the floor nozzle housing. Slide the removable plastic end cap off the metal axle of the roller.
- Cut away wrapped hair: Take a small pair of household scissors or a specialized grooved cleaning tool. Slide the blade along the shallow groove running lengthwise down the roller between the stiff bristle strips. Snip the hair strands in a straight line, then pull the loose hair off with your fingers. Never yank tangled hair with pliers, as aggressive pulling can tear the bristles loose or warp the drive axle.
- Check the suction channel: Look inside the clear plastic intake throat behind where the roller sits. Small stones, paper clips, or compacted hair clumps often lodge in this tight neck, causing the vacuum to pulse on and off due to restricted airflow. Pull out any trapped objects with your fingers.
- Reinstall the roller: Push the clean roller back into the housing, making sure the grooved drive end slides securely onto the internal motor cog. Press the end cap flat against the side of the casing, insert your coin into the slot, and turn it clockwise a quarter-turn until it locks securely into place.
If you regularly vacuum entryways or rugs where damp soil and mud get tracked inside, let that debris dry completely into loose dirt before running the vacuum head over it. Sucking up sticky wet grime packs the brush bristles and jams the roller bearings. For heavily soiled carpets that need liquid extraction rather than dry brushing, a dedicated deep extraction carpet cleaner removes deep stains safely without gumming up your vacuum nozzle.
Drying Rules and Reassembly Checklist
The single most critical step in cleaning your V7 vacuum is allowing the washed filters to dry completely. Reinstalling a damp filter pulls water droplets directly into the high-speed motor fan. This leads to electrical failure, rusted bearings, and a permanent sour smell inside the housing.
- Wait at least 24 hours: Keep both filters in an open area with good air circulation for at least 24 hours. In cool rooms, basements, or during humid summer months, give the filters 36 to 48 hours to dry completely.
- Avoid direct heat sources: Do not place wet filters on hot radiators, inside an oven, under a hot hair dryer, or inside a clothes dryer. Extreme heat warps the plastic frames, melts the rubber gaskets, and shrinks the inner filter fibers.
- Check the deep foam core: Touch the thick foam inside the center wash stick and squeeze the bottom tip. If you feel any cool dampness, leave it on the counter for another night. The filter must be completely bone-dry.
- Reattach the clear bin: Line up the plastic runners on the clear bin with the metal tracks on the front of the motor handle. Slide the bin upward until you hear a sharp, solid click.
- Close the cyclone assembly: Push the top cyclone unit downward into the bin until the red top lever clicks flat into place. Then push the bottom flap door closed until the latch snaps tight.
- Slide the filters home: Slide the dry center wash stick back into the top hole of the cyclone until it sits flush with the casing. Line up the round rear cap filter on the back of the motor, push it firmly against the housing, and twist it clockwise until the alignment marks lock together.
Choosing Replacement Parts and Helpful Cleaning Tools
Keeping a few simple maintenance accessories on hand makes cleaning your vacuum faster and prevents cleaning interruptions. Having an extra set of washable filters means you can keep vacuuming your floors while your freshly washed set spends 24 hours air-drying on the counter.
Specialized cleaning tools with a small curved safety blade and stiff comb teeth are especially useful for cutting tangled hair away from the spinning brush roller without dulling kitchen scissors. Narrow crevice attachments and flexible vent hoses also let you pull out stubborn dust bunnies that pack into tight appliance corners or behind dryer vents.
When selecting a replacement floor nozzle, brush roller, or filter set, verify that the parts use the standard quick-release latch connection designed for the V7 series. Ensure that any motorized floor head features the correct internal electrical pin connectors so power transfers smoothly from the battery wand to the rotating bristle roller.

- VC Score9.4
BCP Score is a ranking system developed by bestcleanerproducts.com. BCP Score has no relationship or impact from any manufacturers or sales agent websites. Learn more
- BrandGeneric

- VC Score9.0
BCP Score is a ranking system developed by bestcleanerproducts.com. BCP Score has no relationship or impact from any manufacturers or sales agent websites. Learn more
- BrandSealegend

- VC Score9.0
BCP Score is a ranking system developed by bestcleanerproducts.com. BCP Score has no relationship or impact from any manufacturers or sales agent websites. Learn more
- BrandWAONIQ

- VC Score9.0
BCP Score is a ranking system developed by bestcleanerproducts.com. BCP Score has no relationship or impact from any manufacturers or sales agent websites. Learn more
- BrandSealegend

- VC Score8.8
BCP Score is a ranking system developed by bestcleanerproducts.com. BCP Score has no relationship or impact from any manufacturers or sales agent websites. Learn more
- BrandHolikme

- VC Score8.6
BCP Score is a ranking system developed by bestcleanerproducts.com. BCP Score has no relationship or impact from any manufacturers or sales agent websites. Learn more
- BrandVataim

- VC Score8.6
BCP Score is a ranking system developed by bestcleanerproducts.com. BCP Score has no relationship or impact from any manufacturers or sales agent websites. Learn more
- BrandAZYM

- VC Score8.4
BCP Score is a ranking system developed by bestcleanerproducts.com. BCP Score has no relationship or impact from any manufacturers or sales agent websites. Learn more
- Brandilovelife
- VC Score8.4
BCP Score is a ranking system developed by bestcleanerproducts.com. BCP Score has no relationship or impact from any manufacturers or sales agent websites. Learn more
- BrandAOMUCH

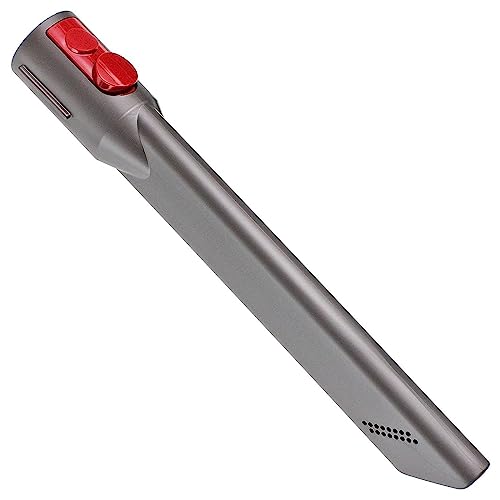
Quick-Release Motorhead Cleaner Compatible with Dyson V7,V8, Cyclone V10,V11,V15 Cordless
View on Amazon- VC Score8.4
BCP Score is a ranking system developed by bestcleanerproducts.com. BCP Score has no relationship or impact from any manufacturers or sales agent websites. Learn more
- Brandkeluke

- VC Score8.4
BCP Score is a ranking system developed by bestcleanerproducts.com. BCP Score has no relationship or impact from any manufacturers or sales agent websites. Learn more
- BrandcaSino187
Last update on 2026-10-02 / Affiliate links / Images, Product Titles, and Product Highlights from Amazon Product Advertising API
FAQs
Can I use dish soap or laundry detergent to clean my V7 filters?
No, you should never use dish soap, laundry detergent, or chemical cleaners on the filters. Soap residues coat the microscopic pores of the filter fabric, which chokes the vacuum airflow and traps fine dust like a sponge. Wash both filters exclusively under cold, running tap water.
Why does my V7 vacuum pulse on and off while I use it?
A pulsating motor sound resembles an engine revving up and down and indicates an airflow blockage. The vacuum pulses intentionally to alert you that the motor cannot draw enough air to cool itself safely. Wash your filters, check the intake neck behind the floor nozzle, and inspect the metal wand for packed debris to clear the blockage.
Can I put the clear plastic bin in the dishwasher?
No, the clear plastic dirt bin is not dishwasher safe. The hot water and drying heat in dishwashers will warp the plastic canister, damage the release catches, and ruin the rubber seals along the trapdoor. Wipe the bin clean with a damp microfiber cloth instead.
What should I do if water accidentally gets pulled into the vacuum motor?
Release the trigger immediately, disconnect the battery from the charger, and detach the wand and dust bin. Do not try to turn the vacuum back on to see if it works, as running the motor while wet causes electrical shorts. Stand the motor handle upright in a warm, dry room for at least 48 hours to dry completely before attempting to power it on again.


How to Refinish a Fiberglass Pool

How Do You Keep Raccoons Out of Your Pool?

How to Fix Cyanuric Acid in Your Pool

How to Shape a Pool Cue Tip to Stop Miscues

Best Far Infrared Sauna Sauna Heats: Top Picks of 2026

11 Best Far Infrared Sauna Carbon Fiber Heaters of 2026 For Balanced Full-Body Heat

11 Best Carbon Far Infrared Sauna of 2026 For Even Heat

10 Best Bluetooth Speaker For Sauna of 2026 For Heat and Steam








