
How to Clean a V11 Vacuum to Restore Suction

Cleaning a V11 stick vacuum takes three simple steps: rinse the filter under cold water, wipe out the clear bin with a damp cloth, and cut tangled hair off the floor roller. That routine changes depending on which parts can safely touch moisture. Only the filter can handle running water, while the motor and the cyclone (the cone-shaped dust separator) must stay completely dry to protect the internal seals.
The right fix also depends on what the screen tells you and how humid your home is. A pulsing motor or a blockage alert usually points to trapped debris in the suction tube rather than normal dust buildup. Room conditions matter too, because washed parts must dry completely for at least 24 hours before reassembly to prevent motor damage and sour mildew smells. Here is how to clean each part safely.
The Short Version
- Wash only the filter: Rinse the purple filter unit under cool tap water without any soap, and leave the main motor body completely dry.
- Wipe the clear bin and cyclone: Slide the clear plastic bin off its runner and wipe it with a damp cloth, but clean the cone-shaped dust separator with only a dry brush.
- Clear the floor roller: Use a coin to unlock the side cap on the cleaner head, slide out the spinning brush roller, and snip away trapped hair.
- Wait a full 24 hours: Never reassemble your machine until the filter is bone dry, or moisture will pull directly into the motor and destroy it.
Safety Prep and Water Rules: What Can Get Wet and What Must Stay Dry
Before you loosen a single screw or rinse a single piece, disconnect the vacuum from its charging cord. Take off the long metal wand and set the main power unit on a clean, flat table. You want the machine completely depowered so you never accidentally squeeze the trigger while handling moving parts.
Water damage is the most common way people accidentally ruin their stick vacuums. The machine relies on high-speed airflow and internal electrical wiring to drive both the suction turbine and the floor tools. Getting the wrong parts wet causes immediate short circuits or leaves a foul, sour mildew smell that never goes away. Keep this checklist in mind before turning on the tap:
- Safe for cold water: Only the purple filter assembly that sits at the very back of the unit. The clear plastic bin can also be rinsed with water, but only if you separate it completely from the machine and remove every trace of moisture before putting it back.
- Must stay completely dry: The main body with the handle and motor, the cone-shaped dust separator (the cyclone with the metal mesh shroud), the long wand, and any motorized cleaner head.
The cone-shaped dust separator contains dozens of tiny air tunnels and internal rubber seals. If you run tap water through the cyclone, the ultra-fine dust trapped inside turns into a thick, sticky mud. That mud dries into hard plugs that permanently choke your airflow. Keep water away from the cyclone, and rely on dry wiping instead.
Accidents also happen when vacuuming damp household messes. If someone accidentally pulled wet carpet mud or damp pet spills into the stick vacuum, clear it out immediately. Dry stick vacuums cannot process liquid; for wet carpet spills, switch to a dedicated carpet cleaner designed for pet stains and odors so you do not ruin your dry machine.
Rinsing the Purple Filter Step by Step
The purple filter on the rear of your vacuum traps microscopic particles before the exhaust air blows back into your room. Over time, powdery drywall dust, pet dander, and fine grit pack tightly into the folded paper pleats. Cleaning it requires patience, cool water, and zero detergent.
- Twist and pull the filter off: Grip the purple plastic cap at the back of the handle. Turn it counter-clockwise about a quarter turn until the dots line up, then pull it straight back off the unit.
- Tap out dry debris first: Before introducing any water, hold the filter over an open trash can. Gently tap the plastic rim against your palm or the side of the bin. You will see a cloud of fine gray powder fall out. Removing this dry dust first prevents it from forming mud when you rinse.
- Flush from the inside out: Hold the filter open-end up under a running tap of cold water. Do not use warm or hot water, and never use dish soap, laundry detergent, or chemical sprays. Hot water and detergents warp the delicate seals and break down the paper fibers. Let the water fill the inside cavity, place your hands over both open ends, and shake gently to wash out the pleats.
- Rinse the outer foam ring: Turn the filter over and run cold water down the outside foam layer. Squeeze the foam gently with your fingers to push out trapped grime. Continue washing both the inner paper pleats and the outer foam until the water flowing out into the sink runs 100 percent clear.
- Shake out trapped water: The paper and foam hold a surprising amount of liquid. Give the whole filter several firm downward flicks of your wrist over the sink. This expels heavy pools of water trapped inside the plastic housing.
Cleaning the Clear Dust Bin and the Cyclone
Dumping the dirt out through the bottom trapdoor empties the bulk of your sweepings, but fine dust eventually coats the clear walls and builds up behind the rubber wiper seal. Giving the canister a thorough wipe-down restores clear visibility and stops grit from jamming the sliding track.
- Release the bin from the handle: Point the bin down into your trash can and push the red sliding lever all the way down until the bottom flap pops open. Look closely at the metal runner track underneath the bin. You will spot a small red release button with an arrow. Press that button while sliding the clear bin forward, completely off the metal rail.
- Wipe the clear plastic bin: Take a soft microfiber cloth dampened with cool water. Wipe the inside walls, the exterior, and the bottom flap. Clean the rubber sealing ring on the bottom door to make sure no trapped hairs break the airtight seal. Set the bin aside on a towel to dry.
- Dust the cone-shaped dust separator: Never submerge the cyclone assembly in water. Instead, use a dry, soft-bristle brush or a dry cloth to brush away the layer of gray lint clinging to the perforated metal shroud. You can use a can of compressed air outdoors to blow fine dust out of the tiny circular cone vents, but wear a mask so you do not inhale the dust cloud.
- Check the intake airway: Look directly into the suction passage where the wand connects to the bin. Use your finger to verify that the small flexible rubber flap swings freely. If hair or dust bunnies wrap around this flap, the vacuum cannot seal properly, and dirt can spill back out onto your floor when you turn the unit off.
Clearing the Motorized Floor Head and Roller Bar
The main cleaning head uses a high-torque electric motor to spin its roller across carpets and hard floors. Long human hair, pet fur, and sewing threads quickly wind tightly around the shaft. When hair builds up, it creates friction, bogs down the motor, and can even melt the plastic bearings on the end of the roller.
- Remove the head from the wand: Press the red quick-release latch on the bottom of the wand and pull the cleaner head away. Turn the floor head upside down on your work surface so you are looking directly at the spinning brush roller.
- Unlock the side end cap: On the side or bottom of the housing, locate the circular plastic locking screw. Take a coin, large washer, or flat screwdriver and turn the slot a quarter-turn counter-clockwise until it clicks into the unlocked position.
- Slide the roller bar out: Slide the end cap away from the main housing, then pull the spinning brush roller straight out of its housing. Take note of how the grooved drive end fits into the internal motor socket so you can put it back together smoothly later.
- Cut away wrapped fibers: Run a pair of scissors or a seam ripper down the built-in guide groove on the roller. Cut through wound hair and peel it away by hand. Avoid yanking fibers forcefully without cutting them first, as this can pull bristle tufts out of the core.
- Inspect the suction neck: Look down the throat of the swivel neck on the cleaner head. Move the joint back and forth to inspect the flexible internal hose. Clumps of lint, small coins, or bottle caps frequently lodge in this bend. Pull out any obstructions with your fingers.
- Reinstall and lock: Slide the roller back into the housing, pushing it onto the internal drive cog. Push the end cap back in place and use your coin to turn the lock a quarter-turn clockwise until it sits flush. Verify the roller spins freely by hand before attaching it back onto your vacuum.
The 24-Hour Drying Rule and Why Trapped Moisture Is Lethal
The single most dangerous mistake you can make while maintaining your stick vacuum is putting a damp filter back onto the machine. While 24 hours sounds like a long time to go without your vacuum, cutting that drying period short risks permanently ruining the entire unit.
Your vacuum draws air straight through the filter before venting it out past the battery and motor electronics. If even a few droplets of water remain deep inside the paper pleats, that moisture is sucked directly into the high-speed turbine. The water bridges electrical contacts, corrodes copper windings, and shorts out the main circuit board in seconds. Beyond electrical danger, damp fibers trapped inside an airtight casing grow bacteria and mold overnight, giving your vacuum an unbearable sour odor every time you run it.
To dry the filter safely, follow these essential steps:
- Stand the filter upright on its wide plastic base on a dry towel in a room with plenty of fresh airflow.
- Place it near an open window or in the gentle path of a standing room fan to keep air circulating through the pleats.
- Give it a minimum of 24 full hours to dry. If you live in a humid climate or washed the filter during rainy weather, give it 36 to 48 hours.
- Never use direct heat sources to rush the process. Placing the filter on a hot radiator, using a hair dryer, or putting it in a clothes dryer or microwave will melt the plastic housing and destroy the glue holding the pleated paper together.
Before snapping the filter back into place, press a dry paper towel firmly against the inner paper folds. If the paper towel picks up even a microscopic speck of dampness, leave the filter alone to dry for several more hours.
Fixing Lingering Blockage Alerts and Motor Pulsing
If you put your freshly cleaned vacuum back together, pull the trigger, and hear the motor make an odd revving sound that pulses on and off like a siren, the machine is not broken. That pulsing sound is an intentional alert programmed into the system to tell you that airflow is restricted.
The LCD screen on the back of the handle will usually show a small graphic alerting you to an airway clog or an unseated filter. Work through this checklist to clear the warning:
- Check the filter alignment: The filter must be twisted on securely. Line up the solid dot on the purple filter with the open dot on the handle, press down firmly, and twist clockwise until the solid dots click into perfect alignment. If the safety sensor does not detect a tight seal, the motor will pulse and refuse to run normally.
- Peer through the metal wand: Detach the long metal wand from both ends. Hold it up to your eye and look through it toward a light source like a ceiling fixture. Long clumps of pet fur mixed with toothpicks, small plastic wrappers, or cardboard scraps often wedge halfway down the tube. Push a broom handle through the tube to dislodge the plug.
- Inspect the clear bin inlet flap: Open the bottom trapdoor of your bin and look at the square rubber flap where the wand clicks into place. If a chunk of dirt or dry cereal is pinched behind that flap, the opening narrows, triggering the blockage sensor. Flick the flap with your finger to clear it.
- Clear the swivel neck on the cleaner head: Detach the floor head and rotate the joint through its full range of motion. Shine a flashlight down the intake neck to confirm no pet fur is jammed against the internal ribbed hose.
Everyday Tools That Make Deep Cleaning Easier
While basic cleaning requires only cool water and a dry cloth, having the right specialized attachments makes long-term maintenance much easier. When fine dust packs into hard-to-reach spots, standard household rags cannot always squeeze into the narrow channels.
A slender cleaning brush equipped with a built-in hooked cutter allows you to slice wrapped threads off the spinning brush roller without scratching the plastic shaft. For pulling packed lint out of deep channels, narrow crevice tools and flexible extension nozzles help reach into the intake airway and around tight cyclone crevices. When choosing maintenance tools, look for attachments made with durable ABS plastic and secure push-button locks so they snap snugly onto your machine without leaking suction.
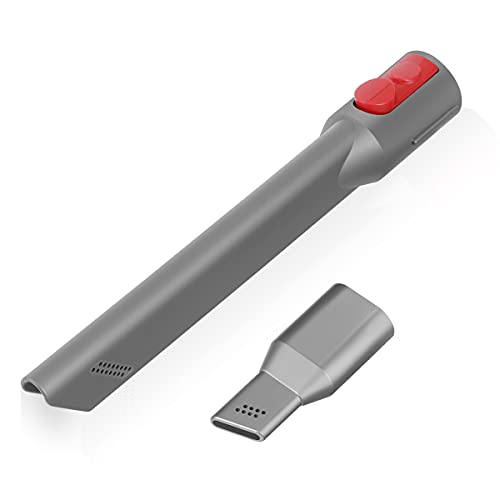
- VC Score9.4
BCP Score is a ranking system developed by bestcleanerproducts.com. BCP Score has no relationship or impact from any manufacturers or sales agent websites. Learn more
- BrandLANMU

- VC Score9.0
BCP Score is a ranking system developed by bestcleanerproducts.com. BCP Score has no relationship or impact from any manufacturers or sales agent websites. Learn more
- BrandSealegend

- VC Score9.0
BCP Score is a ranking system developed by bestcleanerproducts.com. BCP Score has no relationship or impact from any manufacturers or sales agent websites. Learn more
- BrandWAONIQ
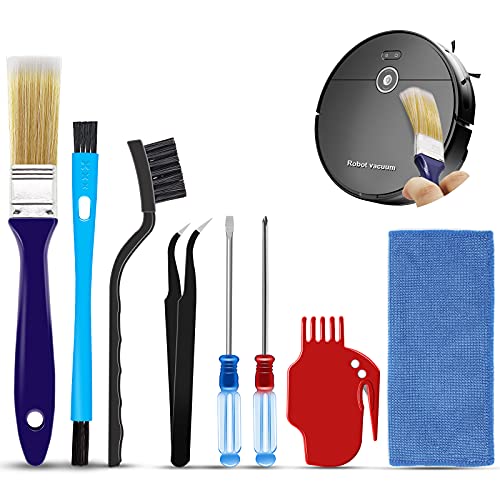
- VC Score9.0
BCP Score is a ranking system developed by bestcleanerproducts.com. BCP Score has no relationship or impact from any manufacturers or sales agent websites. Learn more
- BrandMidukit

- VC Score9.0
BCP Score is a ranking system developed by bestcleanerproducts.com. BCP Score has no relationship or impact from any manufacturers or sales agent websites. Learn more
- BrandTweruna

- VC Score8.8
BCP Score is a ranking system developed by bestcleanerproducts.com. BCP Score has no relationship or impact from any manufacturers or sales agent websites. Learn more
- Brandsonecesiya

- VC Score8.8
BCP Score is a ranking system developed by bestcleanerproducts.com. BCP Score has no relationship or impact from any manufacturers or sales agent websites. Learn more
- BrandYurMemo

- VC Score8.6
BCP Score is a ranking system developed by bestcleanerproducts.com. BCP Score has no relationship or impact from any manufacturers or sales agent websites. Learn more
- BrandVataim
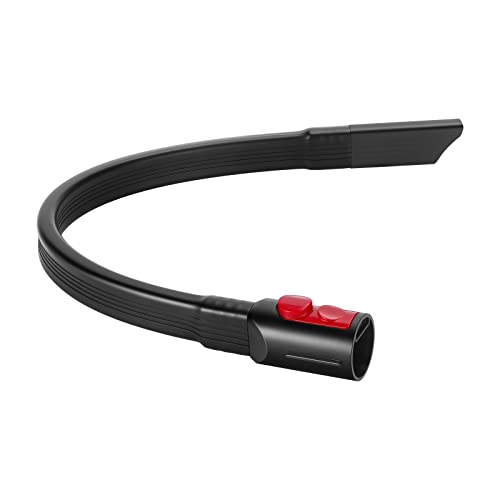
- VC Score8.4
BCP Score is a ranking system developed by bestcleanerproducts.com. BCP Score has no relationship or impact from any manufacturers or sales agent websites. Learn more
- BrandCabor
- VC Score6.8
BCP Score is a ranking system developed by bestcleanerproducts.com. BCP Score has no relationship or impact from any manufacturers or sales agent websites. Learn more
- BrandIntercleaner
Last update on 2026-10-02 / Affiliate links / Images, Product Titles, and Product Highlights from Amazon Product Advertising API
FAQs
Can I wash the clear bin and cyclone under running water?
You can wash the clear plastic bin with cool water as long as you take it completely off the vacuum first and let it dry entirely. However, you must never wash the cone-shaped dust separator under running water. Water mixes with fine dust inside the cyclone to create a thick mud that clogs the internal air chambers and ruins internal rubber gaskets.
How do I wash the purple filter correctly without soap?
Remove the filter and tap it gently over a trash can to knock out loose powder before running it under cool tap water. Cup your hands over the open ends, fill the center with water, and shake it gently to flush the pleats from the inside out. Never use dish soap, laundry detergent, or hot water, as cleaners break down the paper fibers and ruin the airtight seal.
How long does the filter really take to dry before it is safe to use?
The filter requires at least 24 hours of air drying in a warm, well-ventilated room with steady airflow. In humid weather or cool rooms, it can take up to 48 hours to dry completely through the center foam. Never rush the process with a hair dryer, oven, or radiator, because direct heat melts the plastic housing and shrinks the internal seals.
Why does my V11 still pulse or show a blockage screen after cleaning?
The pulsing motor sound means the vacuum detects an airway restriction or an improperly seated part. First, confirm the purple filter is twisted all the way down until its indicator markings line up precisely with the handle. Then look through the detached metal wand toward a light and inspect the small rubber flap inside the bin inlet to clear any hidden clumps of debris.


How to Refinish a Fiberglass Pool

How Do You Keep Raccoons Out of Your Pool?

How to Fix Cyanuric Acid in Your Pool

How to Shape a Pool Cue Tip to Stop Miscues

Best Far Infrared Sauna Sauna Heats: Top Picks of 2026

11 Best Far Infrared Sauna Carbon Fiber Heaters of 2026 For Balanced Full-Body Heat

11 Best Carbon Far Infrared Sauna of 2026 For Even Heat

10 Best Bluetooth Speaker For Sauna of 2026 For Heat and Steam


