
How to Clean a V10 Vacuum to Restore Suction

A sputtering motor, sour smell, or sudden drop in suction sounds alarming, but it rarely means your machine is broken. Fixing it simply takes a quick wipe of the clear bin, clearing tangled hair from the rotating roller, and rinsing the purple filter under cold water until the runoff is clear. The most critical rule is keeping moisture away from the motor body and letting that filter air-dry for at least 24 hours before snapping it back into place.
How far you need to go depends on what your machine is doing and which part is dirty. A motor that pulses on and off in short bursts signals a solid blockage in the wand rather than everyday dust. Different floor heads also unlock in slightly different ways, and motorized pieces must always stay dry. Here is how to safely take apart, wash, and clear each piece without damaging the electronics.
Separate the Washable Parts From the Delicate Electronics First
Before you run any part of your vacuum under a faucet, you need to know which pieces can handle water and which pieces will short-circuit. Getting water into the wrong section is the fastest way to ruin your machine permanently. The main motor body houses the battery pack, circuit boards, and trigger assembly. Water inside this housing will cause corrosion, electrical shorts, and complete motor failure.
Your vacuum cleaner splits into three groups of parts: fully washable, wipe-clean only, and strictly dry. Keeping these boundaries clear protects your machine and keeps your home free from electrical hazards.
- Fully washable: The purple twist-off washable cone (the one-piece filter assembly on the back of the handle). This is the only component on the entire vacuum designed to be rinsed under running water.
- Wipe-clean only: The clear plastic dirt bin. You can wipe the plastic walls down with a slightly damp microfiber rag, but you must avoid soaking the rubber sealing gaskets.
- Strictly dry: The main body with the handle and battery, the cone-shaped dust separator (cyclone assembly), the metal extension wand, and the motorized floor heads.
The motorized floor heads contain their own electric drive motors and wiring harness connections. Even though the plastic casing looks waterproof, rinsing a cleaner head under a tap sends water directly into the drive bearings and the motor. Clean these pieces using dry brushes, lint cloths, and scissors rather than liquid.
Slide the Clear Dirt Bin Off Its Track for a Proper Wipe-Down
Fine dust easily cakes along the rubber gaskets and interior walls of the clear plastic bin. When dirt builds up along the inner seals, the vacuum loses airtight suction and can leak foul odors back into your room. Taking the bin completely off the runner makes it much easier to clean thoroughly.
- Disconnect the accessories: Press the red quick-release catch where the wand meets the vacuum body. Pull the long metal wand away so you are holding only the handheld unit over a trash can.
- Open the bottom trapdoor: Push the red bin-release lever down firmly along the side of the canister. The clear bin slides downward, and the bottom red flap pops open to dump the bulk dirt.
- Locate the runner release catch: Look along the silver metal track on the underside of the bin runner. You will see a small, square red release button.
- Slide the bin free: Press and hold that small red button while sliding the clear bin forward off the metal runner. The bin slides off the frame completely.
Once the bin is off, wipe the inside and outside plastic surfaces with a damp, lint-free cloth. Do not use dish soap, glass cleaner, or abrasive scrubbing pads, because they turn the clear plastic cloudy and break down the flexible rubber seal along the rim. Never drop the clear bin into a dishwasher, as the high heat will warp the shape and prevent it from latching onto the main frame.
With the bin removed, you will see the cone-shaped dust separator (cyclone). This metal and plastic mesh assembly traps fine powder before it reaches the motor. Never wash this cyclone section under water, because moisture gets trapped inside the small inner cones and turns fine dust into thick mud. Instead, take a dry paintbrush or an old toothbrush and gently flick away the caked powder from the metal shroud and silicone seals.
Before putting the bin back on, make sure it is completely dry to the touch. Align the bin grooves with the silver metal runner on the main body. Slide the bin up along the runner until you hear and feel the red catch snap securely into place, then swing the bottom flap closed until it clicks shut.
Wash the Purple Filter with Cold Water and Give It Time to Dry
The purple filter on the rear of your vacuum traps microscopic particles, pet dander, and pollen. Over several weeks of regular cleaning, this mesh clogs with fine gray soot, which chokes off airflow and makes the motor work significantly harder. Washing this part regularly keeps suction strong and prevents bad smells.
- Twist and pull to remove: Hold the vacuum handle with one hand and grasp the purple filter cap at the back with your other hand. Turn the filter counterclockwise a quarter turn until the dots line up, then pull it straight back off the unit.
- Tap out the dry powder: Before getting the filter wet, hold it over your trash bin and tap the plastic rim firmly against your hand. Knocking loose the heavy dry silt first makes the washing step faster and prevents mud from settling into the paper pleats.
- Rinse with cold running water: Place the filter under a cold water tap. Run water through the open end to rinse the inner pleated cone, then run water over the outer foam layer. Do not use warm water, detergents, fabric softeners, or bleach, as harsh cleaners break down the glue and fabric fibers.
- Agitate and rinse again: Fill the inner cone with a little cold water, cover both open ends with your hands, and shake it gently. Tip the water out into the sink. You will see murky, gray liquid spill out. Repeat this rinse-and-shake process until the runoff in your sink is completely clear.
- Squeeze out excess moisture: Gently press and squeeze the foam sides with both hands to push out standing water. Do not twist or wring the filter, because twisting rips the internal mesh layers.
Drying is the most critical part of this entire process. Place the purple filter on its wide side in a bright, well-ventilated room with steady airflow. Never set it on a hot radiator, never use a hair dryer, and never put it in a clothes dryer. Extreme heat shrinks the plastic housing and ruins the seals.
Allow the filter to air-dry for at least 24 hours. If your home is humid or cool, leave it to dry for up to 48 hours. Before putting it back on the vacuum, touch the deepest part of the interior pleated fabric. If it feels even slightly cool or damp, leave it alone. Reinstalling a damp filter pulls water directly into the high-speed motor, leading to rusted bearings, an unmistakable sour mildew smell, and an unusable machine.
Unlock the Cleaner Head to Remove Trapped Hair and Debris
The motorized cleaner head on your floor nozzle does the heavy lifting on carpets and hard floors. Long human hair, pet fur, and stray threads naturally wrap around the spinning brush roller. When hair builds up near the bearings, the roller slows down, drains your battery quickly, and can eventually melt the plastic end caps from friction.
- Detach the cleaner head: Press the red release button connecting the floor nozzle to the metal extension wand. Lay the cleaner head upside down on a flat table or the floor so you can inspect the underside.
- Locate the end-cap lock: On the side or base of the cleaner head, find the circular lock latch. It features a wide slot made for a flat coin or a large flathead screwdriver.
- Turn the lock counterclockwise: Insert a quarter into the slot and twist it a quarter turn counterclockwise until it clicks into the unlocked position.
- Slide out the brush roll: Slide the end cap off and pull the rotating floor roller straight out from the housing cavity. On heads with two rollers, release the secondary roller using the small side lever.
- Cut away tangled fibers: Take a pair of scissors or a small craft blade and slice down the recessed groove running along the length of the roller. Cut through the tangled loops of hair, then peel the strands off by hand. Never pull hair out with brute force, because you risk tearing out the bristle tufts.
- Clean the pivot neck and end bearings: Pull any hair caught around the metal pin at the end of the roller. Look into the clear plastic throat of the floor nozzle where it flexes. Clear out any compacted dust balls, pennies, or small toys stuck in the airway.
Wipe the plastic cavity with a dry cloth. Slide the clean roller back onto its drive spindle inside the housing. Push the end cap back in, insert your coin, and turn the lock a quarter turn clockwise until the lines match up and the cap sits flush. Spin the roller with your fingers to confirm it turns freely without rubbing.
Check for Blockages When the Motor Starts Pulsing
If your vacuum stops and starts in short, rapid bursts of power before shutting off completely, your machine is not broken. This rhythmic pulsing is an intentional electronic alert. The vacuum contains internal air sensors that monitor airflow. When an obstruction starves the motor of air, the unit pulses several times to protect the motor from overheating.
Pulsing always points to a physical blockage or a filter that is clogged shut. You can locate and clear the obstruction by checking the four main choke points in order.
First, inspect the clear plastic bin inlet. Remove the wand from the vacuum body and look straight into the hole where the wand attaches. Inside this intake port sits a small rubber flap. Dust, pet hair, or wadded receipts often wedge themselves under this flap, holding it shut and blocking all air intake. Flick the flap with your finger to verify it moves freely.
Second, inspect the extension wand. Detach the wand from both the vacuum body and the floor nozzle. Look straight down the barrel toward a bright light. If you cannot see light clearly through the other end, drop a small coin down the tube. If the coin does not fall straight through, take a broom handle or a straight wire coat hanger and push the stubborn clog out onto a piece of newspaper.
Third, verify the filter seating. If the purple filter is not twisted completely into its locked position, air leaks around the seal, triggering the pressure sensor. Untwist the filter, line up the positioning markers, and twist it firmly clockwise until it clicks into place.
Keep in mind that stick vacuums are strictly dry appliances. If you accidentally suck up damp pet messes, water, or wet food spills, that moisture mixes with drywall powder and pet hair inside the cyclone, forming a dense plug that stops all suction. When dealing with liquid spills or stained fibers, leave your stick vacuum on the wall and use a dedicated carpet cleaner for tough stains and odors instead. Sucking up liquids with a dry cordless machine ruins the filter and can ruin the electronic control board beyond repair.
For deep, ground-in mud or older animal accidents that have settled deep into carpet padding, a wet extractor like a spot carpet cleaner for deep stain removal is designed specifically to pump water in and lift it back out without choking on moisture. Keeping wet spills away from your stick vacuum ensures your air channels remain dry, clear, and odor-free.
Keep a Spare Filter and Cleaning Brush on Hand
Taking your vacuum apart to wash the filter and brush roller always takes the machine out of service for at least a full day. If an unexpected mess happens while your only filter is drying on the counter, you cannot use your vacuum without risking permanent motor damage. Keeping an extra filter assembly and a dedicated maintenance tool in your cleaning closet solves this problem completely.
When selecting maintenance accessories, look for extra filters that feature an identical twist-lock base and integrated silicone seals. Having two filters allows you to swap in a clean, bone-dry filter immediately while the freshly washed one spends 24 to 48 hours drying safely. This keeps your vacuum ready for daily cleanup jobs at any time.
A specialized roller cleaning brush with a built-in safety cutter is also a huge help. These small hand tools have a hooked blade on one side and stiff nylon bristles on the other. The hook lets you slice through tight hair bundles without damaging the floor head, while the bristles quickly sweep fine dust out of the cyclone mesh and cleaner head channels without scratching delicate surfaces.
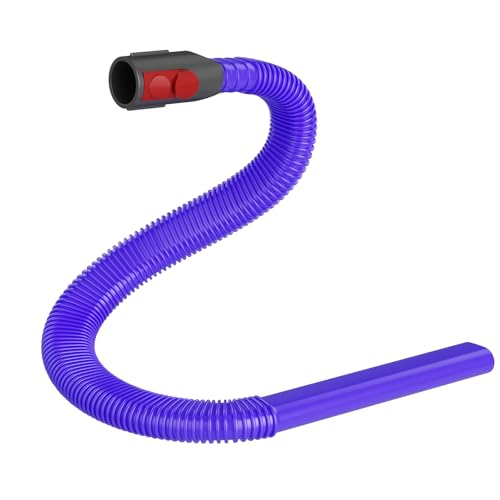
- VC Score9.6
BCP Score is a ranking system developed by bestcleanerproducts.com. BCP Score has no relationship or impact from any manufacturers or sales agent websites. Learn more
- BrandGeneric
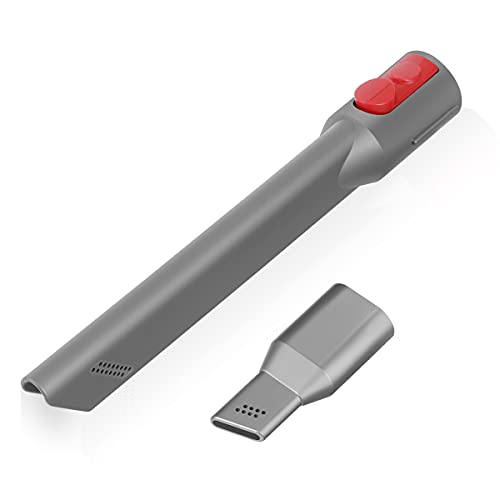
- VC Score9.4
BCP Score is a ranking system developed by bestcleanerproducts.com. BCP Score has no relationship or impact from any manufacturers or sales agent websites. Learn more
- BrandLANMU

- VC Score9.2
BCP Score is a ranking system developed by bestcleanerproducts.com. BCP Score has no relationship or impact from any manufacturers or sales agent websites. Learn more
- BrandAziliogcc

- VC Score9.2
BCP Score is a ranking system developed by bestcleanerproducts.com. BCP Score has no relationship or impact from any manufacturers or sales agent websites. Learn more
- BrandSealegend

- VC Score9.0
BCP Score is a ranking system developed by bestcleanerproducts.com. BCP Score has no relationship or impact from any manufacturers or sales agent websites. Learn more
- BrandSealegend

- VC Score9.0
BCP Score is a ranking system developed by bestcleanerproducts.com. BCP Score has no relationship or impact from any manufacturers or sales agent websites. Learn more
- BrandWAONIQ
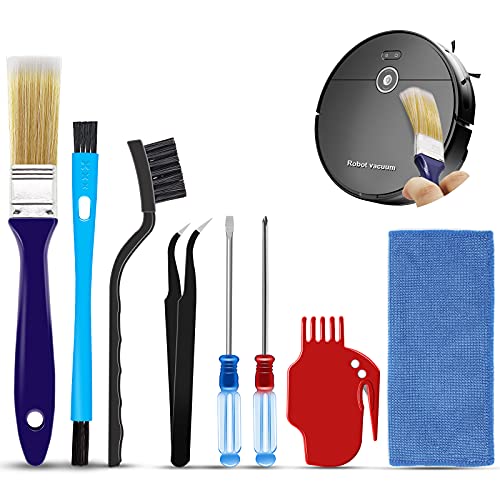
- VC Score9.0
BCP Score is a ranking system developed by bestcleanerproducts.com. BCP Score has no relationship or impact from any manufacturers or sales agent websites. Learn more
- BrandMidukit

- VC Score8.8
BCP Score is a ranking system developed by bestcleanerproducts.com. BCP Score has no relationship or impact from any manufacturers or sales agent websites. Learn more
- BrandYurMemo

- VC Score8.6
BCP Score is a ranking system developed by bestcleanerproducts.com. BCP Score has no relationship or impact from any manufacturers or sales agent websites. Learn more
- BrandVataim

- VC Score8.0
BCP Score is a ranking system developed by bestcleanerproducts.com. BCP Score has no relationship or impact from any manufacturers or sales agent websites. Learn more
- BrandEZ SPARES
- VC Score6.8
BCP Score is a ranking system developed by bestcleanerproducts.com. BCP Score has no relationship or impact from any manufacturers or sales agent websites. Learn more
- BrandIntercleaner
Last update on 2026-10-02 / Affiliate links / Images, Product Titles, and Product Highlights from Amazon Product Advertising API
FAQs
Can I wash my V10 dirt bin in the dishwasher or sink?
No, you should never submerge the clear dirt bin in water or put it in the dishwasher. High water temperatures will warp the clear plastic casing, and detergents will ruin the silicone seals that maintain airtight suction. Instead, remove the bin from the metal runner and wipe the inside clean using a slightly damp microfiber rag, then let it dry thoroughly before reattaching it.
How often should I wash the purple filter?
Wash the purple filter at least once a month under normal household use. If you have multiple shedding pets, use your vacuum daily, or clean up large amounts of fine dust, wash the filter every two to three weeks. Regular washing keeps the air channels open, prevents foul pet odors, and stops the motor from pulsing due to restricted airflow.
What happens if I use my vacuum before the filter is completely dry?
Running the vacuum with a damp filter pulls droplets of water straight through the motor housing. This moisture causes motor bearings to seize, destroys electronic circuit boards, and permanently ruins the machine. Damp filter fibers also trap stagnant bacteria, creating a strong, sour mildew odor that blows into your room whenever you turn the vacuum on.
Why does my V10 smell bad even after I emptied the bin?
A lingering bad smell usually means that fine pet dander or damp debris is trapped deep inside the purple filter or caked against the cyclone shroud. Emptying the clear bin only gets rid of large debris. Wash your purple filter thoroughly with cold water, wipe down the inside of the bin, and clear any trapped hair from the roller bar to eliminate the odor source completely.
Can I use dish soap or vinegar to clean the filter?
No, you should only use cold running tap water to wash your filter. Soaps, detergents, and acidic solutions like vinegar leave chemical residues that can degrade the delicate filter media and damage the internal seals. Rinsing thoroughly with plain cold water until the runoff is clear is all that is needed to remove trapped dirt safely.


How to Refinish a Fiberglass Pool

How Do You Keep Raccoons Out of Your Pool?

How to Fix Cyanuric Acid in Your Pool

How to Shape a Pool Cue Tip to Stop Miscues

Best Far Infrared Sauna Sauna Heats: Top Picks of 2026

11 Best Far Infrared Sauna Carbon Fiber Heaters of 2026 For Balanced Full-Body Heat

11 Best Carbon Far Infrared Sauna of 2026 For Even Heat

10 Best Bluetooth Speaker For Sauna of 2026 For Heat and Steam








