
How to Clean an Upright Vacuum Cleaner to Restore Suction

Cleaning an upright vacuum means unplugging the cord, clearing blocked pathways in the hose, cutting hair off the spinning roller brush, and washing the removable dust bin and filters. The exact routine changes depending on whether the machine collects debris in a disposable bag or a plastic canister. Letting every damp part dry completely for twenty-four hours is essential so moisture never reaches the electric motor.
Filter types also alter the process, because soft foam sponges can be rinsed under the faucet, but pleated paper filters will ruin if they touch water. Reaching the spinning brush varies just as much, since some bottom cover plates pop off with quick tabs while others need a standard screwdriver. Taking apart each section in the right order clears out trapped grime and brings back full suction.
Unplug the Power Cord and Gather Simple Household Tools
Always disconnect the electrical power before touching any moving parts or opening access panels. Upright vacuums use high-speed motors and belt-driven roller assemblies that can pinch fingers or wrap around loose clothing if a switch is bumped. Pull the plug straight out of the wall outlet and wrap the cord loosely around the storage hooks so you do not trip over it while working.
Set up your work area on a bare floor, a patio, or a garage floor rather than a thick carpet. Dust, hair, and dry debris will spill out as you take the machine apart. Laying down an old towel or a flattened cardboard box protects your floor from scratches and gives you a clean surface to rest plastic components.
You only need a few common household items to clean the entire machine thoroughly:
- A Phillips head screwdriver: Most upright vacuum cleaner bottom plates are held in place by two to six standard screws.
- A pair of household scissors or a seam ripper: A small pair of scissors or a sewing ripper cuts through wrapped hair, carpet threads, and string without gouging the plastic roller.
- A wooden broom handle or long dowel: A smooth, rigid wooden handle helps push stubborn debris clogs through the flexible stretch hose without puncturing the material.
- Mild dish soap and warm water: Standard liquid dish soap cuts through oily residue and trapped pet dander on plastic parts without damaging the finish.
- A dry microfiber cloth: Microfiber grabs fine dust off internal plastic channels and wipes away lingering grime without scratching clear bin walls.
- A large trash can or outdoor garbage bag: Emptying components directly into a bag outdoors prevents loose dust from circulating back into your indoor air.
Empty the Dirt Canister and Wash the Plastic Bin
A full dust cup restricts airflow before dirt even reaches the motor. As dirt builds up past the fill line, the incoming air cannot swirl freely, which drops your cleaning suction and forces the motor to run hotter. Emptying the canister after every few cleaning sessions keeps air moving directly through the machine.
- Press the canister release button to separate the dust bin from the main upright vacuum frame. Take the entire bin outside to your trash can so fine particles do not float back into your home.
- Hold the canister deep inside your garbage bag and press the bottom door release latch. Tap the sides of the bin firmly with your knuckles to dislodge caked dirt, fine dust, and compacted pet hair clinging to the upper cyclone cone.
- Twist or unclip the inner plastic cyclone assembly from the main canister body if your vacuum model allows separation. This center piece often traps thick rings of pet hair and carpet fibers in its intake holes. Brush these dry clumps directly into the trash with your fingers or a dry cloth.
- Wash the clear plastic canister and the detached inner cyclone baffle under warm running tap water. Add two drops of mild liquid dish soap to a soft sponge and gently wipe away the hazy gray film coating the interior walls.
- Wipe the inside of the bin dry with a clean cloth, then leave the bottom flap open on a drying rack. Never submerge the vacuum frame, motor housing, or any part containing electrical contact pins in water.
If your upright machine uses disposable paper or cloth bags instead of a plastic canister, open the main bag compartment door and inspect the bag volume. Slide the cardboard collar gently off the intake tube to avoid tearing the paper. Throw the full bag into the garbage immediately. Never attempt to dump out and reuse a disposable paper bag. Microscopic dust particles permanently plug the tiny paper pores on the first use, so an emptied old bag will continue to choke suction and cause your motor to overheat.
Many people wonder why their upright vacuum continues to smell like dirty dog hair or stale dust even after emptying the bin. Plastic canisters absorb odors from pet dander and organic matter over time, while fine static dust settles into the small upper vent channels. Washing the plastic walls with soapy water and wiping down the rubber canister seals stops these trapped odors from blowing back out through the exhaust vents.
Rinse Foam Filters and Tap Pleated Paper Filters Clean
Upright vacuums rely on two main filtering stages to trap debris and protect the suction motor. The inner sponge filter (often called the pre-motor filter) sits directly beneath or above the dust bin to catch particles before they reach the motor fan. The outer air filter (often called the exhaust filter or post-motor HEPA filter) catches microscopic dust, pollen, and motor carbon before the air vents back into your room.
You can wash foam and sponge filters using cool tap water, but you should never soak pleated paper filters. Water dissolves the special paper fibers inside non-washable filters and turns fine trapped dust into a dense paste. Once dry, that paste hardens like concrete inside the paper pleats, permanently blocking air from flowing through the vacuum. If you are unsure whether your filter is washable, check the plastic frame for a small faucet symbol or the word "Washable." When no label exists, keep the filter dry.
To clean a washable foam or felt filter, hold it under a gentle stream of lukewarm tap water. Squeeze the sponge gently with your fingers until the water running out of the bottom turns completely clear. Avoid twisting, wringing, or scrubbing the foam against rough surfaces, as wet sponge material tears easily. Do not use laundry detergent, dishwashing machines, or bleach, because strong chemicals break down the open-cell foam structure.
To clean non-washable pleated paper or HEPA filters, take them outside to an open trash can. Hold the plastic frame firmly and tap the edge gently against the inside rim of the trash can to shake loose packed dust. You can also run a soft, dry paintbrush along the inner folds to dislodge stubborn pet hair. If the white pleated material has turned dark gray or black and tapping no longer frees trapped debris, replace the filter with a fresh one to restore full motor airflow.
Remove the Bottom Plate to Cut Away Tangled Hair
When an upright vacuum leaves dirt behind on carpet, the problem is usually a choked spinning roller brush. Long human hair, pet fur, threads, and dental floss wrap tightly around the roller cylinder and lock into the bristle tufts. This buildup slows the roller down, prevents the bristles from agitating carpet fibers, and puts heavy friction on the rubber drive belt.
- Lower the vacuum handle flat to the floor, then flip the entire machine upside down so the bottom cover plate (also known as the soleplate) faces upward. Rest the top handle on a towel so the plastic finish does not rub against the floor.
- Locate the fasteners holding the bottom cover plate. Depending on your vacuum brand, you will need to turn several quick-release plastic latches with your fingers or remove four to six Phillips head screws with your screwdriver. Set the screws aside in a small bowl so they do not roll away.
- Lift the bottom cover plate off the housing. Clear away any loose clumps of dust, carpet fuzz, or gravel sitting inside the recessed plastic floor nozzle channels.
- Inspect the rubber drive belt connecting the motor shaft to the roller end. If the belt shows deep cracks, edge fraying, loose slack, or shiny melted spots from a past jam, slide it off the motor shaft and replace it with a new belt of the exact same size.
- Lift the spinning roller brush straight up out of its side mounting slots. If the drive belt is still in good shape, slip the roller out from inside the belt loop.
- Clear wrapped hair from the roller without slicing through the rubber drive belt or bristle bundles. Locate the recessed groove running the length of the roller cylinder. Slide the narrow tip of your scissors or a seam ripper along this groove, slicing outward through the hair layers. Pull the sliced strands away in clumps with your fingers.
- Pull off the removable end caps on both sides of the roller brush. Hair naturally migrates outward and wraps tightly around the metal bearing pins beneath these caps. If hair stays wrapped around the bearings, the intense friction can melt the plastic end caps during normal operation. Wipe the metal pins clean and press the caps back into place.
Clear Hose Clogs Using a Blunt Wooden Broom Handle
A sudden loss of suction at the floor nozzle or the hand tool wand usually points to an obstruction inside the flexible stretch hose. Large debris like dry dog kibble, dropped coins, crumpled receipts, or small toys can wedge sideways in a bend, catching pet hair until a dense plug forms across the entire tube opening.
- Unclip the stretch hose from the main vacuum frame. Disconnect the lower hose cuff where it plugs into the base floor nozzle, and detach the upper hose end from the extension wand handle.
- Hold one end of the hose up toward an overhead light and peer down the center opening. If you cannot see light shining through the other side, drop a small metal coin or plastic marble into the top opening. Listen to where the coin stops to locate the exact position of the clog.
- Lay the flexible hose flat and straight along the floor. Take the blunt, rounded handle end of a wooden broom or long wooden dowel and guide it smoothly into the hose toward the blockage.
- Push the broom handle forward with steady, gentle pressure to slide the trapped clump out through the opposite end. Never use a wire coat hanger, metal rod, or sharp tool for this task. Sharp metal edges catch on the internal spiral wire ribs and easily puncture the thin vinyl skin, creating air leaks that ruin suction.
- If sticky grime, food crumbs, or damp dust line the inside walls of the hose, take it to a sink or bathtub. Run warm tap water through the tube to flush out remaining debris. Never wash a stretch hose that contains internal electrical wires or power-cord connections meant for motorized pet tools.
Accidentally running a standard dry vacuum over wet bathroom floors, spilled beverages, or damp mud will cause rapid clogs. Wet debris clings instantly to the ribbed plastic hose walls, creating a sticky dam that catches every passing dust bunny. If you deal with recurring household spills or ground-in muddy paw prints, using a dedicated pet carpet cleaner for deep stain removal is the safest way to extract liquids without ruining your dry upright vacuum.
Similarly, for high-traffic entryways where wet soil packs down into rug fibers, treating the spot with a specialized carpet cleaner for stubborn stains cleans the carpet pile deeply without introducing damaging moisture into your upright vacuum motor or dry paper filtration system.
Allow Every Washed Part to Air Dry Completely
The single most critical step in deep cleaning an upright vacuum is waiting for washed components to dry entirely before reassembly. Putting damp parts back onto your vacuum ruins the machine quickly and creates serious safety hazards.
Electric vacuum motors spin at tens of thousands of revolutions per minute. If you snap a damp foam filter or a wet canister back into place and turn the power switch on, the powerful suction pulls water droplets directly into the high-speed motor chamber. Moisture touching live electrical components can cause immediate short circuits, trip household breakers, and permanently burn out the motor windings. Wet internal environments also rust the metal bearings, leading to loud screeching noises and sudden motor seizure.
Moisture trapped inside a sealed vacuum canister or dark filter chamber also breeds black mold, mildew, and foul bacteria within forty-eight hours. Instead of cleaning your home, a moldy vacuum will blow millions of microscopic mold spores across your floors and furniture every time you clean.
Place your washed plastic canister, cyclone baffle, and sponge filters in a warm, dry room with plenty of natural air circulation. Setting the parts on a wire drying rack or a clean dry towel allows air to reach both sides simultaneously. Do not place wet foam filters on hot radiators, inside clothes dryers, or under high-heat hair dryers, as extreme heat warps the plastic housing and shrinks open-cell sponge material.
Allow all parts to air dry for a full twenty-four hours. Thick foam and felt filters hold moisture deep inside their center cores even when the surface feels dry to your fingertips. Before putting the filters back into the machine, perform a simple paper towel check: press the thickest section of the foam filter firmly between two dry paper towels. If the paper picks up any circle of moisture, set the filter back on the rack and let it dry for another twelve hours.
Select Helpful Cleaning Tools to Keep Your Floor Nozzle Running
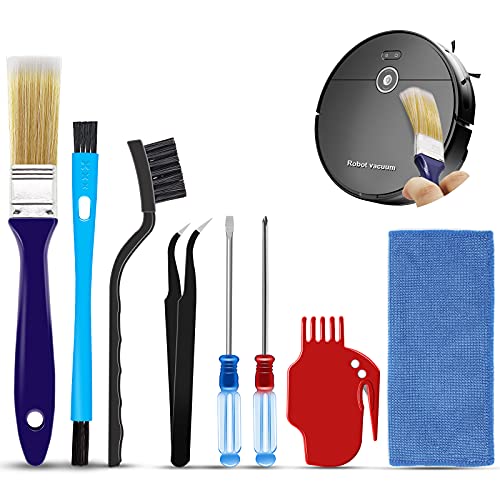
Maintaining an upright vacuum floor nozzle is much easier when you have the right specialty tools designed to clear tight channels and tangled brush mechanisms. Rather than struggling with large kitchen knives or makeshift wire picks that can damage soft plastic parts, keeping a small cleaning kit on hand speeds up your routine maintenance.
Small handheld roller cleaning tools feature a protected internal cutting blade paired with stiff nylon detailing bristles. The recessed blade hooks under tightly wound hair along the brush roller and slices through thick mats with a single pulling motion, keeping your fingers safely away from sharp edges. The integrated stiff bristle brush then sweeps fine grit out of the roller bearing cavities and clears compacted fuzz from the floor nozzle intake mouth.
When selecting maintenance accessories, replacement floor tools, or detail brushes for your upright machine, verify the fitting dimensions carefully before purchasing. Many residential upright vacuums accept standard accessories with a 1-1/4-inch (32mm) inner diameter connection, while other brands use proprietary clip-on latches or wider oval tubes. Check the interior opening of your vacuum hose cuff or extension wand with a ruler or tape measure to confirm the exact attachment diameter you need. Choosing durable tools with stiff nylon bristles and smooth plastic handles ensures you can quickly clear roller brush tangles and keep your upright vacuum operating with peak suction power.

- VC Score10.0
BCP Score is a ranking system developed by bestcleanerproducts.com. BCP Score has no relationship or impact from any manufacturers or sales agent websites. Learn more
- BrandGeneric

- VC Score9.0
BCP Score is a ranking system developed by bestcleanerproducts.com. BCP Score has no relationship or impact from any manufacturers or sales agent websites. Learn more
- BrandTweruna

- VC Score9.0
BCP Score is a ranking system developed by bestcleanerproducts.com. BCP Score has no relationship or impact from any manufacturers or sales agent websites. Learn more
- BrandPetOde
- VC Score9.0
BCP Score is a ranking system developed by bestcleanerproducts.com. BCP Score has no relationship or impact from any manufacturers or sales agent websites. Learn more
- BrandMidukit
- VC Score9.0
BCP Score is a ranking system developed by bestcleanerproducts.com. BCP Score has no relationship or impact from any manufacturers or sales agent websites. Learn more
- BrandBissell

- VC Score8.8
BCP Score is a ranking system developed by bestcleanerproducts.com. BCP Score has no relationship or impact from any manufacturers or sales agent websites. Learn more
- BrandBissell

- VC Score8.8
BCP Score is a ranking system developed by bestcleanerproducts.com. BCP Score has no relationship or impact from any manufacturers or sales agent websites. Learn more
- BrandYurMemo

- VC Score8.8
BCP Score is a ranking system developed by bestcleanerproducts.com. BCP Score has no relationship or impact from any manufacturers or sales agent websites. Learn more
- BrandEureka
- VC Score8.6
BCP Score is a ranking system developed by bestcleanerproducts.com. BCP Score has no relationship or impact from any manufacturers or sales agent websites. Learn more
- BrandPikk-it

- VC Score8.6
BCP Score is a ranking system developed by bestcleanerproducts.com. BCP Score has no relationship or impact from any manufacturers or sales agent websites. Learn more
- BrandVataim

- VC Score8.6
BCP Score is a ranking system developed by bestcleanerproducts.com. BCP Score has no relationship or impact from any manufacturers or sales agent websites. Learn more
- BrandBissell
Last update on 2026-10-01 / Affiliate links / Images, Product Titles, and Product Highlights from Amazon Product Advertising API


How to Refinish a Fiberglass Pool

How Do You Keep Raccoons Out of Your Pool?

How to Fix Cyanuric Acid in Your Pool

How to Shape a Pool Cue Tip to Stop Miscues

Best Far Infrared Sauna Sauna Heats: Top Picks of 2026

11 Best Far Infrared Sauna Carbon Fiber Heaters of 2026 For Balanced Full-Body Heat

11 Best Carbon Far Infrared Sauna of 2026 For Even Heat

10 Best Bluetooth Speaker For Sauna of 2026 For Heat and Steam


