
How to Clean a V8 Stick Vacuum Safely

Dust spills back onto the rug, or the motor suddenly cuts out with a faint, musty smell. Getting that suction back takes only a few minutes: rinse both filters under cold water without soap, wipe out the clear bin, and cut wrapped hair off the roller brush. The battery and motorized sections must stay completely dry so the internal electronics never short out.
How you tackle the job depends on what is inside and which attachment is attached. Loose dust brushes out easily, but sticky kitchen spills inside the plastic container require a careful wipe with a damp rag. Different floor heads also unlock their spinning rollers in slightly different ways, using either a side lever or a simple coin turn. Above all, freshly rinsed pieces need a full day to dry before snapping back together. Here is how to safely take apart and refresh each section.
Disconnect The Power And Strip Down The Attachments First
Before you clean any part of your stick vacuum, remove it from the charging dock or unplug the charging cord from the wall. The red power trigger on the handle operates with a light touch. Removing attachments while the machine is connected to power risks firing the motor accidentally, which can blow trapped dust into your eyes or pinch your fingers.
Strip the vacuum down on a clean work surface. Press the red catch button on the front of the motor body to release the metal extension wand. Then, press the release button at the bottom of the wand to disconnect the cleaner head.
Lay out the pieces on a dry towel near good lighting. Check each section using this quick checklist:
- Verify the battery is disconnected from the charger and the trigger moves freely.
- Separate the floor cleaner head, extension wand, and small tools from the motor body.
- Set aside the motorized cleaner head and motor handle, keeping their metal contact pins dry.
- Inspect the intake port on the motor housing to confirm no large debris is trapped against the seal.
Wipe The Clear Bin And Dust Shroud Without Soaking The Motor
The clear dust canister gathers loose dirt, while the cyclone (the cone-shaped dust separator that spins dirt out of the air) catches fine powder on its metal mesh screen. Static electricity makes fine dust cling tightly to these plastic surfaces, which restricts incoming airflow over time. Cleaning this section restores strong suction, but you must keep water away from the central electrical housing.
Follow these steps to empty, detach, and clean the bin assembly safely:
- Hold the motor handle over a trash can. Pull the red catch on top of the cyclone upward firmly until the bottom flap pops open and the debris falls out.
- Press the small red release catch located on the runner track at the base of the canister, then slide the clear bin completely off the motor body.
- Wipe the inside and outside of the clear bin with a damp microfiber cloth. Do not submerge the bin in water, because moisture can degrade the rubber flap seal and rust the metal hinge springs.
- Use a dry cloth or a soft bristle brush to sweep caked dust from the mesh shroud of the cyclone. Tap the housing gently over your trash can to loosen compacted grime from the tiny air holes.
- Clean the rubber sealing ring at the top of the bin with a dry paper towel to remove grit. Set the plastic bin aside to air out completely.
Rinse Both Washable Filters Under Cold Water Without Soap
Your stick vacuum relies on two distinct filters to keep dust from escaping into your home. The pre-filter (the long pointed top filter that drops into the center of the dust bin) catches larger dust particles, while the post-filter (the round back exhaust filter that twists onto the rear of the motor) traps microscopic allergens. Both filters are washable, but harsh chemicals or hot water will damage their delicate fibers.
Never use dish soap, laundry detergent, or hot tap water. Soap leaves a residue that blocks air, while hot water can shrink the synthetic frame. Clean both filters using these steps:
- Pull the pre-filter straight out from the top of the cone-shaped dust separator. Turn the round post-filter on the back of the handle counterclockwise and pull it away from the motor body.
- Hold the long pre-filter under cold running tap water. Squeeze the cone gently between your hands from top to bottom, flushing water through the open top until the runoff turns clear.
- Run cold water into the cavity of the round post-filter. Cover the open end with your hand, shake the filter gently, and empty the dirty water. Repeat until the water runs clear.
- Tap the plastic rims of both filters against the sink to dislodge trapped water droplets, then shake them firmly by hand to drive out remaining moisture.
- Avoid wringing or twisting the filters, which breaks the airtight rubber seals around their rims.
Unlock The Spinning Roller Brush To Cut Away Tangled Hair
Pet fur, long hair, and loose threads inevitably wrap around the brush bar (the spinning roller brush that sweeps your floors). As hair builds up, it strangles the roller bearings, creating friction that drains your battery quickly and causes the roller motor to stall on carpets. Clearing this hair restores smooth spinning action and protects the drive belt.
Set the cleaner head upside down on your work table and clean the roller mechanism using these steps:
- Inspect the side of the cleaner head to locate the locking mechanism, which is usually a plastic screw plug marked with an arrow.
- Insert a coin or key into the slot and twist it a quarter turn counterclockwise to unlock the end cap.
- Slide the brush bar straight out from the housing. If your vacuum uses a soft roller head for hard floors, slide out the large plush roller and check the smaller roller bar behind it.
- Run scissors down the recessed groove along the roller bar. Cut through wound hair, then peel the tangled bands away from the bristles by hand.
- Pull away stray hair collected around the end cap bearing and drive cog. Wipe the empty housing with a dry cloth, keeping water completely away from the motor drive socket.
Wait At Least 24 Hours For Every Part To Dry Before Reassembly
Patience during the drying stage is critical for protecting your vacuum motor. Reinstalling filters that feel dry on the outside but stay damp inside will pull moisture directly into the high-speed electric motor. This causes electrical shorts, permanent motor burnouts, and sour mold growth inside the housing that ruins suction power.
Place both washed filters and the clear bin in a warm room with good airflow. Set the pre-filter standing upright on its wide base so water drains downward. Rest the round post-filter on its open rim on a dry towel.
Leave all washed parts to dry for at least 24 full hours. In humid weather, allow up to 48 hours. Never use a hair dryer, microwave, clothes dryer, or radiator to speed up drying, because heat warps the plastic frames and melts the filter membrane.
Before reassembly, press your fingers firmly against the thick pleats inside the round post-filter and squeeze the tip of the long pre-filter. If the material feels cool or damp, let it dry longer. If you need to clean wet carpet spills in the meantime, do not use your stick vacuum. Instead, use a dedicated carpet cleaner for deep stain removal to keep liquids away from dry vacuum electronics.
Check For Hidden Airway Blocks When The Motor Keeps Pulsing
If your vacuum starts pulsing (the motor repeatedly cutting out and restarting in short bursts) after you clean it, do not worry. This rhythmic pulsing is an intentional safety feature, not a sign of a broken battery. The motor pulses to signal that an internal sensor detects an airflow blockage, shutting off power momentarily to prevent overheating.
Start your inspection at the clear bin intake. Look inside the opening where the wand connects to the bin to verify that the clear rubber flap swings freely. Clumps of hair, dried leaves, or bottle caps frequently wedge under this flap, choking the intake before air ever reaches the cyclone.
Next, detach the long extension wand and hold it toward a light to look down the barrel. If the airway looks dark, drop a small coin down the tube; if the coin fails to fall through, push the clog free using a long wooden broom handle. Avoid sharp wire hangers that can scratch the smooth lining or punch through flexible rubber sections.
Finally, examine the flexible hose neck on the cleaner head itself. Bending the swivel neck reveals whether gravel or dense lint is lodged in the bend. Sticky spills turn dry dust into hard plugs. If you have wet mud or liquid pet messes, use a carpet cleaner for deep extraction rather than forcing a dry vacuum to pull moist clumps through narrow channels.
Keep Spare Filters And Heads On Hand To Prevent Downtime
Waiting a full day for your filters to dry can interrupt your cleaning routine. Keeping a spare set of washable filters in your cabinet allows you to snap fresh parts into the vacuum immediately while the freshly washed set dries safely on a towel.
When selecting replacement filters or an extra cleaner head, confirm several physical features first. Match the attachment fitting to your vacuum series by looking for the quick-release clip that clicks into the wand. Verify whether your machine uses standard push-fit filters or the revised housing for newer serial variants, as rear cap latches can vary between production runs.
If you are choosing a secondary vacuum head, consider your main flooring needs. A dedicated soft roller head with velvety fabric excels on delicate hardwood and tile by capturing large crumbs without scratching the finish. In contrast, a direct-drive head with stiff nylon bristles penetrates deep into carpet fibers to agitate embedded dirt. Always verify that any motorized floor nozzle features exposed metal power pins that match your extension wand socket so the motor receives steady current.
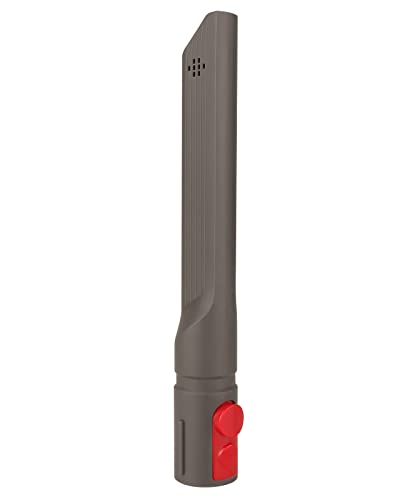
- VC Score9.4
BCP Score is a ranking system developed by bestcleanerproducts.com. BCP Score has no relationship or impact from any manufacturers or sales agent websites. Learn more
- BrandFullclean

- VC Score9.4
BCP Score is a ranking system developed by bestcleanerproducts.com. BCP Score has no relationship or impact from any manufacturers or sales agent websites. Learn more
- BrandTivcroxs

- VC Score9.2
BCP Score is a ranking system developed by bestcleanerproducts.com. BCP Score has no relationship or impact from any manufacturers or sales agent websites. Learn more
- BrandFullclean

- VC Score9.0
BCP Score is a ranking system developed by bestcleanerproducts.com. BCP Score has no relationship or impact from any manufacturers or sales agent websites. Learn more
- BrandSealegend

- VC Score9.0
BCP Score is a ranking system developed by bestcleanerproducts.com. BCP Score has no relationship or impact from any manufacturers or sales agent websites. Learn more
- BrandINTHVKIL

- VC Score9.0
BCP Score is a ranking system developed by bestcleanerproducts.com. BCP Score has no relationship or impact from any manufacturers or sales agent websites. Learn more
- BrandBahuun

- VC Score8.6
BCP Score is a ranking system developed by bestcleanerproducts.com. BCP Score has no relationship or impact from any manufacturers or sales agent websites. Learn more
- BrandOTTWL

- VC Score8.6
BCP Score is a ranking system developed by bestcleanerproducts.com. BCP Score has no relationship or impact from any manufacturers or sales agent websites. Learn more
- BrandVataim

- VC Score8.4
BCP Score is a ranking system developed by bestcleanerproducts.com. BCP Score has no relationship or impact from any manufacturers or sales agent websites. Learn more
- BrandDyson

- VC Score8.4
BCP Score is a ranking system developed by bestcleanerproducts.com. BCP Score has no relationship or impact from any manufacturers or sales agent websites. Learn more
- BrandENUKYCOM
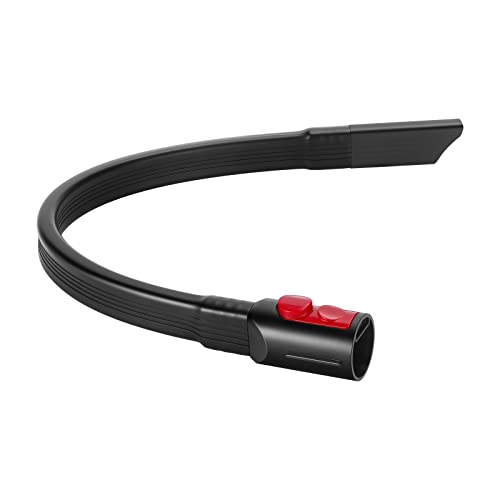
- VC Score8.4
BCP Score is a ranking system developed by bestcleanerproducts.com. BCP Score has no relationship or impact from any manufacturers or sales agent websites. Learn more
- BrandCabor

- VC Score7.6
BCP Score is a ranking system developed by bestcleanerproducts.com. BCP Score has no relationship or impact from any manufacturers or sales agent websites. Learn more
- BrandNABEECA
Last update on 2026-10-02 / Affiliate links / Images, Product Titles, and Product Highlights from Amazon Product Advertising API
FAQs
Which parts of the V8 can safely touch water?
Only the two filters (the long pre-filter and the round rear filter) and the removable soft fabric roller can safely touch cold running water. Never immerse or rinse the clear bin, the cyclone assembly, the extension wand, or the motorized cleaner head. Getting water on internal electrical wiring or contact pins can permanently ruin your machine.
How long do the washed filters take to dry completely?
The filters need at least 24 hours of air drying in a warm room with steady airflow. In cool or humid weather, wait 36 to 48 hours to ensure the dense inner pleats are moisture-free. Always feel the pleated paper inside the rear filter before reinstalling it to avoid drawing damp air into the motor.
Why does my vacuum pulse on and off right after cleaning?
Pulsing occurs when an obstruction cuts off airflow, triggering an automatic motor shutoff to prevent overheating. This usually means a filter is seated incorrectly, a damp filter is choking air passage, or debris is wedged inside the cleaner head neck. Remove the filters and inspect the bin flap and wand to clear the blockage.
How often should you wash the stick vacuum filters?
Rinse both filters at least once a month under typical use. If you have shedding pets or vacuum fine dust like flour or soot, rinse them every two weeks. Keeping filters clean protects suction performance and prevents stale exhaust odors from blowing into your home.


How to Refinish a Fiberglass Pool

How Do You Keep Raccoons Out of Your Pool?

How to Fix Cyanuric Acid in Your Pool

How to Shape a Pool Cue Tip to Stop Miscues

Best Far Infrared Sauna Sauna Heats: Top Picks of 2026

11 Best Far Infrared Sauna Carbon Fiber Heaters of 2026 For Balanced Full-Body Heat

11 Best Carbon Far Infrared Sauna of 2026 For Even Heat

10 Best Bluetooth Speaker For Sauna of 2026 For Heat and Steam


