
How to Clean a Stick Vacuum Head Safely

Most people assume a clogged floor head can simply be rinsed clean under the tap like a regular plastic tool. Running water over the unit will actually destroy the hidden electric motor inside the casing. To clean the head properly, you need to remove the spinning roller bar, snip trapped hair along the guide groove, and wipe out the suction airway with a dry towel.
The exact steps depend on your roller type and where debris is stuck. Fluffy microfiber rollers can usually be washed in cool water and left to dry, but stiff bristle bars should stay dry and wipe clean. Deep clogs also tend to wedge inside the swivel neck or wrap behind the end caps. Taking a few careful steps keeps the plastic tabs intact and restores full suction right away.
Disconnect the Head and Power Before Starting Any Cleaning
Stick vacuum heads contain direct electrical wiring and an internal motor that powers the spinning sweeper bar. Cleaning a floor head while it remains connected to the wand or battery presents a real pinch hazard. If your hand accidentally presses the power trigger, the roller spins instantly and catches your fingers. Taking a few seconds to isolate the power protects your hands and preserves the electrical connectors.
Follow these steps to safely detach the floor nozzle before starting:
- Turn off the power switch and remove the battery pack, or unplug the charging cord if your model uses an integrated battery.
- Press the quick-release button on the lower neck where the extension wand meets the floor nozzle.
- Pull the floor head straight off the wand without twisting to avoid bending the copper pins inside the joint.
- Inspect the metal connector prongs on the neck for lint, and wipe them gently with a dry cloth.
- Place the detached floor head on a towel-covered table to prevent scratches and catch loose dirt.
Unlock the Roller Latch Without Breaking Fragile Plastic Tabs
Every stick vacuum uses a locking mechanism to hold the spinning sweeper bar inside the floor frame. Manufacturers mold these latches out of lightweight plastic to keep the vacuum agile. Because these plastic clips become brittle over time, applying brute force can snap them off. A broken retaining tab often forces you to buy an entirely new motorized head, so careful technique is essential.
Look at the underside and outer edges of the floor head to find your release latch. Most stick vacuums rely on a coin-slot dial, a slide switch, or an end-cap lever. If your vacuum has a coin slot, avoid using a narrow screwdriver that can gouge the plastic channel. Instead, press the edge of a thick coin flat into the groove and rotate it a quarter turn toward the unlock icon.
If your vacuum uses a sliding latch or push tab, clear away any grit packed into the seams before sliding it. Trapped dirt can jam the mechanism. Use a stiff dry brush to dislodge particles, then push the tab firmly in the direction of the arrow.
Once the latch releases, swing the end cap open or slide it outward. Grasp the exposed tip of the spinning sweeper bar and lift it upward at an angle. Slide the opposite end straight out from the electric motor casing. Never pry the roller out by its middle bar, as bending the internal axle causes wobbling and vibration during use.
Cut Away Tangled Hair and Clear the Neck Tube
Hair, thread, and pet fur wrap tightly around the spinning sweeper bar with every revolution. Over time, these strands bind into dense bands that choke the roller, strain the drive belt, and cause the electric motor casing to overheat. Cutting away this tangled debris restores proper agitation, but doing it carelessly can slice bristles or scrape the roller core.
Follow these steps to safely remove wrapped fibers and unclog the inner suction channel:
- Locate the built-in guide groove on the spinning sweeper bar, which is a narrow recessed channel running down the cylinder between the bristle rows.
- Slide the blunt tip of small sewing scissors or a seam ripper along this guide channel beneath the tangled hair to cut fibers without snipping bristles.
- Peel away the severed strands with your fingers, working from the ends toward the center, and drop the hair into a waste bin.
- Pull off the small metal spinner at the roller end, which is the bearing cap, if your model allows it. Pet hair often wraps around this inner metal axle pin, building friction until the roller stops spinning. Use tweezers to pull these wound threads free.
- Inspect the suction tunnel behind the brush, also known as the airway, located in the bottom plastic frame (the soleplate). Pull free any wads of lint, dried mud, or coins jammed in this narrow throat.
- Inspect the clear flexible neck tube that swivels between the roller housing and the wand connector. Shine a flashlight through the joint to check for blockages. If you spot a clog inside the ribbed bend, push a flexible plastic zip-tie or wooden chopstick through the neck. Never use a wire coat hanger, because sharp metal tips punch holes through the plastic hose.
Never Submerge the Motor Casing Under Running Sink Water
Rinsing a dirty vacuum head under the faucet sounds fast, but it is one of the quickest ways to ruin a stick vacuum. Unlike manual sweeper attachments, a stick vacuum floor head is an electric tool. The electric motor casing houses a dedicated drive motor, wiring harnesses, circuit connectors, and front LED headlight panels. Exposing these parts to running water causes internal rust, shorts out electrical connections, and voids your warranty.
Understanding which parts can handle water and which parts must stay dry keeps your equipment safe:
- The main floor housing and motor casing: Wipe-only. Never submerge this assembly or spray water into its openings. To clean dust and grime from the outer plastic shell and clear window, dampen a microfiber cloth with warm water, wring it out until barely moist, and gently wipe the surfaces. Use a dry towel immediately afterward.
- Plush soft rollers: Washable under cold water. If your stick vacuum includes a fluffy roller for hard floors, you can rinse it under a cold tap. Run gentle water over the plush fabric while massaging away embedded dust. Do not use dish soap, laundry detergent, or hot water, as harsh cleaners break down the fabric glue.
- Bristle brush rollers: Check before washing. Sweeper bars with stiff nylon bristles often contain hollow tubes and sealed metal end bearings that do not detach. If your bristle bar has non-removable metal parts, wipe it clean with a damp cloth instead of running water. Water reaching the small metal spinner at the roller end causes the bearing to rust and seize.
- The bottom plastic frame: Wipe-only. The lower soleplate features tiny felt strips, rubber glide wheels, and static strips. Wipe dirt from these wheels and glides using a dry toothbrush or a lightly dampened cloth so the adhesive backing does not dissolve.
If your vacuum sucked up sticky liquids or food spills from carpets, running sink water into the floor head will not solve the problem. Sticky liquids mix with fine dust inside the suction tunnel behind the brush, creating a hardened paste that jams the roller. In those situations, using a dedicated carpet extractor designed for deep stain removal cleans up pet messes properly so your dry stick vacuum never touches wet carpet spots.
Air Dry Parts for a Full Day Before Reassembling
Reassembling a stick vacuum head while the roller is still damp causes sour odors and ruined electronics. Wet fabric fibers trap moisture inside the plastic chamber, creating an ideal breeding ground for mildew. Spinning a damp roller at high speed flings water droplets straight into the internal electric motor casing, risking a short circuit. Giving your parts adequate drying time is just as important as washing them.
Set your washed soft roller upright on a dry towel in an open area with good airflow. Let the roller air-dry completely for at least 24 full hours before reinstalling it. Stand it vertically on its plastic end so gravity pulls moisture away from the spindle. Keep the drying roller away from direct sunlight, radiators, or clothes dryers, as high heat warps the plastic core and melts fabric glue.
Before clicking your vacuum back together, run through this quick checklist to confirm everything is ready:
- Squeeze the plush fibers of the roller with dry fingers to confirm zero dampness remains in the deep underlayer.
- Check that the metal contact pins inside the swivel neck are clean, dry, and free of lint.
- Slide the geared drive end of the spinning sweeper bar into the electric motor casing first, rotating it gently until the notches interlock with the motor drive hub.
- Lower the opposite end into the housing slot, making sure the small metal spinner at the roller end rests squarely in its cradle.
- Close the outer latch or end cap and turn the locking mechanism until it clicks firmly into position.
- Spin the roller bar forward and backward with your hand. It must rotate smoothly without catching or scraping against the bottom plastic frame.
- Reattach the floor head to the extension wand until you hear a sharp snap, attach your battery, and power on the vacuum to verify smooth operation.
If the roller refuses to spin after reassembly, do not force the vacuum to run. A stalled motor can burn out its drive belt or trigger a safety cut-off switch. Take the roller back out and verify that the drive notches match the motor gear. Also inspect the small metal spinner at the roller end, as stray pet hair pinched under the end cap can lock the axle tight.
Choose Replacement Heads and Cleaning Tools Built for Hair
Maintaining a stick vacuum becomes much easier when you have the right accessories and replacement parts for your home's flooring. If your home has long-haired family members or multiple shedding pets, standard brush bars inevitably collect heavy hair wraps within a few cleaning sessions. Equipping your cleaning closet with specialized tools designed to clear hair wraps quickly saves substantial time and extends the working life of your vacuum.
Look for handheld maintenance tools that combine a stiff nylon pick brush with a shielded cutter blade. These compact rakes allow you to slice tangled threads along the roller groove and comb out deep dust without risking cut fingers or sliced bristles. When searching for replacement heads, choose nozzles designed with integrated anti-tangle ribs or comb teeth. These teeth continuously comb hair away from the spinning sweeper bar while you clean, guiding loose strands straight down the suction tunnel behind the brush instead of letting them wind around the axle.
Before purchasing any replacement floor head, always confirm the mechanical and electrical connection style on your vacuum. Motorized stick vacuum heads rely on proprietary wiring pins, latch clips, and tube diameters that vary by manufacturer and model. Check your vacuum's model tag, usually located on the battery or main motor body, to verify that any replacement nozzle matches your machine's connection pins and voltage requirements. For households dealing with sticky mud or ground-in dirt, pairing your dry vacuum routine with a portable machine built for deep extraction keeps damp, clinging grime off your vacuum floor head altogether.

- VC Score9.4
BCP Score is a ranking system developed by bestcleanerproducts.com. BCP Score has no relationship or impact from any manufacturers or sales agent websites. Learn more
- BrandINTHVKIL
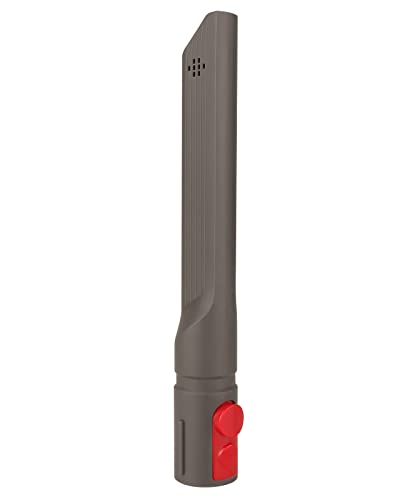
- VC Score9.4
BCP Score is a ranking system developed by bestcleanerproducts.com. BCP Score has no relationship or impact from any manufacturers or sales agent websites. Learn more
- BrandFullclean

- VC Score9.0
BCP Score is a ranking system developed by bestcleanerproducts.com. BCP Score has no relationship or impact from any manufacturers or sales agent websites. Learn more
- BrandTweruna

- VC Score9.0
BCP Score is a ranking system developed by bestcleanerproducts.com. BCP Score has no relationship or impact from any manufacturers or sales agent websites. Learn more
- BrandSelgo

- VC Score8.8
BCP Score is a ranking system developed by bestcleanerproducts.com. BCP Score has no relationship or impact from any manufacturers or sales agent websites. Learn more
- BrandEZ SPARES

- VC Score8.8
BCP Score is a ranking system developed by bestcleanerproducts.com. BCP Score has no relationship or impact from any manufacturers or sales agent websites. Learn more
- BrandLamoutor

- VC Score8.6
BCP Score is a ranking system developed by bestcleanerproducts.com. BCP Score has no relationship or impact from any manufacturers or sales agent websites. Learn more
- BrandVataim
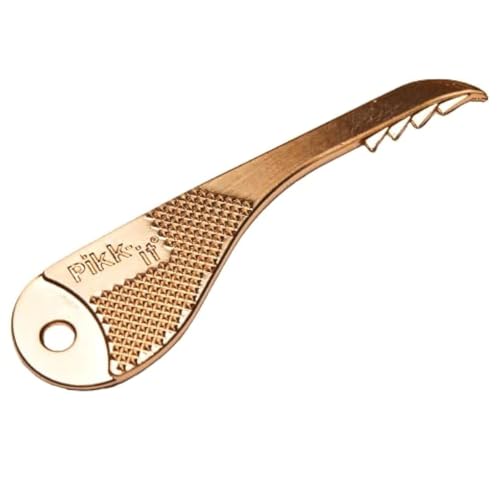
- VC Score8.6
BCP Score is a ranking system developed by bestcleanerproducts.com. BCP Score has no relationship or impact from any manufacturers or sales agent websites. Learn more
- BrandPikk-it

- VC Score8.4
BCP Score is a ranking system developed by bestcleanerproducts.com. BCP Score has no relationship or impact from any manufacturers or sales agent websites. Learn more
- BrandVACEXT

- VC Score8.0
BCP Score is a ranking system developed by bestcleanerproducts.com. BCP Score has no relationship or impact from any manufacturers or sales agent websites. Learn more
- BrandEZ SPARES
- VC Score6.8
BCP Score is a ranking system developed by bestcleanerproducts.com. BCP Score has no relationship or impact from any manufacturers or sales agent websites. Learn more
- BrandIntercleaner
Last update on 2026-10-01 / Affiliate links / Images, Product Titles, and Product Highlights from Amazon Product Advertising API


How to Refinish a Fiberglass Pool

How Do You Keep Raccoons Out of Your Pool?

How to Fix Cyanuric Acid in Your Pool

How to Shape a Pool Cue Tip to Stop Miscues

Best Far Infrared Sauna Sauna Heats: Top Picks of 2026

11 Best Far Infrared Sauna Carbon Fiber Heaters of 2026 For Balanced Full-Body Heat

11 Best Carbon Far Infrared Sauna of 2026 For Even Heat

10 Best Bluetooth Speaker For Sauna of 2026 For Heat and Steam


