
How to Clean a Smelly Vacuum and Keep It Fresh

Most people assume that dumping the clear dirt cup or swapping a full bag is enough to clear out bad odors. In reality, eliminating the stink requires you to wash the washable filters and dirt cup in warm soapy water, cut tangled hair off the spinning bristle bar, and let every piece dry completely for twenty-four hours.
The exact steps depend on your machine and the smell itself. A musty pet smell points to decaying dirt and trapped hair, while a sharp burning scent signals a jammed roller or a slipping rubber motor band. Filter material matters too, because soft foam washes clean under the tap, but pleated fine-dust filters ruin if they get wet. Here is how to trace the odor to its source, clean each part safely, and bring back fresh exhaust air.
Burnt rubber and rotting dirt come from different parts
Every bad vacuum smell falls into one of two categories: organic dirt or mechanical friction. Identifying which one you smell right when the motor turns on saves you from taking apart parts that are not actually dirty.
A musty, sour, or stale dog odor points directly to organic debris rotting inside the airflow path. Vacuums pull in pet dander, food crumbs, dead skin cells, pet hair, and microscopic carpet dust. When these organic materials sit in a dark, enclosed dust bin, bacteria break them down. If the vacuum ever pulled in moisture from a damp rug, water spill, or damp pet accident, mildew spreads rapidly across the filter fabric and canister walls. A standard household vacuum cannot safely process wet debris, so whenever liquid pet accidents happen, using a machine designed for deep pet stains protects your dry vacuum from growing foul mildew colonies.
A burnt rubber, hot plastic, or scorching electrical smell indicates a mechanical problem rather than trapped dirt. This almost always happens when pet hair or carpet threads wind tightly around the ends of the spinning brush roller. The trapped hair stops the roller from turning freely, but the motor shaft keeps spinning at high speed. The rubber motor band slips across the stalled spindle, causing extreme friction that melts the rubber band and chars plastic fittings.
If you smell burnt rubber or see a wisp of smoke, switch the machine off and pull the power plug out of the wall outlet immediately. Running the vacuum with a jammed roller can burn out the drive motor or melt the floor nozzle casing. If the smell is a sharp metallic burning odor accompanied by a high-pitched motor whine, the motor bearings may have failed. At that point, stop running the machine and consult a qualified appliance repair technician or check the manufacturer warranty.
Empty the bin and untangle the spinning brush roller
Safety always comes first when working on household machinery. Pull the power cord out of the wall outlet before touching the underside or removing any covers. Once the power is disconnected, you can clear out the bulk of the trapped hair and debris.
- Empty the dirt collection chamber outside. If your vacuum uses a bagless design, take the clear dirt cup directly to an outdoor garbage can. Press the release latch to drop the bottom door and tap the sides firmly to dislodge packed clumps of pet hair and dander. If your vacuum uses disposable bags, slide the cardboard collar off the intake tube, discard the full bag in an outside trash can, and wipe any fine dust off the inner bag compartment walls using a dry microfiber cloth.
- Remove the floor nozzle baseplate. Flip the floor nozzle upside down on a flat table or the floor. Look for locking tabs, coin-slot latches, or small screws holding the bottom soleplate over the roller. Turn the latches counterclockwise or remove the screws, then lift the plastic cover plate off the nozzle frame.
- Slide out the spinning brush roller. Unhook the rubber motor band from the end of the roller bar and lift the entire brush assembly free from the floor nozzle housing. Check both ends where the metal axle pins sit in the plastic slots.
- Cut tangled hair along the guide groove. Most modern brush rollers feature a recessed groove running down the center cylinder. Slide the blunt tip of small scissors or a seam ripper down this channel to cut through wound hair, carpet yarn, and string. Pull the cut hair strands away with your fingers. Avoid utility knives or bare razor blades, which can slice the plastic cylinder or damage the nylon bristles.
- Clean out the end caps and axle bearings. Pull the removable plastic end caps off both tips of the roller bar if your unit features detachable caps. Hair frequently wraps into a tight, felt-like ring around the metal axle pins beneath the caps. This hidden hair acts like a brake, heating up the metal until it bakes hair oils into a lingering stench. Wipe the axle pins clean with a dry rag.
- Inspect the rubber motor band. Check the rubber band for small cracks, frayed edges, shiny melted spots, or loose slack. If the band feels stretched or smells like scorched rubber, discard it and install a fresh band matched to your model number.
Wash washable filters and dry them for 24 hours
Trapped microscopic dust on the filters causes most musty exhaust odors. As air rushes through the system, it passes through pre-motor filters and post-motor exhaust screens before returning to your room. If these barriers hold old pet dander and moisture, your vacuum essentially operates like a room-sized dirty air blower.
- Separate your filters by material type. Pre-motor filters are usually soft foam sponges or thick felt disks. These are almost always washable. Post-motor exhaust filters are frequently pleated fine-dust filters enclosed in a plastic frame. Check the plastic frame or your user manual carefully. If the frame is stamped with the word "Washable," it can go under water. If it is made of pleated paper without that label, do not wet it; water causes paper fibers to swell, collapse the airflow channels, and permanently ruin the filter. Paper filters must be tapped gently outside or replaced with a fresh unit.
- Rinse foam and felt pads under lukewarm water. Hold the foam pads under a running tap. Squeeze the sponge gently under the stream until the runoff changes from muddy gray to clear. Add a single drop of mild dish soap to break down oily pet dander, massage the foam lightly between your palms, and rinse thoroughly until all soap suds disappear.
- Flush washable pleated filters from the clean side. Hold pleated filters under cool, low-pressure tap water. Direct the water stream against the clean side of the pleats so the water pushes dirt outward, rather than driving dirt deeper into the fabric mesh. Avoid scrubbing pleated material with stiff brushes, which can tear the fine fibers and let dust pass straight into the motor.
- Scrub the clear dirt cup. If your vacuum has a removable plastic dust canister, pull out the inner cyclone cylinder if it twists apart. Wash the plastic cup and cyclone assembly in a sink filled with warm water and a splash of dish soap. Use a soft bottle brush or sponge to wipe away the sticky film of settled dust along the inside corners. Never wash or submerge any part of the canister that contains electrical wiring, power pins, or release buttons connected to motor circuits.
- Dry every part for a minimum of 24 full hours. This step cannot be skipped or rushed. Setting damp filters or a wet dirt cup back into your machine causes severe mildew growth within hours, creating an unbearable sour smell next time you clean. Lay foam pads flat on a clean, dry towel in a sunny room with good air movement. Stand pleated filters upright so water drains freely from the folds. Press firmly into the middle of the foam pads before reinstalling them; if you feel any cold moisture, let them dry for another 12 hours.
Flush the flexible hose to clear hidden wet clogs
A vacuum can have spotless filters and a clean brush roller yet still smell foul if decaying debris is lodged inside the suction hose. The corrugated ridges inside flexible hoses easily trap damp carpet fibers, pet hair, and pet food bits, creating a hidden compost pocket.
- Disconnect the hose at both ends: Press the release tabs on the vacuum body to detach the hose, and unclip the rigid extension wand from the handle end.
- Look through the tube toward a bright light: Hold one end of the hose up to your eye and point the opposite end toward a sunny window or ceiling light. If you cannot see a clear circle of light, a blockage is lodged inside the ridges.
- Push out clogs with a blunt guide: Drop a small, smooth item tied to string, like a wooden spool or golf ball, down the tube to verify the blockage location. Alternatively, gently slide a rounded broom handle through the tube to nudge the obstruction free. Never push sharp wire coat hangers through ribbed vinyl hoses, as they easily puncture the thin walls or scratch the interior lining.
- Flush the hose walls with warm soapy water: Take the hose into a shower or outdoor patio. Run warm water through the hose from one end to the other. Pour half a cup of warm water mixed with a squirt of liquid dish soap directly into the tube, hold both openings upright, and slosh the liquid back and forth across the inner ribs. Drain the soapy water and flush thoroughly with clean water.
- Hang the hose vertically to drain: Loop the hose over a shower curtain rod, a sturdy clothesline, or an interior door so both open ends point down toward the floor. Gravity pulls settled water out of the deep ridges. Leave the hose hanging until the inner walls are completely dry before attaching it back to the vacuum body.
Choose proper attachments and fresheners to prevent odors
Preventing vacuum odors over the long haul comes down to two things: using the right floor attachments and stopping damp debris from entering the machine. If you regularly deal with household pet odors or food spills on rugs, using a dedicated carpet cleaner for tough stains and odors ensures wet messes are washed and extracted with proper equipment instead of pulled into your dry household vacuum.
When selecting a new floor nozzle or vacuum head attachment, check how easily the spinning brush roller can be removed. Floor nozzles that feature quick-release buttons or coin-turn latches make weekly maintenance effortless. If removing a roller requires hunting down three different screwdrivers, tangled pet hair tends to sit on the spindle for months, generating friction and heat. Check also that the throat of the floor nozzle has a wide, direct opening into the neck. Tight right-angle turns inside the intake head catch wet lint and form stubborn clogs right behind the spinning brush roller.
Surface compatibility also plays a significant role in keeping floor tools free from debris buildup. For bare floors, choose a dedicated bare-floor nozzle equipped with natural or soft nylon edge brushes rather than running a carpet nozzle with spinning bristles. Soft bristles sweep fine dander into the suction path without wrapping hair around turning pins or scratching delicate finishes. For homes with thick carpets, ensure the floor nozzle provides adjustable height settings so the intake path maintains strong airflow instead of choking against deep pile.
Once your vacuum is clean and dry, scented maintenance aids help keep the exhaust air smelling fresh during normal operation. Scent tablets, deodorizer beads, and vacuum-safe carpet powders neutralize stale smells as air circulates through the dust chamber. Fragrance pads placed near or behind the exhaust filter disperse a light, clean scent across the room every time the motor runs. Always confirm that carpet freshening powders specify they are safe for your vacuum style, and empty the clear dirt cup after every major cleanup so organic dirt never sits inside your machine between chores.
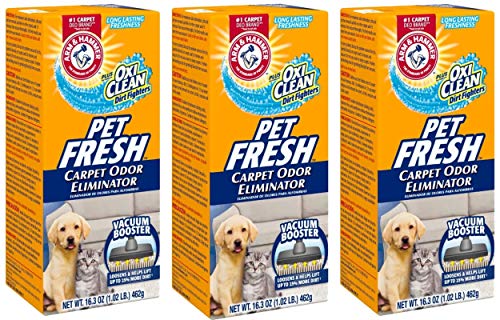
- VC Score9.2
BCP Score is a ranking system developed by bestcleanerproducts.com. BCP Score has no relationship or impact from any manufacturers or sales agent websites. Learn more
- BrandArm & Hammer

- VC Score9.2
BCP Score is a ranking system developed by bestcleanerproducts.com. BCP Score has no relationship or impact from any manufacturers or sales agent websites. Learn more
- BrandHoover

- VC Score9.2
BCP Score is a ranking system developed by bestcleanerproducts.com. BCP Score has no relationship or impact from any manufacturers or sales agent websites. Learn more
- BrandBioda

- VC Score9.2
BCP Score is a ranking system developed by bestcleanerproducts.com. BCP Score has no relationship or impact from any manufacturers or sales agent websites. Learn more
- BrandEnviroCare

- VC Score9.0
BCP Score is a ranking system developed by bestcleanerproducts.com. BCP Score has no relationship or impact from any manufacturers or sales agent websites. Learn more
- BrandEnviroCare

- VC Score9.0
BCP Score is a ranking system developed by bestcleanerproducts.com. BCP Score has no relationship or impact from any manufacturers or sales agent websites. Learn more
- BrandPetOde

- VC Score9.0
BCP Score is a ranking system developed by bestcleanerproducts.com. BCP Score has no relationship or impact from any manufacturers or sales agent websites. Learn more
- BrandSweepScents

- VC Score8.8
BCP Score is a ranking system developed by bestcleanerproducts.com. BCP Score has no relationship or impact from any manufacturers or sales agent websites. Learn more
- BrandHoover

- VC Score8.6
BCP Score is a ranking system developed by bestcleanerproducts.com. BCP Score has no relationship or impact from any manufacturers or sales agent websites. Learn more
- BrandFresh Wave

- VC Score8.6
BCP Score is a ranking system developed by bestcleanerproducts.com. BCP Score has no relationship or impact from any manufacturers or sales agent websites. Learn more
- BrandEnviroCare

- VC Score8.4
BCP Score is a ranking system developed by bestcleanerproducts.com. BCP Score has no relationship or impact from any manufacturers or sales agent websites. Learn more
- BrandUltraScent

- VC Score8.4
BCP Score is a ranking system developed by bestcleanerproducts.com. BCP Score has no relationship or impact from any manufacturers or sales agent websites. Learn more
- BrandFragrant Scent
Last update on 2026-10-01 / Affiliate links / Images, Product Titles, and Product Highlights from Amazon Product Advertising API


How to Refinish a Fiberglass Pool

How Do You Keep Raccoons Out of Your Pool?

How to Fix Cyanuric Acid in Your Pool

How to Shape a Pool Cue Tip to Stop Miscues

Best Far Infrared Sauna Sauna Heats: Top Picks of 2026

11 Best Far Infrared Sauna Carbon Fiber Heaters of 2026 For Balanced Full-Body Heat

11 Best Carbon Far Infrared Sauna of 2026 For Even Heat

10 Best Bluetooth Speaker For Sauna of 2026 For Heat and Steam


