
How to Clean a Small Ball Vacuum to Restore Suction

Pull the power cord out of the wall outlet before pressing a single release button. Electrical wiring runs through the frame down to the floor head, so safety comes first. Getting strong airflow back means rinsing the washable filters under cold tap water, slicing bound hair off the floor roller, and wiping out the clear dust bin.
The exact steps depend on where debris is stuck and how much time parts have to dry. A clog trapped inside the steering ball requires opening the lower airway, while wet filters need at least twenty-four hours to air-dry completely. Water must never touch the motor casing or the cyclone cones (the plastic cone section that spins dirt). Here is how to work through each section safely so the machine runs fresh again.
Separate Washable Pieces From Motor Parts Before You Touch Any Water
Water is the fastest way to ruin a compact upright vacuum if it touches the wrong spot. Before you do anything else, unplug the electrical cord from the wall outlet. Never clean or take apart any section of your machine while it is still plugged into power.
Ball vacuums pack their heavy electrical parts, steering pivots, and suction pathways into a very tight body. You can safely rinse some sections under a sink faucet, but getting other parts wet will permanently destroy the electric motor or create mold that smells like sour milk. Separate your vacuum into clear categories before you bring any part near the sink.
- Safe to rinse under running water: The pre-motor filter (the washable filter before the fan) and the post-motor filter (the exhaust filter inside the ball). The clear plastic canister bin can also be rinsed only after you completely remove it from the cyclone assembly.
- Wipe with a damp cloth only: The outside of the steering ball shell, the outer wand, and the clear plastic bin body. Wring your rag out completely so no drips run into seams or button openings.
- Never let touch water: The cyclone (the plastic cone section that spins dirt), the main motor housing nestled inside the steering ball, the motorized floor nozzle, and the power cord.
If you recently tried to clean up a damp spill or wet pet mess, stop running your upright vacuum. Using a dry vacuum on wet carpet causes dirty mud to cake inside the internal airways and motor fan. For damp spills or muddy pet tracks, use a dedicated machine for deep stain removal rather than risking your main household vacuum.
Clear Tangled Hair and Threads From the Spinning Brush Roller
When your machine stops picking up debris on rugs, hair is usually choking the floor head. The spinning brush roller (the rotating bar that sweeps carpet) cannot spin at full speed when long hair, rug fringe, and threads bind its axle. This extra drag overheats the small drive belt and causes the roller motor to shut off automatically.
- Release the floor head soleplate: Lay the vacuum flat on the floor with the underside facing up toward you. Look for the red plastic latches or coin-turn screws on the bottom plate. Turn the screws a quarter turn or slide the release clips to lift off the bottom cover plate.
- Slide out the brush roller: Lift the free end of the roller bar up and gently slide the other end out of the rubber drive belt loop. Set the roller bar on a flat table.
- Cut the hair along the guide groove: Most roller bars have a narrow groove molded directly into the plastic between the bristle rows. Slide the tip of a pair of sewing scissors or a seam ripper down this groove. Cut through the hair bands in a straight line, making sure you do not cut or pluck the stiff bristles.
- Clean the end caps: Pull off the removable plastic end caps on both sides of the roller. Pet hair and carpet fuzz love to wrap around these metal pins, creating friction that melts the plastic casing. Wipe off all dirt, pull away tangled threads, and verify that the end bearings spin smoothly between your fingertips.
- Wipe the floor nozzle airway: Look through the throat of the floor nozzle right behind where the roller sits. Shine a flashlight through this opening to make sure no trapped pebbles, coins, or wads of pet hair are wedged inside.
- Reinstall the roller and belt: Loop the drive belt around the roller cog, seat the roller back into its cradle notches, and replace the soleplate. Turn the locking clips until you hear a sharp snap to confirm the plate is locked tight.
Rinse the Pre-Motor and Post-Motor Filters Under Cold Tap Water
Clogged filters strangle airflow and cause the vacuum motor to run hot and whistle. Your compact ball vacuum relies on two distinct filters to trap dirt and keep the exhaust air fresh. Washing them once every month restores strong suction and stops musty odors from filling the room.
- Remove the pre-motor filter: Press the release button on top of the carry handle to lift off the dust canister. Open the filter latch at the top or center of the bin assembly and pull out the washable foam or fabric filter. Tap it gently against the inside of your trash can to knock off the loose cake of gray dust.
- Wash with cold water only: Hold the filter under a cold running tap. Avoid hot water, because hot temperatures can shrink the dense filter fibers and warp the rubber seal. Squeeze the foam gently with your fingers under the stream until the water flowing out runs completely clear. Never use dish soap, laundry detergent, or chemical sprays, because dried soap residue blocks airflow.
- Remove the post-motor filter from the ball: Turn the central dial or locking ring on the side of the steering ball wheel. Remove the wheel cover to access the round exhaust filter tucked inside. Pull this filter out and inspect it for discoloration.
- Rinse the exhaust filter: Run cold water through the pleated side of this round filter while rotating it with your hand. Tap it softly against the side of the sink basin to release trapped carbon dust. Continue rinsing until no gray streaks show in the water.
- Press out the excess moisture: Press both filters between two dry bath towels to soak up dripping water. Do not twist or wring the foam, because aggressive twisting can rip the seams.
- Air-dry for at least 24 hours: Lay both filters flat in a warm, dry room with good air movement. Never put damp filters back into your vacuum, and never place them in a clothes dryer, on a baseboard radiator, or under a hair dryer. They must be bone-dry to the touch before you reinstall them.
Wipe the Clear Bin and Dust the Cyclone Cones Without Soaking Them
The cyclone (the plastic cone section that spins dirt) uses rapid air currents to separate fine dust from heavy debris. Many owners make the costly mistake of running tap water straight into these plastic cones to wash out stubborn dust. Doing that turns fine dust into wet sludge inside the tiny internal air baffles, which clogs the assembly permanently and causes severe sour odors.
Always separate the clear bin from the cyclone assembly before cleaning. Press the red bin-release trigger to dump the dirt out of the bottom flap. Next, locate the secondary release catch (often a small red tab along the spine or inside the hinge) to unlatch the clear plastic cylinder completely from the upper cone assembly.
Wash the clear plastic bin with lukewarm water and a drop of mild dish liquid if the plastic looks cloudy. Rinse it thoroughly and wipe it dry with a lint-free cloth. Inspect the rubber sealing ring along the bottom flap to make sure no trapped grit keeps the door from snapping shut air-tight.
Clean the cyclone section using only dry methods. Step outside into your yard or lean over a trash can. Tap the cyclone assembly against the palm of your hand to knock loose fine powders trapped in the upper chambers. Use a dry, soft-bristled brush to sweep dust out of the metal mesh shroud. If stubborn dirt remains, blow short bursts of compressed air through the cone tips to dislodge trapped lint.
Check the Steering Ball Duct and Lower Airway for Trapped Debris
Ball vacuums are known for tight cornering, but their compact steering ball requires a sharp turn in the internal airway. This curve is the most common place for hidden blockages. When small toys, toothpicks, or clumps of carpet fibers get stuck in this turn, suction drops to zero even when the filters and dust bin are completely clean.
Start your inspection by checking the clear plastic duct directly under the ball. Recline the vacuum handle down toward the floor so the neck stretches open. Look closely through the clear plastic airway sleeve to see if debris is wedged inside. Many models include a quick-release inspection cuff that lets you detach this lower hose with a firm squeeze.
If you see a clog, avoid jamming a metal wire coat hanger down the neck. Wire hangers easily puncture the flexible rubber bellows and split internal plastic seals. Instead, use a smooth wooden spoon handle or a flexible plastic rod to gently nudge the blockage toward the open end until you can pull it out with your fingers.
Check the rubber neck seals for cracks or trapped debris. If a rubber gasket is pinched or coated with grit, air leaks into the airway, reducing the vacuum suction at the floor. Wipe the rubber gaskets with a slightly damp rag to ensure they seal flush against the plastic duct when you click the vacuum back into its upright locked position.
Pick the Right Detailing Attachments to Keep Tight Crevices Clear
Keeping a compact ball vacuum clean is much simpler when you have the right accessories to reach tight spaces. Built-in vacuum parts have narrow channels, ribbed hoses, and internal screens where normal rags cannot reach. Adding a few specialized cleaning tools to your supply closet helps you maintain your machine with less effort.
A handheld roller cleaning tool with a guarded cutting blade is one of the most useful accessories you can keep on hand. These tools feature a curved hook with an internal blade that slides smoothly under wrapped hair strands along the roller bar. The blade slices the tangled threads cleanly in one pull without nicking your fingers or trimming the roller bristles.
Micro-attachment kits are also helpful for deep cleaning your vacuum body. These kits typically come with miniature crevice tools and tiny round dusting brushes that step down to fit standard 1-1/4-inch vacuum hose connections. You can attach these tiny nozzles to a secondary vacuum wand to suck fine plaster dust and pet dander out of the cyclone cones and bin hinges without using any water.
Remember that standard upright vacuums are built strictly for dry household dirt. If you regularly deal with soaked carpets, pet accidents, or drink spills, do not rely on your dry ball vacuum. Pulling dirty water through a dry vacuum motor creates dangerous electrical shorts and ruins internal bearings. Keep an extraction unit designed for deep pet stains ready for wet emergencies so your upright machine stays dry and clean.

- VC Score10.0
BCP Score is a ranking system developed by bestcleanerproducts.com. BCP Score has no relationship or impact from any manufacturers or sales agent websites. Learn more
- BrandFuzdaycu

- VC Score9.0
BCP Score is a ranking system developed by bestcleanerproducts.com. BCP Score has no relationship or impact from any manufacturers or sales agent websites. Learn more
- BrandTweruna
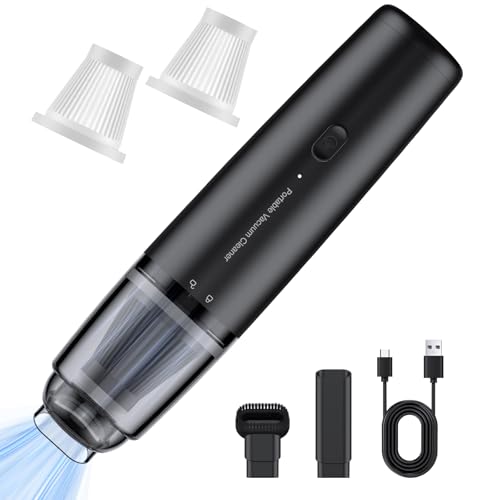
- VC Score8.8
BCP Score is a ranking system developed by bestcleanerproducts.com. BCP Score has no relationship or impact from any manufacturers or sales agent websites. Learn more
- BrandLYFUHUI

- VC Score8.8
BCP Score is a ranking system developed by bestcleanerproducts.com. BCP Score has no relationship or impact from any manufacturers or sales agent websites. Learn more
- BrandLamoutor

- VC Score8.6
BCP Score is a ranking system developed by bestcleanerproducts.com. BCP Score has no relationship or impact from any manufacturers or sales agent websites. Learn more
- BrandFuzdaycu

- VC Score8.4
BCP Score is a ranking system developed by bestcleanerproducts.com. BCP Score has no relationship or impact from any manufacturers or sales agent websites. Learn more
- BrandTweruna
- VC Score8.2
BCP Score is a ranking system developed by bestcleanerproducts.com. BCP Score has no relationship or impact from any manufacturers or sales agent websites. Learn more
- BrandAuloea

- VC Score8.0
BCP Score is a ranking system developed by bestcleanerproducts.com. BCP Score has no relationship or impact from any manufacturers or sales agent websites. Learn more
- BrandEZ SPARES

- VC Score8.0
BCP Score is a ranking system developed by bestcleanerproducts.com. BCP Score has no relationship or impact from any manufacturers or sales agent websites. Learn more
- BrandEZ SPARES

- VC Score8.0
BCP Score is a ranking system developed by bestcleanerproducts.com. BCP Score has no relationship or impact from any manufacturers or sales agent websites. Learn more
- BrandEZ SPARES

- VC Score7.8
BCP Score is a ranking system developed by bestcleanerproducts.com. BCP Score has no relationship or impact from any manufacturers or sales agent websites. Learn more
- BrandHONKYOB

- VC Score6.2
BCP Score is a ranking system developed by bestcleanerproducts.com. BCP Score has no relationship or impact from any manufacturers or sales agent websites. Learn more
- BrandHaibinsuo
Last update on 2026-10-02 / Affiliate links / Images, Product Titles, and Product Highlights from Amazon Product Advertising API
Frequently Asked Questions
Can I wash the clear bin and cyclone section with water?
You can wash the clear plastic collection bin with water, but only after detaching it completely from the cyclone cones. Never rinse or submerge the cyclone cone assembly. Water gets trapped inside the narrow internal air chambers, mixing with residual dust to create an impenetrable paste that ruins suction and smells musty.
How do I cut hair wrapped around the brush roller without damaging bristles?
Locate the straight guide groove running lengthwise down the plastic roller bar between the rows of bristles. Slide the tip of small scissors or a specialized roller cutter along this groove beneath the tangled hair bands. Slice outward along the groove, then gently pull the loosened hair away from the bristles with your fingers.
How long must the filters dry before going back into the machine?
Filters must air-dry for at least 24 full hours in a warm, well-ventilated space before you reinstall them. Even a slight trace of dampness inside the filter foam will pull into the high-speed fan motor, causing electrical short-circuits, motor burnout, and lingering sour mildew smells. Never use a hair dryer or direct heat, which can melt the filter material.
Why is my vacuum whistling or cutting out after cleaning?
A high-pitched whistling noise indicates an air leak around a poorly seated filter, a loose bin seal, or an incomplete connection at the lower ball duct. If the vacuum cuts out completely, the thermal safety switch has activated because airflow is blocked or the motor is overheating. Unplug the machine, let it cool for 45 minutes, and verify that every latch, hose cuff, and filter cover is clicked firmly into place.


How to Refinish a Fiberglass Pool

How Do You Keep Raccoons Out of Your Pool?

How to Fix Cyanuric Acid in Your Pool

How to Shape a Pool Cue Tip to Stop Miscues

Best Far Infrared Sauna Sauna Heats: Top Picks of 2026

11 Best Far Infrared Sauna Carbon Fiber Heaters of 2026 For Balanced Full-Body Heat

11 Best Carbon Far Infrared Sauna of 2026 For Even Heat

10 Best Bluetooth Speaker For Sauna of 2026 For Heat and Steam


