
How to Clean a DC17 Vacuum to Restore Suction

Cleaning a DC17 upright comes down to washing the foam filter in cold water, wiping out the bin, and clearing trapped clogs from the roller and airways. The single catch is keeping moisture completely away from the upper cyclone pack, the cone section that spins dirt out of the air. Water trapped inside those plastic cones causes mildew and can ruin the suction motor once you turn the power back on.
How far you need to go depends on where the airflow is choking. Thick layers of pet hair wrapped around the spinning brush bar require a quick trim, while stubborn blockages often hide deeper inside the stretch hose or the lower duct. Checking each trouble spot in the right order helps you refresh the entire machine safely and brings back its original pulling power.
Unplug the vacuum and gather basic tools first
Always unplug the power cord from the electrical wall outlet before touching any latch, screw, or panel. The DC17 uses a high-draw electric motor to generate airflow and spin the brush bar (the spinning roller with bristles) inside the floor nozzle. Touching moving parts or electrical contacts while the cord is plugged in creates a severe shock and pinch hazard.
Working on an older upright vacuum requires patience and care. The plastic housing and clips have gone through years of warm motor exhaust, which makes the molded tabs brittle. Forcing a stubborn part or yanking on a latch can snap the aged plastic permanently. Set the machine on a flat, well-lit floor where you have plenty of room to lay parts out in the order you remove them.
You only need a few common household items to do a complete teardown and cleaning. Collect these items before you begin:
- A coin such as a nickel, or a wide flat-head screwdriver, to unlock the soleplate (the bottom cover plate under the vacuum head).
- A pair of scissors or a seam ripper to slice through wound carpet fibers, thread, and pet hair.
- A dry microfiber cloth and a clean, dry utility brush with soft bristles to sweep fine silt out of narrow crevices.
- A long, blunt object like a wooden broom handle to gently probe for clogs inside long plastic tubes.
- A clean sink with cool running tap water to rinse the washable filter.
Wipe the bin clean but keep the cyclone dry
Start your cleanout by removing the clear dust container from the vacuum spine. Press down on the cyclone release catch sitting right at the front of the carry handle. Pull the entire bin assembly forward and away from the body of the machine.
Carry the bin over to a large trash can. Hold the assembly low inside the rim of your trash can to keep dust plumes from flying back into your room. Push the red bin release button down firmly. The hinged bottom door will pop open, allowing the bulk of the collected dirt, dust bunnies, and pet fur to drop straight out. Tap the rim of the clear cylinder gently against the inside of the can to dislodge stubborn clumps.
Now comes the most critical rule of DC17 maintenance: never wash the cyclone pack (the upper cone section that spins dust) in water. Many owners assume that running the entire top assembly under a faucet is the best way to eliminate dusty smells, but that mistake can ruin the vacuum. Inside that upper section sits a cluster of narrow plastic funnels that spin air at extreme speeds to fling dust out of the airflow.
When you flood those internal cones with water, the fine flour-like dust trapped inside turns into wet mud. That mud packs tightly into the narrow tips of the funnels. Once that paste dries, it hardens into solid plugs that choke off the vacuum airflow permanently. Even worse, moisture trapped inside those blind plastic chambers travels straight into the motor housing when you switch the vacuum back on, causing bad mildew odors or burning out electrical components.
To safely clean the upper assembly, use a dry, soft-bristled brush. Gently sweep the fine powder off the metal or plastic shroud screen. Wipe the exterior contours of the cones with a microfiber towel that is barely damp, then wipe the surface completely dry with a clean cloth. If your clear plastic bin unclips completely from the cone section, you may wash the clear plastic shell with cold tap water. Let that clear shell air-dry on a towel for several hours before snapping it back onto the dry cone section.
Wash the filter in cold water and dry fully
The DC17 uses a pre-motor filter (the washable foam filter in the side housing) to trap microscopic particles before the air enters the suction motor. When this filter clogs with drywall dust, skin flakes, or pet dander, airflow drops sharply and the motor runs hot. Washing this component restores lost suction quickly.
- Locate the filter door on the lower left side of the vacuum base. Press the release catch and swing the door open to slide out the filter cartridge.
- Separate the blue foam pad from the yellow plastic cage. Inspect both pieces for tears or crumbling foam.
- Hold the foam pad under a faucet running cold water. Never use warm or hot water, and never add dish soap, laundry detergent, or bleach. Harsh heat and cleaning chemicals degrade the foam structure and ruin its filtration pores.
- Squeeze the foam gently between your palms under the running stream. Let the water fill the foam, squeeze out the murky liquid, and repeat the motion. Continue rinsing and squeezing until the runoff is completely clear.
- Rinse the yellow plastic cage under cold water to knock away loose dirt, then shake off any standing droplets.
- Squeeze the foam pad firmly between your hands to press out as much excess moisture as possible. You can also roll the foam inside a dry hand towel and press down to blot up trapped water.
- Place the foam pad and the yellow plastic cage in a warm, well-ventilated room to dry.
Leave the filter out to dry for a minimum of 24 full hours. Do not place the foam on a hot radiator, inside a clothes dryer, or directly under a hair dryer, because high heat will warp and melt the material. The core of the foam stays damp long after the surface feels dry. Putting a slightly damp filter back into the machine pulls liquid directly into the spinning motor fan, which causes motor failure and rust. Wait until the foam is completely dry before reinstalling it.
Remove the bottom plate to cut away roller hair
If your vacuum makes a high-pitched whine, smells like hot rubber, or struggles to pull lint out of carpet fibers, the brush bar (the spinning roller with bristles) is choked with debris. Hair and long threads wrap tightly around the cylinder, creating friction that slows rotation and overheats the drive belt.
- Recline the vacuum handle and gently lay the entire machine flat on its back so the underside of the cleaner head faces up. Place an old towel underneath to protect hard floors from scratches.
- Locate the fasteners holding the soleplate (the bottom cover plate under the vacuum head) in place. The DC17 features quarter-turn fastener screws along the bottom plate.
- Fit a coin or a wide flat-head screwdriver into each slot. Rotate each fastener a quarter turn counter-clockwise until it releases, then lift the soleplate off the head and set it aside.
- Examine the brush roller. You will see a narrow channel or groove running lengthwise across the roller body between the bristle tufts. Slide the blunt tip of your scissors or a seam ripper along that groove, cutting through the wrapped hair bands from end to end.
- Pull the severed hair and carpet threads free using your fingers. Avoid pulling so hard that you yank bristle bundles out of their plastic sockets.
- Inspect both ends of the roller cylinder where it meets the outer housing. Pet hair often binds tightly around the metal end pins and side bearings. Use tweezers or your fingers to unwind these dense hair washers, allowing the roller to spin freely when pushed by hand.
- Wipe down the inside of the roller cavity with a dry cloth to remove caked carpet grit and loose lint balls.
- Align the front tabs of the soleplate back into their matching slots on the cleaner head, press the plate flat, and turn each fastener a quarter turn clockwise to lock the plate tight.
Check the hose and lower duct for trapped clogs
When the bin is empty and the filter is clean, but suction remains weak, a physical blockage is hiding inside the internal air channels. Large debris like packing peanuts, coins, pens, or dense wads of pet hair can wedge in the sharp bends of the airway duct (the internal plastic tunnel carrying dirt to the bin).
Work through this checklist to clear blockages throughout the machine:
- The stretch hose: Press the hose release clips and disconnect the long flexible hose from the vacuum body. Stretch the hose out straight across the floor. Drop a coin or a small marble into one end and verify that it rolls freely out the other side. If it stops, look down the bore against a bright light to locate the clog. Push the smooth, rounded handle of a wooden broom gently through the hose to pop the obstruction free. Do not use metal coat hangers with sharp ends that could puncture the flexible ribs.
- The lower airway duct: Look at the rear base of the vacuum head near the back wheels. You will see a clear or dark plastic elbow pipe that routes airflow from the floor nozzle into the main spine. Unlatch this duct inspection piece. Shine a flashlight inside to inspect the curve. Fluff and grit frequently bunch up at this transition point. Pull any trapped plugs out with your fingers or a pair of needle-nose pliers.
- The internal changeover valve: The DC17 relies on an internal mechanical valve behind the base that directs suction either to the floor nozzle or up into the wand. When you lock the machine upright, the valve shifts the airway automatically. If carpet grit wedges around the valve flap, the door may stick halfway. That opening bleeds vacuum pressure in both directions. Use a stiff, dry utility brush to sweep away packed grit around the valve hinges until the door moves smoothly.
- The wand handle: Detach the metal wand from the hose grip. Look down the metal pipe to confirm small objects like plastic bottle caps or cardboard scraps are not jammed inside the metal tube.
Reassemble parts firmly and follow a monthly cleaning schedule
Once all parts are fully dry and clear of debris, put the vacuum back together. Slide the dry foam filter into its yellow cage, press the cartridge into the side housing, and push the filter door shut until the latch clicks. Set the clear bin base onto the cyclone pack, close the bottom trapdoor firmly, and lower the bin assembly onto the vacuum spine until the top handle clicks into place.
Air leaks ruin suction performance. If a door or hose cuff is slightly loose, the motor draws air through the gap instead of pulling dirt from your floor. Check that the hose cuff seats completely in the lower port. Plug the power cord into an outlet, turn the vacuum on, and hold your hand over the end of the hose wand to confirm strong, steady suction. Lower the spine into carpet mode and confirm that the brush roller spins vigorously across the floor.
Keeping a steady upkeep schedule prevents deep blockages and protects the motor from strain:
- Empty the clear bin as soon as dirt reaches the maximum line marked on the plastic. Overfilling forces debris up into the cyclone funnels where it can clog internal passages.
- Rinse the pre-motor filter every one to three months. If you have multiple shedding pets or clean up powdery messes frequently, wash it once a month.
- Check the bottom brush roller every two to three weeks. Slicing away hair before it packs into the bearings prevents melted end caps and snapped belts.
- Never pick up water, damp soil, or wet bathroom messes with this dry upright machine. Moisture turns the internal dust into sludge and damages the motor. For wet pet messes and mud, rely on a dedicated carpet cleaner for deep stain removal to extract liquid safely without risking your dry vacuum.
Choose the right replacement tools and hoses for maintenance
Even with consistent washing and maintenance, plastic and rubber components degrade over years of regular home cleaning. Flexible stretch hoses expand and contract during every use, which eventually creates pinhole punctures or tears inside the deep accordion ribs. These small splits bleed air pressure silently, causing a mysterious loss of suction even when the motor sounds healthy.
When picking out replacement parts or cleaning accessories for an upright vacuum, keep several practical factors in mind:
- Confirm the exact model series fit for any replacement suction hose. Upright vacuums require specific molded end cuffs that snap securely into the mechanical changeover valve and wand latch. Universal slip-on cuffs will not create an airtight seal or trigger the internal valve doors correctly.
- Check the hose length and wall thickness. Replacement hoses made with durable vinyl and molded stress-relief cuffs resist cracking around the connection points when pulled at sharp angles around furniture.
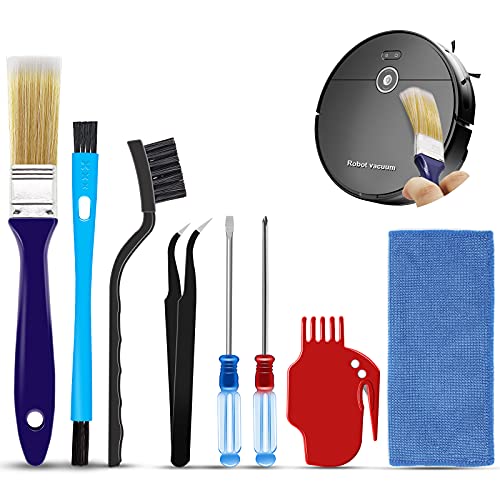
- Pick up a handheld brush-cleaning tool with an integrated cutting groove. These simple tools feature an internal, shielded blade paired with dense bristles, allowing you to slice hair away from the roller without nicking the plastic core or risking cuts from open utility knives.
- Ensure any extra accessory brushes match standard household fitting dimensions so they click securely into your extension wand without wobbling loose during overhead cleaning.

- VC Score9.2
BCP Score is a ranking system developed by bestcleanerproducts.com. BCP Score has no relationship or impact from any manufacturers or sales agent websites. Learn more
- BrandDyson

- VC Score9.0
BCP Score is a ranking system developed by bestcleanerproducts.com. BCP Score has no relationship or impact from any manufacturers or sales agent websites. Learn more
- BrandTweruna

- VC Score9.0
BCP Score is a ranking system developed by bestcleanerproducts.com. BCP Score has no relationship or impact from any manufacturers or sales agent websites. Learn more
- BrandWAONIQ
- VC Score9.0
BCP Score is a ranking system developed by bestcleanerproducts.com. BCP Score has no relationship or impact from any manufacturers or sales agent websites. Learn more
- BrandMidukit

- VC Score9.0
BCP Score is a ranking system developed by bestcleanerproducts.com. BCP Score has no relationship or impact from any manufacturers or sales agent websites. Learn more
- BrandSealegend

- VC Score8.8
BCP Score is a ranking system developed by bestcleanerproducts.com. BCP Score has no relationship or impact from any manufacturers or sales agent websites. Learn more
- Brand4YourHome

- VC Score8.8
BCP Score is a ranking system developed by bestcleanerproducts.com. BCP Score has no relationship or impact from any manufacturers or sales agent websites. Learn more
- BrandYurMemo

- VC Score8.6
BCP Score is a ranking system developed by bestcleanerproducts.com. BCP Score has no relationship or impact from any manufacturers or sales agent websites. Learn more
- BrandVataim

- VC Score8.0
BCP Score is a ranking system developed by bestcleanerproducts.com. BCP Score has no relationship or impact from any manufacturers or sales agent websites. Learn more
- BrandEZ SPARES
- VC Score6.8
BCP Score is a ranking system developed by bestcleanerproducts.com. BCP Score has no relationship or impact from any manufacturers or sales agent websites. Learn more
- BrandIntercleaner
Last update on 2026-10-02 / Affiliate links / Images, Product Titles, and Product Highlights from Amazon Product Advertising API


How to Refinish a Fiberglass Pool

How Do You Keep Raccoons Out of Your Pool?

How to Fix Cyanuric Acid in Your Pool

How to Shape a Pool Cue Tip to Stop Miscues

Best Far Infrared Sauna Sauna Heats: Top Picks of 2026

11 Best Far Infrared Sauna Carbon Fiber Heaters of 2026 For Balanced Full-Body Heat

11 Best Carbon Far Infrared Sauna of 2026 For Even Heat

10 Best Bluetooth Speaker For Sauna of 2026 For Heat and Steam


