
How to Clean a Dyson DC14 Animal Vacuum to Restore Suction

Most people assume that washing every piece of a dusty vacuum under the faucet is the fastest way to get rid of stubborn pet odors. That shortcut will actually ruin the motor if moisture gets trapped inside. The right method is to wash only the top sponge filter in cold water, wipe the cone-shaped dust separator with a dry cloth, and clear tangled hair from the rotating floor roller by hand.
The exact steps depend on where the suction is dropping and how old your parts are. A clog trapped in the lower hose requires a different fix than fur jamming the roller, and the bottom exhaust filter must never get wet. Sponges that stay stiff or smell after washing simply need to be replaced. Taking care of each section properly gets your machine pulling hard again without cracking any fragile plastic.
Safety Steps and Preparation Before You Begin
Working on an upright vacuum requires a few simple precautions to protect both you and the machine. The Dyson DC14 Animal relies on durable but aging molded plastic parts. Being gentle with every latch prevents accidental cracks on pieces that are difficult to mend. Before you pick up any tools, run through this brief preparation checklist:
- Unplug the power cord from the wall outlet: Never clean, inspect, or disassemble the machine while it connects to electricity. Accidental starts can cause serious injury or damage internal wiring.
- Set up a wide, flat work area: Place the vacuum on a bare floor, a garage workbench, or an old drop sheet. Trapped pet dander, dried dirt, and carpet fuzz will spill out as you disconnect the ducting.
- Gather three everyday tools: You only need a coin or flathead screwdriver to unlock the floor head, a pair of household scissors or a seam ripper to slice through wound pet fur, and a dry microfiber cloth to wipe away dust.
- Keep liquids away from the main vacuum body: Water must never touch the motor housing, the power cord, the internal wiring, or the power switch. Moisture pulled into the electrical motor causes permanent failure and electrical shock hazards.
- Plan for drying time: Washing the reusable sponge filter takes just a few minutes, but it must air-dry completely for at least 24 hours before you put it back together.
Emptying the Dust Bin and Wiping the Cone-Shaped Separator
The clear canister collects everyday dirt, while the cone-shaped dust separator (the cyclone assembly sitting directly above the bin) uses spinning air channels to spin fine pet dander away from the motor. Pet hair often mats against the inner screen of the cone assembly. Cleaning this area restores proper airflow, but you must keep water away from the internal funnels.
- Press the bin release catch at the top of the carry handle: Pull the clear bin assembly forward and away from the vacuum spine. This disconnects the dust container from the vacuum body so you can empty it without the heavy motor base in your way.
- Hold the canister deep inside a trash bag and push the red trigger: Pressing the red release lever drops the bottom flap open. Lowering the bin into a trash bag prevents fine dust and pet fur from floating back into your room air.
- Separate the clear bin from the cone-shaped dust separator: Locate the small plastic release catch near the top rim and press it while pulling the clear plastic cylinder down. This step separates the smooth plastic bin from the inner cyclone shroud so you can reach trapped pet hair.
- Wipe the outer grid and funnels with a dry microfiber cloth: Use a dry cloth or a soft dry brush to remove caked-on pet hair and fine dander from the perforated metal or plastic screen. Never wash this cone-shaped assembly with water, because moisture gets trapped inside the narrow internal funnels, mixes with leftover dust to create a thick paste, and enters the motor when you turn the machine on.
- Rinse only the clear plastic bin with cool tap water if needed: If the clear cylinder is dusty, rinse it under running tap water without any dish soap or harsh detergents. Soap leaves a cloudy film on clear plastic, and heat can warp the bottom seal.
- Dry the clear bin completely: Wipe the clear bin with a dry towel and let it sit until every drop of water evaporates before snapping it back onto the cone assembly. Any water droplets left on the plastic walls will get sucked directly into the internal airways.
Washing and Drying the Washable Top Sponge Filter
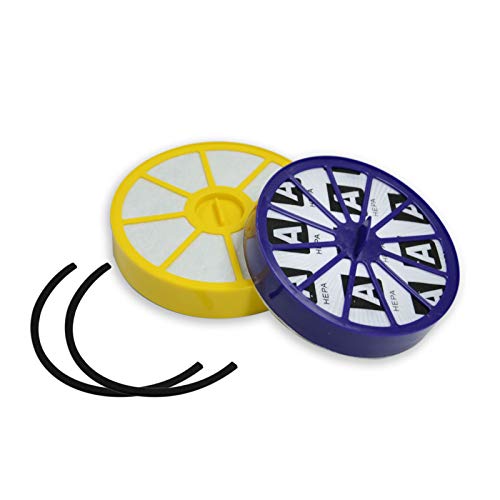
The DC14 Animal uses two separate filters. The washable top sponge filter (the pre-motor filter) rests in a yellow and blue housing on the upper side of the vacuum. This sponge catches the remaining microscopic dust before air reaches the motor fan. Washing this sponge removes built-up pet dander that restricts suction and produces a stale, dusty odor.
- Press the filter release catch on the side of the vacuum: Push the release button on top of the filter housing to swing the filter door open. This unlocks the filter frame without putting stress on the plastic hinges.
- Remove the yellow plastic case and lift out the blue foam sponge: Take the entire cartridge out of the vacuum, then separate the circular blue foam pad from the yellow plastic frame. Separating these pieces allows water to flush directly through the foam cells rather than trapping grit against the plastic frame.
- Rinse the blue foam sponge under cold running tap water: Hold the sponge under cold water without any detergent, laundry soap, or scented cleansers. Harsh chemicals degrade the flexible foam structure and shorten its lifespan.
- Squeeze the sponge repeatedly under the running water: Squeeze the foam firmly with your hands until the water running out of the bottom turns clear. Pushing water through the sponge expels deep-seated pet dander trapped in the inner foam pores.
- Rinse the yellow plastic housing separately: Run cold water through the plastic casing to rinse away stray dirt, then shake off any standing droplets. Keeping this frame clean prevents dirt from transferring back onto the clean sponge.
- Gently squeeze out excess water from the blue sponge: Press the sponge between your palms to remove as much standing water as possible without twisting or wringing the foam. Twisting the pad can tear the edges or misshape the foam ring.
- Allow both parts to air-dry for at least 24 full hours: Lay the blue sponge and the yellow casing on a clean towel in a warm, well-ventilated room. Never place the filter in a clothes dryer, on a radiator, or under direct sunlight, as high heat shrinks the foam. The sponge must be bone-dry before you install it; running the vacuum with a damp filter pulls water straight into the electrical motor, creating mold, foul smells, and motor burnouts.
Clearing Tangled Hair from the Rotating Floor Roller
Long pet fur, human hair, and carpet threads wrap tightly around the rotating floor roller (the spinning brush bar inside the floor head). As hair accumulates, it binds the roller bearings, forces the drive belt to slip, and triggers a loud ratcheting noise from the floor head clutch. Cleaning this assembly keeps the bristles spinning at full speed across your carpets.
- Recline the vacuum handle and lay the machine flat on its back: Lower the vacuum so the bottom cover of the vacuum head faces directly up toward you. This gives you clear visibility and steady access to the roller latches.
- Turn the bottom fasteners a quarter-turn counterclockwise: Insert a coin or flathead screwdriver into the slots of the two or three plastic retaining fasteners on the bottom plate. Turning them a quarter-turn releases the locking tabs without snapping the aged plastic.
- Lift off the bottom cover of the vacuum head: Pull the soleplate (the protective bottom plate) away from the housing. Removing this cover exposes the entire rotating floor roller and the rubber drive belt on the side.
- Cut away wrapped hair along the brush roller groove: Slide the tip of a pair of scissors or a seam ripper along the designated guide groove running down the length of the roller. Slicing the wrapped strands lets you pull them free without cutting the stiff cleaning bristles or nicking the drive belt.
- Clear packed pet fur from the end caps and side bearings: Inspect both ends of the rotating roller where it sits in the floor head brackets. Pull away hair that has wound around the metal axles, because packed hair creates friction that heats up and melts the plastic housing.
- Check the roller for smooth movement: Spin the brush roller with your fingers to confirm it turns without binding. If it drags or feels stiff, clear any remaining debris from the belt path.
- Reattach the bottom cover and secure the fasteners: Seat the bottom plate back into its alignment grooves and turn each fastener a quarter-turn clockwise until it clicks into place. A tight seal on the bottom cover prevents air leaks that weaken floor suction.
Inspecting the Stretch Hose and Lower Air Ducts for Clogs
If your vacuum sounds like it is straining or the floor head fails to pick up debris despite clean filters, a physical blockage is choking the airflow. Pet owners often experience clogs when long hair bundles with carpet fibers or dry pet food. A clog can hide in several key checkpoints along the DC14 air path.
Start by checking the wand and the flexible stretch hose. Remove the wand from the hose handle and look through the metal tube toward a bright light. If the wand is clear, disconnect the flexible hose from the base of the vacuum. Stretch the hose out straight and drop a small coin through it. If the coin does not fall out the other end, hair and debris have lodged inside the ribs. To clear it, feed a blunt, flexible object like a broom handle or a length of garden hose gently through the opening to dislodge the wad. Never use a sharp wire coat hanger, which easily punctures the flexible vinyl hose.
Next, check the clear U-bend pipe at the bottom rear of the machine. Press the small plastic clip that holds this elbow pipe to the base and pivot it out. Pet hair frequently bunches at this sharp turn. Pull out any jammed debris with your fingers. Finally, inspect the lower duct beneath the brush head by reclining the machine and looking directly into the suction inlet behind the roller. When pet accidents or wet food get sucked up accidentally, they turn into hard plugs inside these tight bends.
If your vacuum picked up wet pet messes or liquids by mistake, those damp spills will bind with dust, coat the internal airways, and produce strong odors. Household upright vacuums are built strictly for dry debris. When dealing with damp carpet spills or set-in pet messes, using a dedicated carpet cleaner for deep stain removal is the proper way to pull moisture out of carpet fibers without clogging your dry vacuum airways.
When to Wash Versus When to Replace Your Vacuum Filters
Cleaning your filters restores airflow most of the time, but vacuum filters do not last forever. Regular use with heavy pet shedding eventually packs microscopic pores beyond what cold water can rinse clean. Knowing whether to wash a filter or install a brand-new one keeps your motor running cool and prevents dust from blowing back into your living room.
The top pre-motor sponge filter should be washed every one to two months in a home with pets. But if you notice that the blue foam pad is beginning to crumble, feels stiff and crusty after drying, or shows tears along the edge, washing it will no longer protect the motor. A degraded sponge lets fine grit pass through the fan blades, causing internal wear. If water runoff remains cloudy after multiple rinses, replace the sponge and its yellow housing.
The bottom exhaust filter (the post-motor filter located in the lower base underneath the clear bin) requires a completely different approach. This is a pleated HEPA filter designed to capture microscopic pet allergens and carbon dust from the motor before air exits the machine. Unlike the top sponge, this bottom filter cannot be washed with water. Wetting the pleated paper media damages the delicate microscopic fibers and permanently seals the pores. If you open the lower filter door and find that the pleated paper is dark gray, brown, or coated in pet dust, it must be thrown away and replaced. For homes with multiple pets, replacing the pre-motor sponge and the bottom HEPA filter every 6 to 12 months maintains original airflow and eliminates dusty exhaust smells.
If pet accidents leave lingering odors deep in carpet backing where dry vacuuming cannot reach, running an upright machine will only spread the smell. In those situations, treating the spot with a carpet cleaner for deep pet stains lifts trapped liquids out of the floor before dry dust settles over the area.
Choosing Compatible Replacement Parts for Your Vacuum Head
When regular cleaning no longer resolves weak pickup or roller vibration, replacing worn components restores the vacuum head to working order. The moving parts inside the floor nozzle face constant wear from pet fur, grit, and carpet resistance. Over years of use, brush roller bristles wear down until they can no longer reach deep into carpet pile, and drive belts stretch until they slip under load.
Before purchasing replacement parts for your vacuum head, confirm your exact machine configuration. The DC14 was manufactured in several variations, including versions with a brush control clutch and versions with a direct drive system. A clutched floor head allows you to turn the spinning brush roller off when moving from carpet to bare floors, and it uses two separate rubber belts connected to a central clutch unit. A non-clutched model uses a single continuous belt running straight from the motor shaft. Check the control dial on the front of your vacuum head to verify which system you have before ordering belts or rollers.
Always check your specific model number on the rating label, located on the machine body behind the clear bin, rather than buying parts based on color or generic pictures. Replacement parts such as soleplate covers, internal duct seals, and roller bars must match the precise clip locations and casing widths of your specific model. Selecting parts with proper rubber seals and sturdy bristle patterns ensures your floor nozzle maintains full contact with the floor and delivers strong suction.

- VC Score10.0
BCP Score is a ranking system developed by bestcleanerproducts.com. BCP Score has no relationship or impact from any manufacturers or sales agent websites. Learn more
- BrandTOP VACUUM PARTS

- VC Score9.4
BCP Score is a ranking system developed by bestcleanerproducts.com. BCP Score has no relationship or impact from any manufacturers or sales agent websites. Learn more
- BrandAitruman
- VC Score9.4
BCP Score is a ranking system developed by bestcleanerproducts.com. BCP Score has no relationship or impact from any manufacturers or sales agent websites. Learn more
- BrandPUREBURG

- VC Score9.4
BCP Score is a ranking system developed by bestcleanerproducts.com. BCP Score has no relationship or impact from any manufacturers or sales agent websites. Learn more
- BrandRvanv

- VC Score9.4
BCP Score is a ranking system developed by bestcleanerproducts.com. BCP Score has no relationship or impact from any manufacturers or sales agent websites. Learn more
- BrandCasa Vacuums

- VC Score9.4
BCP Score is a ranking system developed by bestcleanerproducts.com. BCP Score has no relationship or impact from any manufacturers or sales agent websites. Learn more
- BrandKingBra

- VC Score9.2
BCP Score is a ranking system developed by bestcleanerproducts.com. BCP Score has no relationship or impact from any manufacturers or sales agent websites. Learn more
- BrandRstartree

- VC Score9.2
BCP Score is a ranking system developed by bestcleanerproducts.com. BCP Score has no relationship or impact from any manufacturers or sales agent websites. Learn more
- BrandAziliogcc

- VC Score9.2
BCP Score is a ranking system developed by bestcleanerproducts.com. BCP Score has no relationship or impact from any manufacturers or sales agent websites. Learn more
- BrandHome Revolution

- VC Score8.6
BCP Score is a ranking system developed by bestcleanerproducts.com. BCP Score has no relationship or impact from any manufacturers or sales agent websites. Learn more
- BrandVataim

- VC Score8.2
BCP Score is a ranking system developed by bestcleanerproducts.com. BCP Score has no relationship or impact from any manufacturers or sales agent websites. Learn more
- BrandDyson

- VC Score8.2
BCP Score is a ranking system developed by bestcleanerproducts.com. BCP Score has no relationship or impact from any manufacturers or sales agent websites. Learn more
- BrandAftermarket
Last update on 2026-10-02 / Affiliate links / Images, Product Titles, and Product Highlights from Amazon Product Advertising API
Frequently Asked Questions
Can I wash the cone-shaped dust separator with water?
No, you should never submerge or rinse the cyclone assembly under running tap water. Water easily enters the tiny internal cones through the air baffles, where it gets trapped with fine pet dust and turns into thick mud that blocks airflow. That trapped moisture can also get pulled directly into the motor fan, causing rust, electrical shorts, and motor failure. Use only a dry microfiber cloth or a soft, dry brush to wipe down the outer screen and plastic funnels.
How can I tell if the pre-motor sponge filter is dry enough to reinstall?
Feel the very center of the blue foam pad with dry fingers, as the thickest part holds moisture long after the outer surface feels dry. Press it firmly against a dry paper towel; if any damp spot or discoloration appears on the paper, the sponge still holds water. Always allow at least 24 full hours of drying time in a warm, airy spot before putting the filter back into the vacuum.
Why does my vacuum head make a loud ratcheting noise on carpets?
A loud ratcheting or buzzing noise usually means the brush roller clutch is slipping because the rotating floor roller cannot spin freely. Tangled pet hair wrapped around the roller ends or bearing caps creates heavy resistance, forcing the clutch mechanism to disengage to prevent the rubber belt from snapping. Clearing all wrapped fur and strings from the roller and end caps resolves this resistance and silences the clutch.
What should I check if suction is still weak after cleaning the filter and bin?
Inspect the lower air paths where pet hair clogs frequently hide out of sight. Disconnect and check the lower clear U-bend pipe at the bottom rear of the machine, stretch out the flexible hose to check for trapped debris inside its ribs, and inspect the lower duct directly behind the brush roller. Also check the bottom exhaust filter beneath the bin; if that filter is clogged with dark grey dust, it restricts airflow and must be replaced.


How to Refinish a Fiberglass Pool

How Do You Keep Raccoons Out of Your Pool?

How to Fix Cyanuric Acid in Your Pool

How to Shape a Pool Cue Tip to Stop Miscues

Best Far Infrared Sauna Sauna Heats: Top Picks of 2026

11 Best Far Infrared Sauna Carbon Fiber Heaters of 2026 For Balanced Full-Body Heat

11 Best Carbon Far Infrared Sauna of 2026 For Even Heat

10 Best Bluetooth Speaker For Sauna of 2026 For Heat and Steam


