
How to Clean a Dyson DC07 Vacuum to Restore Suction

Pull the power cord from the wall outlet and unlatch the clear dirt canister. Removing built-up grime safely starts with cutting power so the motor cannot accidentally turn on while you work. To restore full suction throughout the machine, wash the upper foam filter in cold water, snip tangled hair off the floor brush roller, and check the suction tubes for hidden clogs.
The exact cleaning steps depend on where dirt is trapped and which filter you are handling. The upper yellow sponge washes easily under the sink, but the lower exhaust filter underneath must stay dry. Blockages can also hide inside the flexible hose or the lower inspection valve near the base. Most importantly, never snap pieces back together until every washed part has dried for at least 24 hours, since trapped moisture will ruin the electric motor. Follow these straightforward steps to refresh every section safely.
How do you safely prepare and empty the canister?
Working on an older upright vacuum requires a gentle touch because the plastic clips become stiff over time. Before touching any latches, take the machine to an open area like a garage, patio, or near an open trash bin. Preparing your work area prevents spilled dust from settling back onto your clean floors.
- Unplug the power cord from the wall outlet: Never clean, clear, or inspect your vacuum while it remains connected to power. Pull the plug directly from the wall and wrap the cord loosely around the rear cord hooks so you do not trip over it while working.
- Release the dirt canister from the vacuum spine: Press down on the silver release catch at the top of the carrying handle with your thumb. Tilt the entire clear canister forward and lift it straight away from the machine body.
- Position the bin deep inside a trash bag: Lower the base of the canister into a heavy-duty trash can or trash bag. Holding the bin low stops loose dust clouds from billowing up into your face and room.
- Trigger the bottom trapdoor: Press the red trigger switch located on the upper spine of the canister handle. The bottom flap will drop open on its spring hinge, allowing the accumulated debris, dust bunnies, and pet hair to fall out.
- Clear compacted lint from the inner tube: Tap the side of the plastic bin gently with your knuckles to dislodge dirt caked around the center core. If pet hair clings to the inner plastic funnel, reach in with a gloved hand or a dry paper towel to pull it free.
- Inspect the bottom rubber seal: Look closely at the flexible rubber rim around the bottom flap. Wipe away stray grit with a dry cloth so the door forms an airtight seal when you click it shut.
Which filters can you wash with tap water?
The Dyson DC07 uses two separate filters to trap dust before and after air touches the motor. Treating them correctly determines whether your machine runs smoothly or overheats. Only the top filter can touch water, while the lower filter must be handled completely dry.
- Open the upper filter housing: Locate the filter compartment on the upper left side of the machine, right next to the carrying handle. Press the release catch on the casing door and swing the lid open to reveal the washable yellow sponge filter (pre-motor filter).
- Separate the foam from the plastic cage: Pull the blue or yellow circular plastic holder out of the vacuum body. Separate the soft yellow foam pad from the blue plastic ring support so water can reach all sides of the material.
- Rinse thoroughly under cold running water: Hold the yellow foam sponge under a cold tap. Squeeze the sponge gently with your fingers to flush out fine silt and gray dust. Never use warm water, dish soap, laundry detergent, or bleach, because cleaning agents leave soapy residues that choke the fine pores of the foam.
- Squeeze out excess water repeatedly: Continue rinsing and squeezing the yellow sponge until the water running through the foam is completely clear. Press the foam between your palms to expel the bulk of the trapped water, but do not wring or twist the sponge, as twisting can tear the aged cell structure.
- Inspect the lower HEPA exhaust filter: Open the lower filter door located beneath the clear dust container near the base of the machine. Take out the lower HEPA exhaust filter (post-motor filter) and examine the white paper pleats. Do not wash this lower filter with water, because wet paper pleats collapse, trap moisture, and choke off motor cooling airflow. If the pleats are dark gray, caked with fine powder, or smell foul, discard it and replace it with a fresh unit.
- Set the foam out to dry: Place the washed yellow sponge on a clean, dry towel in a well-ventilated room. Keep it away from direct heat sources like radiators, hair dryers, or open flames, which will shrink and warp the foam material.
How do you clean tangled hair from the roller?
Hair, thread, and carpet fibers constantly wind around the spinning bristled floor roller (brush bar). When debris builds up at the ends of the roller, friction increases, which puts heavy drag on the drive belt and causes the motor clutch to slip.
- Lower the vacuum flat onto the floor: Lay the vacuum on its back on top of a soft rug or drop cloth. This position exposes the underside of the floor head without scratching the colored plastic trim on your vacuum.
- Release the removable bottom plate: Look at the removable bottom plate (soleplate) covering the roller cavity. Locate the three reversible fasteners, which resemble large plastic screw heads. Turn each screw a quarter turn counter-clockwise using a wide flat-head screwdriver or a coin until they click open.
- Lift away the bottom plate: Pull the front edge of the removable bottom plate up and slide its rear locking tabs out of the base casing. Set the plate aside and brush away any loose fluff clinging to the plastic ribs.
- Unhook the roller from the rubber belt: Grasp the spinning bristled floor roller firmly and lift the non-belt end out of its cradle first. Slide the roller sideways to slip it free from the heavy rubber drive belt. Inspect the rubber belt for cracks, smooth spots, or fraying edges while it is exposed.
- Cut away trapped threads and pet hair: Slide the tip of a pair of blunt-nosed scissors, a seam ripper, or a curved hair-cutting blade along the molded guide groove of the roller. Slice straight through the bound hair loops from end to end. Pull the cut strands away with your fingers, taking care not to snip off the stiff cleaning bristles.
- Clean behind the end caps and bearing spindles: Pull the plastic end caps off both ends of the roller bar. Long hair frequently migrates behind these caps and wraps tightly around the steel axle pins, creating enough friction to melt plastic parts during use. Strip all hair off the metal pins and wipe the area clean with a dry microfiber cloth before pushing the end caps back into place.
- Reinstall the roller and secure the plate: Slip the drive belt over the notched collar on the roller. Seat the roller ends back down into their alignment slots in the base. Fit the rear tabs of the removable bottom plate into their matching slots, push the plate down flat, and turn the three quarter-turn fasteners clockwise to lock the plate tight.
Where do hidden clogs usually block your suction?
If your DC07 motor runs loudly with a high-pitched whine while picking up very little dirt, a blockage is choking the airway. Because air moves through multiple channels depending on whether you clean bare floors or use the extension wand, clogs can hide in several distinct places.
Start by identifying which cleaning mode has lost suction. Turn the vacuum on and feel the end of the flexible wand with your palm. If suction feels strong at the metal wand but completely absent at the floor head, the obstruction sits down in the lower airway channels. If suction is weak in both positions, the clog sits in the upper spine or inside the canister duct.
Check the clear stretch hose first. Press the clip holding the hose collar to the lower base and pull the hose free. Stretch the hose out straight across a hallway and drop a small coin or heavy button down through the top opening. If the object drops out the bottom onto the floor, the hose is clear. If it stops midway, look through the ribbed tube toward a bright light to spot the blockage. Push the trapped wad out gently using the blunt handle of a wooden broom. Never force metal coat hangers or sharp wire tools through the hose, as they will puncture the flexible vinyl skin.
Next, inspect the lower U-bend duct located at the bottom rear of the chassis. This small curved channel routes dirty air from the floor head up into the vacuum body. Press the plastic release tab on the duct, swing it open, and check the bend. This tight turn often catches bottle caps, toothpicks, coins, and dense carpet lint. Pull any stuck items out with needle-nose pliers and verify that the rubber flap inside moves freely without catching.
Never use an upright DC07 to pick up damp garden soil, liquid spills, or wet carpet messes. Moisture combines with fine drywall powder or carpet dust to form a dense paste that hardens like plaster inside the air channels. When you need to pull liquid spills or deep stains out of carpet fibers, use a dedicated spot clean carpet cleaner instead of a dry vacuum.
Can you wash the cyclone assembly with water?
Homeowners often want to dunk the top cone section that spins dirt (cyclone assembly) straight into a sink of soapy water to make it look brand new. Doing this is one of the most common mistakes made on classic Dyson machines. Submerging or flushing the cyclone housing causes severe, long-term problems.
The cyclone assembly contains complex internal cone channels, narrow air baffles, and internal rubber gaskets. When you run water down through the cones, moisture gets trapped inside the small inner chambers where air cannot easily circulate. That moisture mixes with residual microscopic dust to form a thick, foul-smelling mud that glues the internal funnels shut. Once dried, this buildup blocks the high-speed air swirl permanently, destroying suction and producing a sour, moldy smell every time you switch the vacuum on.
Clean the cyclone using dry methods only. Separate the clear dirt bin from the cyclone assembly by pressing the release tab on the spine. You can wash the clear plastic bin itself in warm water with a few drops of dish soap, provided you rinse it cleanly and dry it with a towel. For the cyclone assembly, carry it outside and tap the plastic rim firmly against the inside edge of a trash can to knock loose dust free from the cones.
Use a clean, dry paintbrush with long natural bristles to dust out the fine mesh shroud and the entryways of the individual cone ports. If you have an air compressor or a can of compressed air, blow short bursts through the cone holes from the outside inward to dislodge deeply packed powder. Wipe down the external surfaces and handle with a lightly damp microfiber cloth, but make sure no water drips down into the upper cone openings.
How do you put everything back together safely?
Reassembling your vacuum requires careful verification to ensure that every seal is airtight and every component is dry. Rushing this step risks pulling liquid into the high-speed motor windings, which causes immediate electrical failure.
- Perform the 24-hour drying test on the yellow sponge: Never reinstall the washable yellow sponge filter until it has dried for at least 24 full hours in warm room air. Place the sponge between two sheets of dry paper towel and press down hard with your palms. If the paper towel picks up even a single spot of dampness, set the filter back out to dry for another 12 hours.
- Check that the clear bin is dry: Wipe the inside and outside of the clear bin with a dry lint-free towel. Pay close attention to the bottom rubber flap and the catch mechanism, making sure no water droplets remain hidden in the hinges.
- Assemble the upper filter: Slip the dry yellow foam pad back into the blue plastic support ring. Slide the filter unit into the side filter compartment and press the door shut until the latch clicks firmly into the outer housing.
- Snap the lower filter into place: Verify that the lower HEPA exhaust filter sits flat in its housing under the canister location with its rubber sealing bead facing inward. Push the access cover closed until the outer tabs lock flush against the body.
- Reattach the cyclone top to the clear bin: Align the cyclone assembly over the top opening of the clear bin. Press down gently until the locking tabs hook into place without forcing the brittle plastic.
- Mount the canister assembly to the machine: Place the bottom lip of the dirt canister onto the lower support shelf on the front of the vacuum. Push the top handle back toward the spine until the silver latch clicks decisively.
- Seat the hose and wand securely: Push the flexible hose collar down firmly into the lower suction port at the base of the machine. Slide the wand down into the rear storage channel until it locks in its upright resting position.
- Listen to the motor during startup: Plug the machine into the wall and switch it on. The DC07 should produce a steady, deep humming sound. If you hear a high-pitched squeal or a fluttering noise, switch the unit off immediately and verify that all filter doors and hose connections are seated tightly.
What replacement parts keep your DC07 running strong?
Even with thorough routine cleaning, certain wear-and-tear parts on an older upright vacuum lose their effectiveness over time. When plastic edges wear down or rubber components lose their elasticity, swapping out key pieces restores peak cleaning power without needing a whole new machine.
Look at your filters first. The washable foam sponge degrades after years of washing, losing its springiness and allowing microscopic grit to reach the motor fan. The lower HEPA exhaust unit also fills with micro-particles that simple tapping cannot dislodge. Installing a fresh pair of matching pre-motor and post-motor filters immediately improves exhaust airflow, lowers motor operating temperatures, and eliminates lingering pet odors.
Check the condition of your floor head components. The spinning brush roller relies on stiff, upright bristles to agitate carpet fibers and lift embedded pet hair. If the bristle tufts are bent flat, soft, or worn down to the plastic core, the roller will spin without cleaning the carpet pile properly. A replacement roller bar paired with a fresh drive belt restores deep carpet agitation.
Before buying replacement parts, verify your exact model name and part numbers on the rating label underneath the vacuum base. DC07 models came in several variations, including Animal, All Floors, and Target editions. Some models use a clutch system with two belts that lets you switch the brush roller off for bare floors, while others use a single direct drive belt. Confirming your specific belt style and roller diameter guarantees that your replacement parts snap smoothly into place.

- VC Score9.4
BCP Score is a ranking system developed by bestcleanerproducts.com. BCP Score has no relationship or impact from any manufacturers or sales agent websites. Learn more
- BrandPUREBURG

- VC Score9.0
BCP Score is a ranking system developed by bestcleanerproducts.com. BCP Score has no relationship or impact from any manufacturers or sales agent websites. Learn more
- BrandPetOde

- VC Score9.0
BCP Score is a ranking system developed by bestcleanerproducts.com. BCP Score has no relationship or impact from any manufacturers or sales agent websites. Learn more
- BrandTweruna

- VC Score9.0
BCP Score is a ranking system developed by bestcleanerproducts.com. BCP Score has no relationship or impact from any manufacturers or sales agent websites. Learn more
- Brand4YourHome
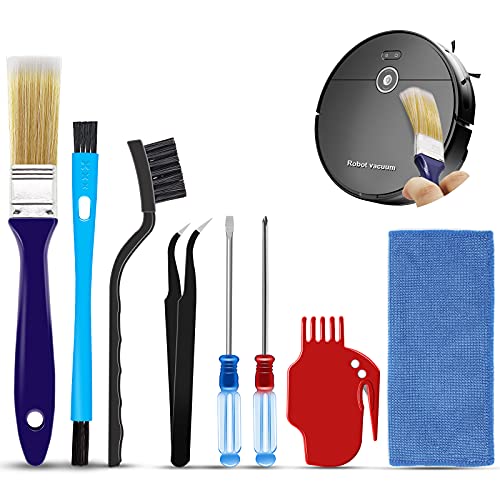
- VC Score9.0
BCP Score is a ranking system developed by bestcleanerproducts.com. BCP Score has no relationship or impact from any manufacturers or sales agent websites. Learn more
- BrandMidukit

- VC Score9.0
BCP Score is a ranking system developed by bestcleanerproducts.com. BCP Score has no relationship or impact from any manufacturers or sales agent websites. Learn more
- BrandSealegend

- VC Score8.8
BCP Score is a ranking system developed by bestcleanerproducts.com. BCP Score has no relationship or impact from any manufacturers or sales agent websites. Learn more
- BrandHolikme

- VC Score8.6
BCP Score is a ranking system developed by bestcleanerproducts.com. BCP Score has no relationship or impact from any manufacturers or sales agent websites. Learn more
- BrandVataim

- VC Score8.4
BCP Score is a ranking system developed by bestcleanerproducts.com. BCP Score has no relationship or impact from any manufacturers or sales agent websites. Learn more
- BrandTOP VACUUM PARTS
- VC Score6.8
BCP Score is a ranking system developed by bestcleanerproducts.com. BCP Score has no relationship or impact from any manufacturers or sales agent websites. Learn more
- BrandIntercleaner
Last update on 2026-10-02 / Affiliate links / Images, Product Titles, and Product Highlights from Amazon Product Advertising API
FAQs
How often should you clean the filters on a DC07?
Wash the yellow pre-motor sponge filter at least once every three months under normal household conditions. If you have multiple shedding pets or clean up fine dust frequently, wash the sponge every month to keep airflow unrestricted. The lower HEPA exhaust filter should be inspected every six months and replaced whenever its paper pleats turn dark gray.
Why does my DC07 make a loud whistling noise?
A high-pitched whistle almost always means air is leaking past a rubber gasket or pulling through a safety valve due to a heavy clog. Check whether the clear bin is clicked firmly against the main chassis and inspect the yellow filter door on the side. If all compartments are shut tight, check the hose, wand, and lower U-duct for a trapped blockage that is forcing the airflow bypass valve open.
Can you wash the lower HEPA exhaust filter?
No, you should never wash the lower post-motor filter with water. The fine paper-like pleats inside the HEPA housing are engineered to catch microscopic allergens, and water breaks down those delicate fibers while trapping dampness. Replace the HEPA filter with a new unit when it becomes visibly discolored or emits a stale odor.
What causes the brush roller to stop spinning?
The roller stops turning when long hair tangles around the end bearings, jamming the axle and causing the drive belt to slip. On models equipped with a brush control clutch, hitting a rug fringe or thick pile triggers the clutch to disconnect the roller, producing a loud ratcheting sound. Clearing tangled debris from the roller ends and turning the clutch dial reset switch usually restores rotation.


How to Refinish a Fiberglass Pool

How Do You Keep Raccoons Out of Your Pool?

How to Fix Cyanuric Acid in Your Pool

How to Shape a Pool Cue Tip to Stop Miscues

Best Far Infrared Sauna Sauna Heats: Top Picks of 2026

11 Best Far Infrared Sauna Carbon Fiber Heaters of 2026 For Balanced Full-Body Heat

11 Best Carbon Far Infrared Sauna of 2026 For Even Heat

10 Best Bluetooth Speaker For Sauna of 2026 For Heat and Steam


