
How to Clean a Big Ball Vacuum Safely

Unplug the machine from the wall before touching any latch or release button. This keeps you safe while unclipping parts. To restore lost suction, rinse the washable filter in cold water, wipe the clear bin with a damp cloth, and snip tangled hair off the floor roller. Most importantly, never wash the cone-shaped dust separator or the ball base under a tap, because trapped water breeds mildew and ruins the motor.
A few details change based on your specific model. Some machines use a washable fabric filter, while filterless versions only need a gentle tap outside to dislodge fine powder. Your floor head might also run on airflow or an internal motor, which dictates how you clean around the bearings. Here is the safest way to take apart each section, clear out the grime, and get your suction back.
Disassembling the Ball Vacuum Safely Without Breaking Clips
Taking apart a ball vacuum can feel nerve-wracking because the machine relies on plastic clips, catches, and snap-fit joints. If you pull on the wrong plastic tab with too much force, you risk snapping a part that keeps the airway sealed. Taking a methodical approach prevents cracked housings and keeps the whole unit running smoothly.
Before you touch any latches, unplug the machine from the wall outlet. Electrical safety comes first, and working on an unplugged vacuum prevents accidental motor startups while your fingers are near moving parts. If your vacuum was stored in a chilly garage, basement, or closet, let it sit at room temperature for an hour. Cold plastic turns brittle, and warm plastic flexes naturally when you release the locking tabs.
- Disconnect the wand and hose: Press the wand release button near the top of the handle. Slide the metal wand straight out of the flexible hose. Next, push the lower hose clip where it joins the base of the ball and slide the hose collar free. Check the rubber ends for splits or stuck debris while the hose is free.
- Release the clear bin assembly: Press the primary bin release trigger on the carry handle. On most ball uprights and canister models, this catch sits right above the dust chamber. Lift the entire canister straight up and away from the central ball chassis. Set the heavy motor base aside on a level floor.
- Separate the clear bin from the cyclone: Look for a secondary release catch along the hinge or the runner track of the canister. When you push this lever past its normal drop-door position, the clear plastic outer sleeve slides completely away from the central cone-shaped dust separator. Set both pieces flat on a clean towel so they do not roll off your work surface.
- Remove the floor nozzle: Lay the vacuum gently on its back. Locate the pivot neck release clip that connects the large floor head to the bottom of the ball housing. Press the release collar firmly with your thumb and pull the floor head straight out. Never twist the neck sideways, as the internal electrical pins or air seals can bend out of alignment.
- Access the filters: Remove the washable foam or fabric filter from the top of the cyclone core or the side hatch of the ball. On ball uprights, a second post-motor filter sits inside the ball wheel itself. Turn the central ball wheel lock counterclockwise with your fingers or a flat tool, take off the outer wheel cover, and pull the circular filter out.
Keep your screws or small clips together in a shallow tray. If any tab feels stuck, stop pulling. Shine a flashlight onto the seam to locate the catch, press squarely on the center of the button, and ease the joint apart with steady, gentle pressure.
Washing and Drying the Filters Without Trapping Odors
Dirty filters choke off airflow, causing the motor inside the ball to strain, overheat, and lose suction. Washing these parts restores breathing room to your machine, but doing it incorrectly can ruin the filter material or introduce mildew smells that are nearly impossible to remove.
Most ball vacuums feature two distinct filters. The first is a washable foam or fabric filter, often called a pre-filter, which catches larger dust specks before air reaches the motor. The second is a dense post-motor filter tucked inside the ball wheel, which traps microscopic particles. Both need regular maintenance to keep exhaust air clean and airflow high.
- Tap away loose debris: Take the filters outside or hold them deep inside a trash bag. Tap the plastic frames gently against the palm of your hand or the side of the trash can. Knocking out loose dirt first keeps the filter material from turning into muddy sludge when water hits it.
- Rinse with cold tap water only: Hold the filter under a running faucet with cold or lukewarm water. Run the stream from the clean side through to the dirty side so the water pushes dirt particles out rather than washing them deeper into the fibers. Never use hot water, as high heat shrinks synthetic filter fabrics and warps plastic support rings.
- Skip soaps and household detergents: Wash the material using water alone. Dish soap, laundry detergent, and scented cleaning sprays leave behind chemical films. These residues attract sticky dust, clog microscopic pores, and generate foul smells when warm exhaust air passes through them later.
- Squeeze out excess water: Squeeze the foam core gently between your palms to press out excess water. Never wring, twist, or stretch the material, which tears the delicate foam seams. For solid pleated filters, tap the plastic rim lightly against a dry towel until water stops dripping.
- Dry completely for 24 to 48 hours: Place the filters in a warm, dry room with good air movement. Stand them on their edges on a dry microfiber towel so air circulates around all sides. Never put them in a clothes dryer, on top of a radiator, or under a hair dryer, because direct heat melts the glue seals.
Patience during the drying phase is critical. If you reinstall a filter that is even slightly damp inside, the powerful motor will pull moisture directly into the electrical bearings. That moisture leads to rusted motor windings, foul mold smells, and total motor failure.
Cleaning the Clear Bin and Cone-Shaped Dust Separator
The clear dust bin and the cone-shaped dust separator do two very different jobs, and they must be cleaned using completely different methods. The clear bin is simply a plastic container, but the separator above it contains a complex network of narrow air channels that fling fine dust out of the air stream.
The most common and destructive mistake owners make is running the entire cone-shaped separator under the kitchen faucet. While it looks like a single piece of molded plastic, the inner body contains internal baffles and sound-dampening foam. Water runs into these internal channels easily, but surface tension prevents it from draining back out. That trapped moisture mixes with fine drywall dust or pet dander, forming a thick paste that cakes inside the air funnels and breeds black mold.
Clean the clear bin by wiping it down with a damp microfiber cloth. If the inside wall has sticky residue, you can wash the clear plastic shell under the tap using cold water, provided it is completely detached from the cyclone unit. Avoid harsh chemical cleaners or abrasive scouring pads, which scratch clear plastic and leave it cloudy. Dry the bin thoroughly with a soft cloth before setting it aside.
Clean the cone-shaped dust separator using dry methods only. Hold the unit over a garbage can and tap the rim firmly with your hand to dislodge caked powder. Take a soft, dry paint brush, an old toothbrush, or a handheld detailing brush to wipe away dust clinging to the metal or plastic mesh shroud. If you have a can of compressed air, blow short bursts through the small cone openings from the outside inward to dislodge stubborn dirt. Wipe the exterior housing and rubber sealing gaskets with a barely damp cloth, then wipe them dry immediately.
Clearing Tangled Hair from the Floor Head and Spinning Brush Roller
When a ball vacuum struggles on carpets, the problem is almost always in the floor head. Hair, carpet fibers, and threads wrap tightly around the spinning brush roller, also known as the brush bar. As layers of hair build up, they create friction against the end caps, slow down rotation, and strain the internal drive belt or roller motor.
- Open the soleplate: Turn the floor nozzle upside down so the brush compartment faces up. Look for the locking fasteners on the bottom plate. These are usually quarter-turn screws or sliding latch clips. Use the edge of a coin or a flat-blade screwdriver to turn the fasteners a quarter turn counterclockwise until they pop open, then lift the soleplate off.
- Lift out the spinning brush roller: Slide the end of the roller out of its retaining slot. If your floor nozzle uses an air-driven floor tool, the roller slips out directly once the gate is open. If your model uses an electric motor inside the head, slide the rubber drive belt off the side cog before pulling the roller completely out.
- Cut tangled hair along the guide groove: Most brush bars have a narrow groove molded straight down the plastic core between the bristle tufts. Slide the tip of small, blunt-ended scissors or a specialized cutting hook along this channel. Cut straight through the hair bundles. Once cut, pull the strands away by hand. Never yank hard on tangled hair without cutting it first, or you will pull nylon bristle bundles out of the roller body.
- Clean the end bearings: Hair naturally migrates outward toward the metal axle pins and bearing caps. Pull off the removable end caps on both sides of the roller. Clear away any hidden rings of hair wrapped around the metal axle pins. If hair packs tightly into these corners, the friction generates heat that melts the plastic end caps.
- Inspect the suction airway: Shine a flashlight down the clear pivot neck of the floor nozzle. Small coins, toy pieces, and clumps of pet fur often get wedged in the lower bend right behind the roller. Pull out any clogs with your fingers or a pair of blunt tweezers.
Dry ball vacuums handle everyday dirt with ease, but they cannot handle damp messes. Vacuuming wet pet accidents or damp carpet spots pulls moisture into the head, where hair and dirt combine into a cement-like plug. For wet spills or deep-set carpet odors, use an extraction machine such as a carpet cleaner for deep pet stains or a dedicated carpet cleaner for stubborn stains instead of risking your dry vacuum.
Once the brush roller and floor head are clear, follow this quick checklist before plugging the machine back in:
- Filter dryness: Squeeze the washable foam filter in your hand. If your skin feels even slightly cool or damp, let it dry longer.
- Canister seals: Check that the clear bin clicked securely into the cone-shaped separator with no gaps along the rubber seal.
- Roller rotation: Spin the brush roller with your fingers after replacing the soleplate. It must turn freely without rubbing against the housing.
- Hose connection: Push the lower hose cuff firmly into the ball base until the release button clicks fully into its hole.
Choosing Helpful Tools for Vacuum Head and Roller Maintenance
Maintaining a ball vacuum floor head is much faster when you have the right accessories on hand. Cleaning hair from a spinning brush roller by hand is frustrating and slow, especially in homes with multiple pets or family members with long hair. A few basic tools keep maintenance simple and protect delicate vacuum parts from accidental damage.
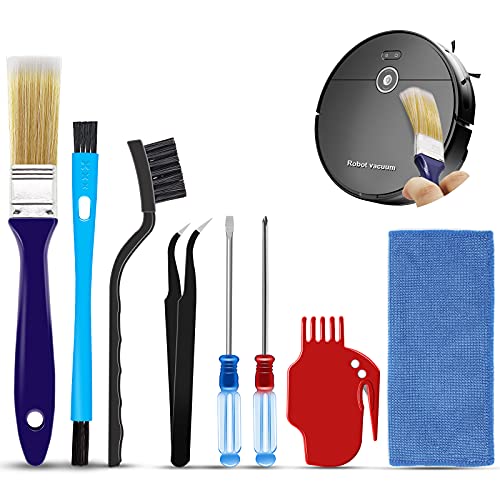
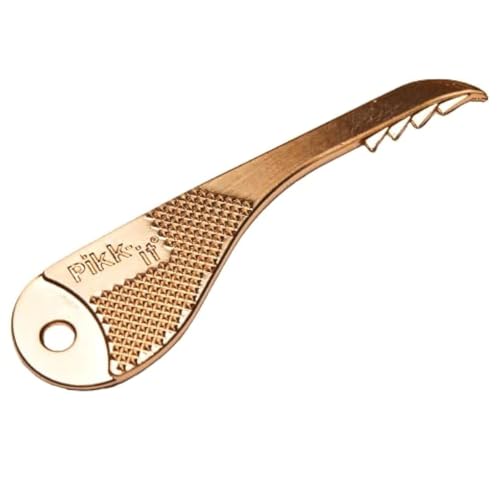
A dedicated roller cleaning tool is the most practical addition to your cleaning kit. These small handheld accessories combine a safe, recessed cutting blade with a row of stiff comb teeth. The comb slides under tightly wound pet hair to lift it away from the plastic core, while the shielded blade slices cleanly through threads without cutting the bristles. Using a shielded cutter is far safer for the roller than using open utility knives, which can gouge the plastic core or slice the drive belt.
Small detailing brushes with stiff nylon bristles also make a noticeable difference when servicing the vacuum head and cyclone shroud. These brushes reach deep into the recessed corners around the roller bearings and clear fine lint from the tiny intake holes on the separator. Look for tools made from durable plastics that provide a comfortable grip and feature bristles that do not shed while you work.
When selecting accessories for floor head maintenance, make sure any attachment nozzles you choose match your vacuum's connection style. Standard friction-fit tubes require stretchable universal adapters, while specialized wands need compatible snap-lock fittings to form an airtight seal. Keeping a small cleaning kit stored right next to your vacuum makes regular roller clearing an effortless habit rather than a messy chore.

- VC Score9.0
BCP Score is a ranking system developed by bestcleanerproducts.com. BCP Score has no relationship or impact from any manufacturers or sales agent websites. Learn more
- BrandTweruna

- VC Score9.0
BCP Score is a ranking system developed by bestcleanerproducts.com. BCP Score has no relationship or impact from any manufacturers or sales agent websites. Learn more
- BrandPetOde

- VC Score9.0
BCP Score is a ranking system developed by bestcleanerproducts.com. BCP Score has no relationship or impact from any manufacturers or sales agent websites. Learn more
- BrandSealegend
- VC Score9.0
BCP Score is a ranking system developed by bestcleanerproducts.com. BCP Score has no relationship or impact from any manufacturers or sales agent websites. Learn more
- BrandMidukit

- VC Score8.8
BCP Score is a ranking system developed by bestcleanerproducts.com. BCP Score has no relationship or impact from any manufacturers or sales agent websites. Learn more
- BrandHolikme

- VC Score8.8
BCP Score is a ranking system developed by bestcleanerproducts.com. BCP Score has no relationship or impact from any manufacturers or sales agent websites. Learn more
- BrandYurMemo
- VC Score8.6
BCP Score is a ranking system developed by bestcleanerproducts.com. BCP Score has no relationship or impact from any manufacturers or sales agent websites. Learn more
- BrandPikk-it

- VC Score8.6
BCP Score is a ranking system developed by bestcleanerproducts.com. BCP Score has no relationship or impact from any manufacturers or sales agent websites. Learn more
- BrandVataim

- VC Score8.4
BCP Score is a ranking system developed by bestcleanerproducts.com. BCP Score has no relationship or impact from any manufacturers or sales agent websites. Learn more
- BrandTweruna

- VC Score8.0
BCP Score is a ranking system developed by bestcleanerproducts.com. BCP Score has no relationship or impact from any manufacturers or sales agent websites. Learn more
- Brandsmcca

- VC Score7.2
BCP Score is a ranking system developed by bestcleanerproducts.com. BCP Score has no relationship or impact from any manufacturers or sales agent websites. Learn more
- BrandEZ Vac Brush
Last update on 2026-10-02 / Affiliate links / Images, Product Titles, and Product Highlights from Amazon Product Advertising API
FAQs
Can I rinse the cyclone cones under the tap?
No, you should never rinse the cone-shaped dust separator under running water. Water gets trapped inside the internal baffles and foam insulation, creating mold and mixing with dust to form clogs. Clean the cyclone using dry methods only, such as tapping it over a trash can, brushing the shroud with a stiff nylon brush, or using compressed air.
What should I do if my vacuum smells like wet dog after cleaning?
A foul smell almost always means one of the washable filters was reinstalled before it was completely dry. Remove the foam and post-motor filters immediately, check them for any dampness, and let them dry on a flat surface for another full day. If the smell persists, wash the filters again in cold water without soap and wipe down the interior of the clear bin with a diluted vinegar-and-water solution.
How often should I clean the filters on a ball vacuum?
Rinse the washable foam pre-filter at least once every month under normal household use. If you have multiple shedding pets, vacuum fine drywall dust, or use carpet powders, wash the filter every two to three weeks. Inspect the post-motor filter inside the ball wheel every six months and rinse it whenever it shows visible gray discoloration.


How to Refinish a Fiberglass Pool

How Do You Keep Raccoons Out of Your Pool?

How to Fix Cyanuric Acid in Your Pool

How to Shape a Pool Cue Tip to Stop Miscues

Best Far Infrared Sauna Sauna Heats: Top Picks of 2026

11 Best Far Infrared Sauna Carbon Fiber Heaters of 2026 For Balanced Full-Body Heat

11 Best Carbon Far Infrared Sauna of 2026 For Even Heat

10 Best Bluetooth Speaker For Sauna of 2026 For Heat and Steam


