
How to Clean a Ball Vacuum Cleaner to Restore Suction

Cleaning an upright ball vacuum starts with clearing tangled hair from the spinning roller brush, wiping the suction tubes, and rinsing the filters. How far apart the machine needs to come depends on where trapped dirt is choking the airflow. The most critical rule is keeping water away from the electrical motor inside the ball and letting every washed part dry completely before flipping the power back on.
The exact steps also change based on your specific setup. Certain models use non-washable exhaust filters that ruin if they touch water, while washable foam or pleated filters require at least 24 hours to air-dry in a warm room. Blockages deep inside the ball suction channel also need a bit more care than a surface hair wrap on the floor nozzle. Here is how to strip down the key parts safely, remove stubborn grime, and bring back strong suction.
Prep Work and Safety Checks Before Dismantling
A ball vacuum packs a powerful motor and multiple air channels into a compact frame. Taking it apart without a plan can lead to cracked plastic tabs or lost screws. Before loosening any latches, prepare your workspace and make sure the machine is completely safe to handle.
- Unplug the power cord from the wall outlet. Never service an upright vacuum while it is plugged in. Accidental starts can cause severe hand injuries around the spinning roller brush.
- Let the motor cool down completely. If your vacuum shut off suddenly, the motor likely overheated due to a blockage. Wait at least 45 minutes for internal parts to cool before opening any housings.
- Work on a hard floor or lay down a towel. Opening the dust chambers and roller head will drop fine silt, dried grit, and tangled hair. Working on a bare floor makes cleanup quick.
- Gather a few simple tools. You will need scissors or a hair cutter, a clean microfiber cloth, and a coin or flat tool to turn the plastic locking dials.
- Check the power cord for damage. Verify the power switch sits in the off position. Inspect the electrical cord for cuts, exposed copper wires, or crushed insulation before you start.
Removing Hair and Debris from the Spinning Roller Brush
The vacuum head takes the brunt of daily cleaning. Long hair, pet fur, and thread wrap tightly around the spinning roller brush until the roller stalls. This puts extra strain on the drive belt and electric motor, often creating a burning rubber smell. Clearing the roller restores agitation and lifts dirt out of carpet fibers.
- Lay the vacuum flat on its back to access the bottom cover plate.
Reason: This position gives you a clear view of the latches and keeps the heavy ball housing stable while you work. - Turn the locking fasteners to release the bottom cover plate.
Reason: Modern ball vacuums use quarter-turn screws or sliding clips that release the base without cracking the plastic casing. - Lift the spinning roller brush out of the floor nozzle housing.
Reason: Hair packs tightly around the end caps and bearing hubs, which you cannot see or reach while the roller remains locked inside. - Slice tangled hair along the roller groove with scissors.
Reason: Cutting along the built-in guide channel lets you peel tangled hair away in one strip without pulling out the stiff bristles. - Pull off the removable end caps to clear hidden threads.
Reason: Hair often wraps behind the plastic end caps, where friction creates heat that can melt the plastic bearings and seize the axle. - Wipe the empty roller housing with a dry microfiber cloth.
Reason: Removing caked dust and grit prevents debris from grinding against the drive belt or spinning axle during operation. - Reinstall the roller brush and lock the bottom cover plate.
Reason: Securing the plate prevents rattling, floor scratches, and sudden roller misalignment during use.
Cleaning the Clear Bin and Dust Cone Chamber Without Water Damage
The clear dust bin collects everyday dirt, while the dust cone chamber above it uses swirling air currents to spin fine dust out of the airflow. While rinsing the clear plastic bin with water is completely safe, letting water touch the dust cone chamber can permanently ruin your machine.
The dust cone chamber contains narrow plastic funnels and internal airways. When you run water through these cones, the fine powder trapped inside turns into thick mud. This sludge clogs the tiny internal openings and creates a breeding ground for mold. Because the inside of the cone assembly does not open easily, that wet dust never dries out, leaving your vacuum with a sour smell and permanently weak suction.
To clean these parts safely, separate the clear bin from the dust cone chamber. Press the bin release catch to drop the bottom flap, then unclip the clear cylinder entirely. Wash the clear plastic container in the sink with warm water and a drop of dish soap. Rinse it thoroughly and wipe it dry with a lint-free cloth.
Treat the dust cone chamber with dry cleaning methods only. Hold the cone assembly over a trash can and tap the sides firmly with your palm to shake loose compacted silt. Use a dry, soft-bristle brush to gently scrub the fine mesh screen. You can wipe the outer plastic shell with a damp cloth, but never submerge the unit or pour water down the air funnels.
Clearing Hidden Blockages Inside the Ball Housing and Suction Tubes
The signature ball on your vacuum houses the heavy motor and serves as the central junction for all suction tubes. When an upright ball machine loses suction at the floor head while the wand still pulls air, a clog is almost always lodged inside the curved tubes near the ball pivot.
- Disconnect the lower suction tube from the base of the vacuum.
Reason: This opening lets you inspect the exact point where dirt transitions from the floor nozzle into the main internal airway. - Examine the clear inspection duct on the side of the ball.
Reason: Large debris such as dry pet food, paper clips, or clumped carpet fibers often lodge directly at this sharp ninety-degree bend. - Look through the internal suction tube toward a bright light.
Reason: Peering through the tube reveals partial blockages that allow some air through but trap hair and dust over time. - Push trapped debris out using a flexible plastic cleaning line or cardboard tube.
Reason: Rigid wire coat hangers can puncture the flexible rubber bellows or scratch the airtight inner sealing surfaces. - Check the spring-loaded changeover valve near the rear wheels.
Reason: This internal flap switches suction between the floor head and the wand, and stuck debris will prevent it from sealing shut. - Wipe grit away from the exterior ball swivel joints.
Reason: Sand and hair trapped in the ball shell joints cause stiff steering and wear down the smooth plastic pivot points.
Washing and Drying the Filters Safely
Upright ball vacuums rely on two separate filters to keep dust out of the motor and protect your indoor air. The pre-motor filter sits near the dust cone chamber, capturing larger airborne dust. The fine-dust exhaust filter sits inside the ball shell itself, trapping microscopic allergens before air exhausts back into your room. Both filters need regular cleaning to protect the motor from burning out.
- Remove the pre-motor filter from the dust collector housing.
Reason: This washable foam or fabric piece catches fine dust before it can reach the high-speed motor fan. - Twist open the ball shell to remove the fine-dust exhaust filter.
Reason: The center disc of the ball unscrews to reveal the circular exhaust filter, which traps carbon dust and tiny particles right at the motor exhaust port. - Rinse both filters under a cold running tap without soap.
Reason: Detergent and hot water degrade the delicate synthetic fibers and strip the electrostatic charge that traps fine allergens. - Squeeze the foam filter gently until the runoff water turns clear.
Reason: Leaving trapped silt inside the sponge core restricts airflow and hardens the material once dry. - Tap the plastic frame of the exhaust filter against the sink edge.
Reason: Gentle tapping dislodges fine silt settled deep between the pleated folds without tearing the filter material. - Place all filter parts in a warm, well-ventilated spot for at least 24 hours.
Reason: Running the vacuum with damp filters draws moisture directly into the high-speed motor, causing electrical shorts, bearing rust, and mold.
Fixing Remaining Suction Loss or Bad Smells
If you reassembled your vacuum and it still loses suction, whistles, or smells stale, a smaller issue is breaking the airtight vacuum seal or hiding deep in the machine. Work through this checklist to pinpoint the problem.
- Inspect the rubber sealing rings on the dust bin and filter doors. Even a tiny pinch of grit on a rubber gasket prevents an airtight seal. Wipe every rubber ring with a damp cloth and confirm they sit flat in their grooves.
- Check the stretch hose for hairline splits or pinholes. Stretch the hose out under a bright lamp. Look for small tears along the plastic ridges, which bleed off suction pressure before air ever reaches the bin.
- Confirm the filter is completely dry. If a damp filter was installed, it will emit a sour smell as warm air blows through it. Remove the filter, let it air out in the sun, and replace it if the smell persists.
- Tackle deeply embedded carpet odors directly. Sometimes the vacuum simply picks up bad smells from dirty carpets. If you have pet accidents or ground-in dirt, dry vacuuming alone cannot fix the problem. Consider deep cleaning your carpets with a dedicated spot cleaner to eliminate the source of the odor before running your upright vacuum again.
- Reset the thermal safety switch if the motor cuts out. Modern ball machines have an internal cutoff switch that cuts power when the motor overheats. If your vacuum shuts off after five minutes of use, a hidden blockage is still starving the motor of cooling air.
- Know when to stop and contact a professional repair service. If you notice a high-pitched grinding screech, electrical sparks inside the ball casing, or a strong burning plastic smell that persists after the roller is cleared, the motor bearings or internal wiring are damaged. Unplug the machine immediately and contact an authorized repair technician.
Choosing the Right Cleaning Tools for Ball Vacuum Heads
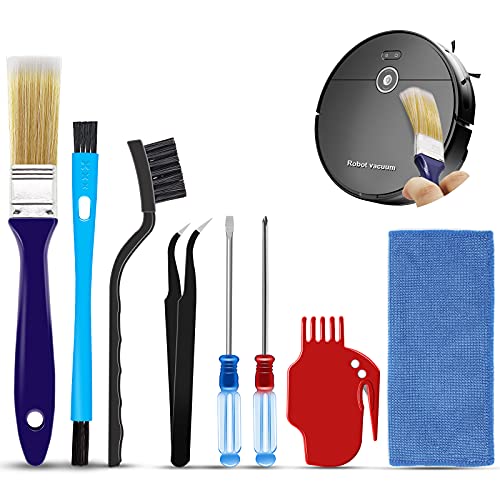
Keeping a ball vacuum running smoothly is much easier when you use dedicated maintenance accessories. Standard household tools like kitchen knives can easily slice the rubber drive belt or puncture thin flexible suction tubes inside the vacuum head. Dedicated cleaning accessories help you reach tight areas without damaging fragile plastic parts.
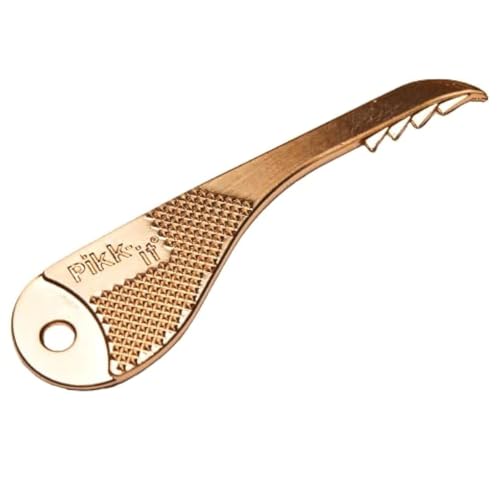
When selecting a cleaning tool for your vacuum head, look for a small handheld tool that features both stiff nylon bristles and a recessed cutting blade. The curved hook lets you slip underneath tightly wound pet hair without scratching the spinning roller brush core, while the shielded blade slices hair cleanly. Stiff nylon bristles sweep fine grit and pet dander out of the bearing channels and roller end caps where standard cloths cannot reach.
Narrow, flexible vacuum attachments also make clearing internal ball airways straightforward. Look for slender, flexible cleaning tubes that connect directly to your vacuum hose or a secondary cleaner. These slim nozzles can bend around the ninety-degree turns inside the ball junction, pulling out clogs without requiring you to take apart the entire motor housing.

- VC Score10.0
BCP Score is a ranking system developed by bestcleanerproducts.com. BCP Score has no relationship or impact from any manufacturers or sales agent websites. Learn more
- BrandEiodoni

- VC Score9.0
BCP Score is a ranking system developed by bestcleanerproducts.com. BCP Score has no relationship or impact from any manufacturers or sales agent websites. Learn more
- BrandTweruna

- VC Score9.0
BCP Score is a ranking system developed by bestcleanerproducts.com. BCP Score has no relationship or impact from any manufacturers or sales agent websites. Learn more
- BrandPetOde
- VC Score9.0
BCP Score is a ranking system developed by bestcleanerproducts.com. BCP Score has no relationship or impact from any manufacturers or sales agent websites. Learn more
- BrandMidukit

- VC Score9.0
BCP Score is a ranking system developed by bestcleanerproducts.com. BCP Score has no relationship or impact from any manufacturers or sales agent websites. Learn more
- BrandINTHVKIL

- VC Score8.8
BCP Score is a ranking system developed by bestcleanerproducts.com. BCP Score has no relationship or impact from any manufacturers or sales agent websites. Learn more
- BrandYurMemo

- VC Score8.8
BCP Score is a ranking system developed by bestcleanerproducts.com. BCP Score has no relationship or impact from any manufacturers or sales agent websites. Learn more
- BrandSealegend

- VC Score8.8
BCP Score is a ranking system developed by bestcleanerproducts.com. BCP Score has no relationship or impact from any manufacturers or sales agent websites. Learn more
- BrandLamoutor

- VC Score8.6
BCP Score is a ranking system developed by bestcleanerproducts.com. BCP Score has no relationship or impact from any manufacturers or sales agent websites. Learn more
- BrandVataim
- VC Score8.6
BCP Score is a ranking system developed by bestcleanerproducts.com. BCP Score has no relationship or impact from any manufacturers or sales agent websites. Learn more
- BrandPikk-it

- VC Score8.4
BCP Score is a ranking system developed by bestcleanerproducts.com. BCP Score has no relationship or impact from any manufacturers or sales agent websites. Learn more
- BrandTweruna
- VC Score6.8
BCP Score is a ranking system developed by bestcleanerproducts.com. BCP Score has no relationship or impact from any manufacturers or sales agent websites. Learn more
- BrandIntercleaner
Last update on 2026-10-02 / Affiliate links / Images, Product Titles, and Product Highlights from Amazon Product Advertising API
Frequently Asked Questions
Can I wash the dust cone chamber with water?
No, you should never wash the dust cone chamber with water. The narrow internal funnels trap fine silt that turns into thick mud when wet. This paste clogs the cyclone airways, cannot dry properly, and causes permanent mildew smells and poor suction.
How do I clean inside the ball without wrecking the motor?
Only use dry cloths and flexible plastic tools to clean the ball area. The electric motor sits directly inside the ball shell, so never spray cleaning liquids or pour water into any openings around the ball. Wipe exterior dirt with a dry or barely damp microfiber towel.
Why does my vacuum still smell bad after cleaning?
A bad smell usually comes from a damp filter that was reinstalled too quickly, or from pet dander stuck deep in the exhaust filter. If you washed the filter, let it dry for an extra day in a sunny spot. If the odor remains after the filter is completely dry, replace the exhaust filter with a fresh one.
How long do filters need to dry before reinstalling them?
Filters need at least 24 hours of air drying at normal room temperature, though thick foam filters may take up to 48 hours in humid conditions. Never place filters in a clothes dryer, on a radiator, or near an open flame, as extreme heat warps the plastic frame and shrinks the fibers.


How to Refinish a Fiberglass Pool

How Do You Keep Raccoons Out of Your Pool?

How to Fix Cyanuric Acid in Your Pool

How to Shape a Pool Cue Tip to Stop Miscues

Best Far Infrared Sauna Sauna Heats: Top Picks of 2026

11 Best Far Infrared Sauna Carbon Fiber Heaters of 2026 For Balanced Full-Body Heat

11 Best Carbon Far Infrared Sauna of 2026 For Even Heat

10 Best Bluetooth Speaker For Sauna of 2026 For Heat and Steam


