
How to Clean a Bagless Vacuum to Restore Suction

Washing the plastic parts restores lost suction. Once the cord is unplugged, empty the dust bin, scrub it clean with mild dish soap, and slice tangled hair away from the roller. Clearing trapped clumps out of the suction hose lets air move freely again and stops stale odors before they blow back into your living room.
How far you go depends on your specific vacuum parts. Soft foam filters rinse clean under running water, but delicate pleated paper filters must stay completely dry to avoid ruin. Some spinning floor rollers unlatch with a simple switch, while others need a coin to turn the lock. Most importantly, let every wet piece air dry for a full day so trapped moisture never enters the motor. Here is how to work through the machine step by step.
The Short Version
- Unplug the power cord from the wall outlet and separate the dirt canister, flexible hose, and floor head over a hard floor or trash bag.
- Rinse the plastic dust canister and cyclone assembly with warm water and mild dish soap, keeping any motorized sections and wiring completely dry.
- Wash soft foam or felt filters under cold running tap water, but only dry-tap fine pleated paper filters to protect their delicate fibers.
- Cut wrapped hair away from the spinning floor roller, dislodge any stuck plugs in the suction hose, and let all washed parts dry for a full 24 hours before putting the machine back together.
Preparation and Safety Checklist
Working on an electrical appliance requires a few simple precautions before you begin taking parts off the frame. A vacuum cleaner pulls high wattage through its motor, and any moisture that reaches live wiring can shock you or ruin the machine forever. Set yourself up in an area that handles dust well, such as a garage, a patio, or over an old towel on a hard kitchen floor.
Gather these basic household supplies before you begin:
- Unplugged power cable: Pull the plug from the wall outlet. Never rely on the power switch alone when opening covers or touching internal parts.
- Liquid dish soap: A mild grease-cutting dish soap dissolves oily dirt and stale odors without softening or clouding clear plastic parts.
- A soft detailing brush: An old toothbrush works well to reach around plastic baffles and dust seals.
- Small scissors or a seam ripper: A pair of scissors with narrow tips helps you slide under tightly wound hair without cutting into plastic parts or rubber belts.
- A long, blunt tool: A broom handle or a wooden dowel lets you push clogs out of long hoses without puncturing the ribbed material.
- Microfiber towels: Clean rags help wipe down the exterior body and soak up surface moisture before air drying.
Keep in mind that dry vacuums are made strictly for dry debris. If you are cleaning up after wet pet messes or muddy spills, running your upright vacuum over damp carpet will pull wet muck into the motor housing. In those situations, you are better off treating the carpet with a dedicated carpet cleaner for deep stain removal so you do not clog your vacuum with wet gunk that turns into thick mold.
Washing the Dust Bin and Cyclone Assembly
The clear dust canister catches heavy dirt, while the cyclone (the plastic cone inside the dust bin with dozens of tiny holes) spins the air to separate fine grit from the main airflow. Over several months of use, a sticky gray film of pet dander, kitchen grease, and fine dust covers these surfaces, cutting down air speed and creating stale exhaust smells.
- Release and empty the canister: Press the canister release button on the vacuum spine and carry the container directly to a trash can. Hold the bottom flap deep inside the bag before hitting the trapdoor release to prevent a cloud of dust from floating back into your room.
- Separate the internal cyclone: Look for a twist icon or a small release latch at the top or center of the bin. On most models, the inner plastic cone twists a quarter-turn counterclockwise and pulls straight out from the outer clear shell.
- Check for electrical connections: Some advanced upright models carry electrical pins on the canister frame to power lights or sensors on the handle. Inspect the outside of the bin. If you see metal contacts or wire tracks, do not soak those areas in water; wipe them down with a damp microfiber cloth instead.
- Soak in warm, soapy water: Submerge the empty plastic bin and the removed plastic cone in a sink filled with warm tap water and a squirt of liquid dish soap. Avoid hot water, because high heat can warp the thin plastic lip and distort rubber sealing gaskets, causing air leaks later on.
- Scrub the small crevices: Use your soft brush to clean inside the funnel holes and around the bottom hinge. Fine silt loves to pack into the corner seams where the flap shuts.
- Rinse and drain: Rinse both pieces under running tap water until all soap bubbles disappear. Shake the parts firmly over the sink to clear standing water from deep pockets, then set them upside down on a clean towel.
Cleaning Vacuum Filters Without Damaging Them
Bagless vacuums rely on steady airflow to cool their motors. When filters clog, the motor works twice as hard, runs hot, and loses suction. Most bagless units contain two distinct filtration stages: a pre-motor filter located before the motor, and an exhaust filter placed where air exits the machine. Treating both filters correctly keeps you from destroying them accidentally.
Start by identifying which filter type you have in your hand:
Foam and felt filters: These spongy pre-motor pads sit right below or above the dust bin. They are washable and catch medium dirt particles before air enters the mechanical motor chamber. Run these under cold tap water. Squeeze them gently with your palms until the runoff water turns completely clear. Do not twist or wring them out like a towel, because twisting stretches and tears the spongy cell structure.
Pleated paper filters: The fine pleated paper filter (often called a HEPA filter) sits behind the motor or at the side of the chassis to catch microscopic dander and pollen. Look closely at the frame. Unless the plastic casing has the word "Washable" molded directly into the plastic, do not let water touch it. Water collapses the delicate paper fibers, turns the trapped dust into a solid mud paste, and chokes the machine permanently. Instead, tap the frame gently against the inside wall of a trash can to shake loose dust free, or brush between the folds using a dry, soft-bristled brush.
The strict drying rule: Any filter that gets wet must dry in open air for at least 24 full hours. Do not place wet filters on hot radiators, and never use a hair dryer or clothes dryer to speed things up, as artificial heat shrinks filter materials and warps their frames. Putting a damp filter back into your vacuum pulls water vapor straight into the electric motor, which causes short circuits, destroys motor bearings, and fills your living room with a sour mildew smell.
Clearing the Spinning Floor Roller
The spinning floor roller (the rotating brush cylinder inside the floor nozzle) sweeps carpet fibers and flicks grit up into the suction channel. Hair, sewing threads, and dental floss wrap tightly around the core of the roller over time. When hair builds up, it creates severe friction against the plastic roller bearings, which can melt the plastic housing, snap your drive belt, or cause the motor to shut down from overheating.
- Access the underside: Lay the vacuum flat on the floor with the base facing up. Locate the retaining tabs, twist locks, or small screws on the bottom soleplate. Turn the locks using a coin or screwdriver and lift the bottom plate off.
- Unhook the roller: Lift the free end of the spinning floor roller up and slide the other end out of the rubber drive belt. Take note of how the belt loops around the metal motor spindle so you can put it back the same way.
- Slice through tangled hair: Find the recessed groove running the length of the roller cylinder. Slide the blade of your scissors or a seam ripper along this groove, cutting through the hair bands without nicking the stiff bristles. Peel the cut hair away with your fingers and drop it straight into the trash.
- Clean the end caps and bearing pins: Pull off the removable caps on both ends of the roller spindle. Long strands of hair love to burrow inside these end caps and wrap around the metal axles. Clean this hidden hair out thoroughly; if left alone, it creates enough friction to scorch the roller frame.
- Check the rubber drive belt: Look along the surface of the belt for cracks, fraying edges, or slick, shiny spots. If the belt feels loose, stretched, or brittle, swap it out for a fresh one so the roller spins at full speed.
- Wipe the floor nozzle throat: Dust accumulates along the floor nozzle walls right behind the roller. Wipe the plastic housing clean with a damp rag before setting the roller and belt back into their slots.
Clearing Hoses and Airway Blockages
If your dust canister is empty and the filters are spotless, but your vacuum still fails to pick up lightweight crumbs, you likely have a physical blockage in the airway (the suction tube or hose opening). A single pen, toothpick, or piece of cardboard can turn sideways in the pipe, creating a trap that collects hair and lint until the tube is choked shut.
- Check airflow by hand: Detach the flexible hose from the vacuum base, switch the unit on, and place your palm over the open hose end. If you feel strong suction pulling against your skin at the hose end, the blockage sits down in the lower floor nozzle. If suction feels weak at the hose end, the clog is inside the hose itself.
- Locate the blockage: Stretch the flexible hose out straight and look through it toward a bright window or lamp. You should see a clean circle of light. If the tube looks dark, squeeze gently along the length of the ribbed rubber; you will feel a hard, dense section where debris has compacted.
- Push the clog free: Lay the hose flat on the floor. Take a smooth broom handle, wooden dowel, or a straightened wire coat hanger with the hook bent flat and wrapped in tape. Push the tool gently through the hose from the opposite direction to knock the debris plug loose. Avoid forcing sharp metal tips against the inner walls, which could puncture the flexible plastic lining.
- Clear the lower suction tube: Check the short, curved rubber hose that connects the floor nozzle to the upright spine. Debris often lodges right in this tight bend. Use your fingers or a pair of blunt tweezers to pull clumps out from the lower intake mouth.
- Wash only non-electric hoses: If your hose is made entirely of plastic without internal metal wires, you can flush it out in the bathtub with warm water. However, if the hose features electrical prongs at the handle end to run a motorized floor head, never submerge it. If washed, hang the hose over a shower rod with both ends pointing down until the interior is bone-dry.
Safe Reassembly and Drying Checklist
Never rush to reassemble your vacuum cleaner while parts are still cool or damp to the touch. Trapped moisture combined with dark plastic cavities creates a breeding ground for bacteria within hours. Walk through this quick verification checklist before you latch the components back into place:
- Paper towel blot check: Take your clean foam filter and press it hard between two dry paper towels. If the paper absorbs even a faint ring of moisture, the filter core is still wet. Set it in a sunny, well-ventilated spot for a few more hours.
- Clear dust bin inspection: Look closely at the inner corners, hinge joints, and bottom trapdoor of the canister. Wipe away any lingering water beads with a dry microfiber rag.
- Belt and roller alignment: Make sure the rubber drive belt sits dead center on both the motor shaft and the spinning brush roller track. Turn the roller by hand three or four times to confirm that the belt tracks smoothly without slipping off the edge.
- Gasket and latch seating: Inspect the rubber ring around the dust bin lid. Ensure it sits flat in its channel so air cannot leak around the rim. Press the canister back onto the chassis until you hear a sharp, solid click from the locking latch.
- Test run: Plug the machine back into the wall outlet. Switch it on and let it run for ten seconds while listening to the motor pitch. The motor should hum at a steady, smooth pitch without whistling, whining, or blowing musty air into the room.
If you regularly deal with stubborn spills or ground-in dirt that strains your vacuum motor, pairing your floor routine with a portable machine for stubborn stains helps keep wet, sticky grit out of your main dry vacuum airways altogether.
What to Look for in Vacuum Cleaning Tools
Cleaning a vacuum cleaner is much easier when you use small maintenance tools designed specifically to clear tight airways and tangled rollers. Standard household scissors often have tips that are too wide to slide into narrow roller recesses, and your fingers cannot reach deep inside tight cyclone cones.
When shopping for basic cleaning accessories to help maintain your machine, look for these practical features:
- Hooked cutting blades: Small handheld tools with a recessed blade and a curved plastic guide allow you to slide beneath hair strands and slice them cleanly without nicking roller plastic or cutting your fingers.
- Dual-ended brush designs: Tools that combine stiff bristle arrays on one end for flicking dried dirt out of cyclone funnels with soft nylon tips on the other make quick work of fine filter dust.
- Narrow crevice attachments: Thin, flexible rubber tubes designed to slip onto standard household vacuum hose necks (such as common 1-1/4-inch friction-fit openings) let you use the vacuum wand itself to clear out deep lint pockets and tight housings before washing.

- VC Score10.0
BCP Score is a ranking system developed by bestcleanerproducts.com. BCP Score has no relationship or impact from any manufacturers or sales agent websites. Learn more
- BrandMajosta

- VC Score10.0
BCP Score is a ranking system developed by bestcleanerproducts.com. BCP Score has no relationship or impact from any manufacturers or sales agent websites. Learn more
- BrandFuzdaycu

- VC Score9.6
BCP Score is a ranking system developed by bestcleanerproducts.com. BCP Score has no relationship or impact from any manufacturers or sales agent websites. Learn more
- BrandLXUEJIE
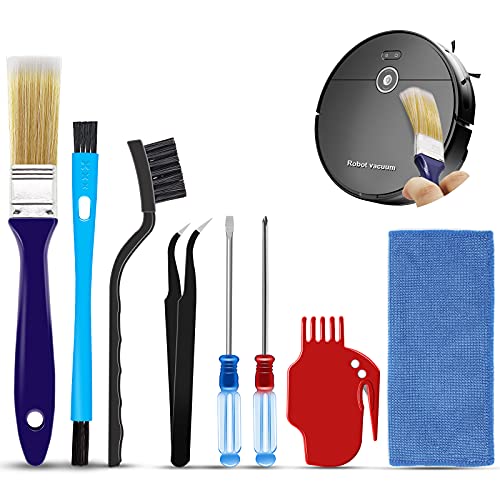
- VC Score9.0
BCP Score is a ranking system developed by bestcleanerproducts.com. BCP Score has no relationship or impact from any manufacturers or sales agent websites. Learn more
- BrandMidukit

- VC Score9.0
BCP Score is a ranking system developed by bestcleanerproducts.com. BCP Score has no relationship or impact from any manufacturers or sales agent websites. Learn more
- BrandTweruna

- VC Score9.0
BCP Score is a ranking system developed by bestcleanerproducts.com. BCP Score has no relationship or impact from any manufacturers or sales agent websites. Learn more
- BrandPetOde

- VC Score8.8
BCP Score is a ranking system developed by bestcleanerproducts.com. BCP Score has no relationship or impact from any manufacturers or sales agent websites. Learn more
- BrandBissell

- VC Score8.8
BCP Score is a ranking system developed by bestcleanerproducts.com. BCP Score has no relationship or impact from any manufacturers or sales agent websites. Learn more
- BrandYurMemo

- VC Score8.6
BCP Score is a ranking system developed by bestcleanerproducts.com. BCP Score has no relationship or impact from any manufacturers or sales agent websites. Learn more
- BrandFuzdaycu

- VC Score8.6
BCP Score is a ranking system developed by bestcleanerproducts.com. BCP Score has no relationship or impact from any manufacturers or sales agent websites. Learn more
- BrandVataim

- VC Score8.4
BCP Score is a ranking system developed by bestcleanerproducts.com. BCP Score has no relationship or impact from any manufacturers or sales agent websites. Learn more
- BrandTweruna

- VC Score8.4
BCP Score is a ranking system developed by bestcleanerproducts.com. BCP Score has no relationship or impact from any manufacturers or sales agent websites. Learn more
- BrandcaSino187
Last update on 2026-10-01 / Affiliate links / Images, Product Titles, and Product Highlights from Amazon Product Advertising API
Frequently Asked Questions
Can I wash the plastic dust bin with hot water?
Stick strictly to warm or lukewarm tap water when washing the clear plastic canister. Hot water softens thin plastics and causes the canister shell to warp out of true alignment. Even slight warping prevents the rubber gaskets from making an airtight seal, resulting in whistling noises and lost suction power.
How do I know if my vacuum filter is safe to wash with water?
Check the plastic frame of the filter for clear lettering, or look in your machine manual under filter maintenance. Soft foam, sponge, and felt filters are almost always washable under cold water. Fine pleated paper filters must stay completely dry unless the manufacturer has molded the word "Washable" directly into the plastic casing.
What should I do if my vacuum still smells bad after a deep clean?
A foul smell after cleaning almost always points to a damp filter that was reinstalled too early, or hidden pet hair packed inside the roller end caps. Pull the filters back out and smell them directly; if they smell sour, wash the foam pads again and let them dry for another full day. Also inspect the small rubber airway neck between the floor head and the machine base for decaying lint.
How often should a bagless vacuum be deep cleaned?
Empty the dirt canister after every major cleaning session, or whenever dirt reaches the marked fill line. Wash the dust bin and foam filters once every month if you have pets or clean high-pile carpets. Clear tangled hair from the spinning floor roller every two to three weeks to stop friction from damaging your drive belt and bearings.


How to Refinish a Fiberglass Pool

How Do You Keep Raccoons Out of Your Pool?

How to Fix Cyanuric Acid in Your Pool

How to Shape a Pool Cue Tip to Stop Miscues

Best Far Infrared Sauna Sauna Heats: Top Picks of 2026

11 Best Far Infrared Sauna Carbon Fiber Heaters of 2026 For Balanced Full-Body Heat

11 Best Carbon Far Infrared Sauna of 2026 For Even Heat

10 Best Bluetooth Speaker For Sauna of 2026 For Heat and Steam


