
How to Clean an Animal Vacuum Cleaner to Restore Suction

Cleaning a pet vacuum means unplugging the power, cutting tangled hair off the spinning roller, emptying the canister, and washing the filters under cool tap water. The exact steps change depending on whether the machine is a cordless stick or a corded upright model. Letting wet pieces air-dry for at least twenty-four hours is just as vital, since trapped moisture will ruin the electric motor.
Different designs also affect what you can wash. Some floor nozzles let the roller pop straight out with a coin, while others stay locked behind a screwed-on bottom cover. Certain filters rinse clean, but paper exhaust filters must stay dry. Clear plastic bins and wand joints can also hide metal electrical pins that should never get wet. The steps below walk through clearing packed fur, removing stubborn pet odors, and restoring strong airflow safely.
The Short Version
- Disconnect power: Unplug corded models from the wall or slide the battery off cordless stick vacuums before touching moving parts.
- Slice hair off the roller: Cut tangled fur along the roller groove rather than pulling it, and strip hair rings off end bearings.
- Wash only rinseable filters: Rinse washable foam and screen filters under cold running tap water without soaps or detergents.
- Dry for 24 hours: Allow all washed parts to air-dry completely before reassembly; damp parts ruin the electric motor and breed mold.
Safety and Preparation Before Cleaning
Cleaning a vacuum packed with animal hair requires a clear workspace and basic precautions to protect the motor and keep dander off clean floors.
- Cut all electrical power: Unplug corded models from the wall outlet. For cordless stick vacuums, remove the battery pack so the motor cannot start while your hands are on the spinning roller.
- Work on a hard surface: Set the vacuum on tile, vinyl, or concrete, or head outside to a porch. Clearing pet hair always releases loose fur and dander.
- Separate main components: Unclip the floor nozzle from the extension wand, take the wand off the handle, and remove the clear dirt bin from the motor housing.
- Locate electrical pins: Check the joints where the cleaner head attaches to the wand. Many pet vacuums use small metal pins inside these connections to power the roller. Keep these pins completely dry.
- Gather basic tools: Keep scissors, a coin for turning latch screws, a dry cloth, and a lined trash can nearby.
Cleaning the Vacuum Head and Roller Brush
Animal hair quickly winds into tight coils around the spinning brush roller. When fur wraps tightly, it locks the roller, strains the rubber belt, and can melt plastic bearings through friction. Follow these steps to clear the floor nozzle.
- Remove the bottom cover: Turn the cleaner head upside down. Locate the bottom cover of the vacuum head surrounding the roller. Most models use slide latches or plastic screw locks that twist a quarter-turn with a coin. Release the latches and lift the cover off.
- Lift out the spinning roller: Many stick vacuums let you slide the roller out of the side casing. Upright models often anchor the roller in a rubber belt. If yours uses a drive belt, slide the roller free from the rubber loop, noting how the belt sits over the motor spindle for reassembly.
- Slice tangled fur along the guide groove: Most rollers have a shallow groove running end to end between the bristles. Slide the tip of scissors or a hair cutter blade down this channel. Slicing through the hair lets it pull away in clumps without tearing out the bristles.
- Clear the end caps and bearings: Pull off the removable end caps on both sides of the roller bar. Remove any tight rings of hair wrapped around the metal pins or bearing cups to stop friction that melts plastic parts.
- Clear the intake neck: Look into the opening behind the roller where dirt enters the nozzle neck. Pull out trapped fur clumps with your fingers, and wipe the plastic throat clean with a dry cloth.
Emptying and Cleaning the Dust Bin
Pet hair rarely stays loose inside a canister. High-speed airflow winds fur into a dense ring around the center core, blocking incoming air and starving the motor of cooling airflow.
Hold the canister deep inside a trash bag before pressing the release latch to keep dander clouds from drifting into the room. If packed hair stays stuck, tap the canister wall with your hand or use a gloved finger to ease the clump free.
Next, inspect the cone-shaped dirt separator inside the canister. This perforated plastic section spins heavy debris out of the airflow. Fine pet dander packs tightly into these tiny holes, forming a chalky crust. Use an old dry toothbrush or stiff nylon brush to sweep across the mesh until every hole is clear.
If the clear bin separates completely from the motor and contains no electrical pins, rinse it under cool tap water to remove oily pet film. If the bin housing includes metal pins or electronic sensors, never wash it under water. Wipe the inside walls with a damp cloth and dry them with a paper towel.
Washing and Drying the Filters
Filters choked with pet dander cause most suction drops in pet vacuums. When fine dust coats the filter pores, the motor strains to pull air, causing overheating and automatic shutoffs. Washing your filters restores airflow, but handling them correctly is critical.
- Check filter types: Check your manual to see which filters are washable. Foam sleeves and felt pre-motor pads are almost always washable. However, many fine dust exhaust filter assemblies (often a HEPA filter) use pleated paper that degrades in water. If an exhaust filter is marked non-washable, tap it against a trash can to dislodge dust, or replace it.
- Rinse with cold water: Hold washable foam and plastic-framed filters under running cold tap water. Squeeze the foam gently until the runoff turns clear. Avoid hot water, which can warp plastic frames.
- Skip detergents: Never use dish soap, laundry detergent, or cleaning sprays. Soap residues leave a sticky film inside the pores that attracts fresh dander, clogging the filter much faster next time.
- Press out moisture: Squeeze foam filters between your palms to remove excess water. Do not twist or wring them, which tears the foam structure. Tap plastic filter frames against your palm to dislodge standing water.
- Allow a full 24-hour air-dry: Lay washed filters flat on a dry towel in a well-ventilated spot away from radiators, clothes dryers, and direct heat. Let them dry for at least 24 hours. Reinstalling a damp filter pulls moisture into the motor, ruining electrical components and growing foul mildew.
Removing Trapped Odors and Pet Dander
If your vacuum exhausts a stale animal odor even after emptying the dirt, dander oils have coated internal surfaces. Dogs and cats produce natural skin oils that coat loose fur. As hair rushes through the machine, these oils smear onto plastic walls and rubber seals, turning sour as the motor warms up.
To eliminate these odors, examine the rubber gaskets sealing the canister lid, filter door, and intake tube. Wipe each gasket with a cloth moistened with equal parts white vinegar and water. The mild acid breaks down oily pet dander without drying out or damaging the flexible rubber.
Allow the rubber seals to air-dry before closing the latches. Avoid spraying air fresheners, deodorizing sprays, or scented oils into the vacuum. Sprays create damp spots that trap dust, while essential oils can degrade plastic housings and harm internal parts.
Keep in mind that dry vacuums only lift loose hair and surface dander. If animal accidents or oily grime have soaked deep into your carpet backing, treating the floor with a dedicated machine built for tough stains and odors or pulling up ground-in filth using equipment made for deep pet stains will keep the room fresh so your main vacuum does not keep sucking up old oily smells.
Checking for Hidden Clogs in Hoses and Wands
Pet vacuums often pick up small rigid debris like kibble, litter, or hair clips alongside loose fur. When a small item catches in a curve, pet hair accumulates against it, forming a solid blockage that chokes airflow. Check these areas to ensure the airway stays clear.
- Perform the coin drop test: Detach the extension wand, hold it upright, and drop a coin through the top. If the coin drops out the bottom, the wand is clear. If it catches inside, a clog is present.
- Inspect flexible hose ribs: Look through the detached flexible hose toward a bright light. If light is blocked, pinch along the ribs. A firm, stiff spot indicates an internal hair clog.
- Push clogs out safely: Push the smooth handle of a wooden broom or mop through the wand or hose to dislodge the jam. Avoid using metal wire or coat hangers, which can puncture flexible hose walls and destroy suction.
- Inspect swivel elbows: Check the tight curved joints where the hose meets the base and where the cleaner head pivots. Long fur frequently builds up in these tight corners. Pull out any packed hair with your fingers or needle-nose pliers.
Choosing the Right Tools for Vacuum Maintenance
Maintaining an animal vacuum is much easier when you use dedicated cleaning accessories. Instead of wrestling with kitchen scissors or tugging at tight knots, purpose-built maintenance tools remove trapped fur quickly and protect your machine from damage.
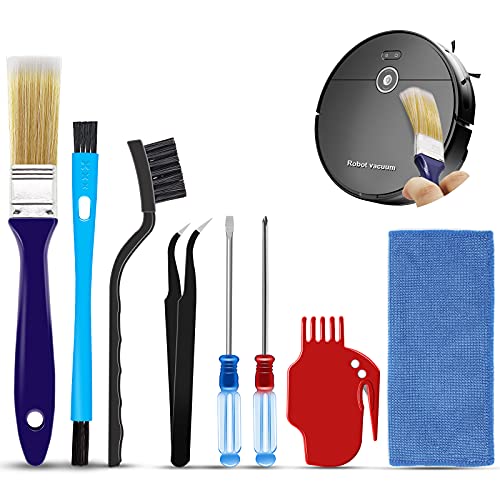
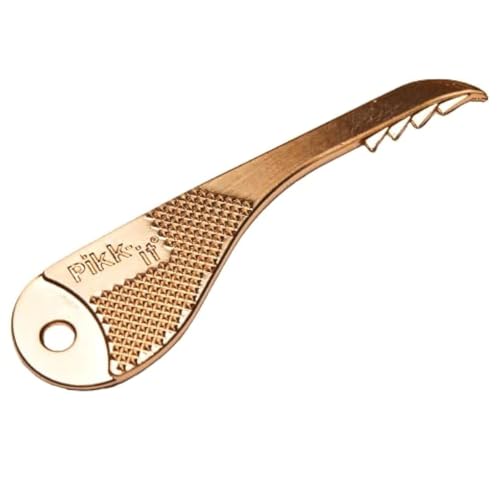
Look for small hair-cutting tools featuring a recessed hook blade and an integrated comb. The hook slips neatly under hair wrapped tightly around the spinning roller, slicing cleanly through packed fur without scratching the roller or cutting your fingers. A dual-ended brush featuring stiff nylon bristles on one side and a soft dusting head on the other works well for clearing fine dander from filter pleats and cleaning dirt separator screens.
For deeper airway blockages, flexible long-reach hose attachments can bend into narrow wand joints and internal intake necks to extract compacted hair. Before buying any cleaning tool or replacement floor nozzle, verify the connection shape and fitting diameter on your vacuum. Ensuring that your model uses standard friction-fit fittings or specific quick-release clips prevents loose connections and air leaks.

- VC Score9.0
BCP Score is a ranking system developed by bestcleanerproducts.com. BCP Score has no relationship or impact from any manufacturers or sales agent websites. Learn more
- BrandPetOde

- VC Score9.0
BCP Score is a ranking system developed by bestcleanerproducts.com. BCP Score has no relationship or impact from any manufacturers or sales agent websites. Learn more
- BrandTweruna
- VC Score9.0
BCP Score is a ranking system developed by bestcleanerproducts.com. BCP Score has no relationship or impact from any manufacturers or sales agent websites. Learn more
- BrandBissell

- VC Score9.0
BCP Score is a ranking system developed by bestcleanerproducts.com. BCP Score has no relationship or impact from any manufacturers or sales agent websites. Learn more
- BrandSealegend
- VC Score9.0
BCP Score is a ranking system developed by bestcleanerproducts.com. BCP Score has no relationship or impact from any manufacturers or sales agent websites. Learn more
- BrandMidukit

- VC Score8.8
BCP Score is a ranking system developed by bestcleanerproducts.com. BCP Score has no relationship or impact from any manufacturers or sales agent websites. Learn more
- BrandBissell

- VC Score8.8
BCP Score is a ranking system developed by bestcleanerproducts.com. BCP Score has no relationship or impact from any manufacturers or sales agent websites. Learn more
- BrandHolikme
- VC Score8.6
BCP Score is a ranking system developed by bestcleanerproducts.com. BCP Score has no relationship or impact from any manufacturers or sales agent websites. Learn more
- BrandPikk-it

- VC Score8.4
BCP Score is a ranking system developed by bestcleanerproducts.com. BCP Score has no relationship or impact from any manufacturers or sales agent websites. Learn more
- BrandcaSino187

- VC Score7.2
BCP Score is a ranking system developed by bestcleanerproducts.com. BCP Score has no relationship or impact from any manufacturers or sales agent websites. Learn more
- BrandEZ Vac Brush
Last update on 2026-10-01 / Affiliate links / Images, Product Titles, and Product Highlights from Amazon Product Advertising API
FAQs
How often should I clean an animal vacuum cleaner?
Empty the dirt bin after every use or whenever hair reaches the fill line. Check the spinning roller every two to three weeks and cut away wrapped hair to protect the drive belt and bearings. Wash your rinseable foam filters once a month with cold water, or sooner if suction drops or you smell stale fur.
Can I wash the entire vacuum head under running water?
Never rinse or submerge the entire floor nozzle under water. Motorized cleaner heads contain electric wiring, circuit boards, and the drive motor that turns the spinning roller. Water entering these components creates serious electrical shock hazards, corrodes metal wires, and ruins the motor. Only wash removable parts that have no electrical contacts, such as bare plastic canisters and foam filters.
Why is suction still weak after emptying the bin and cleaning filters?
When suction remains weak after cleaning the bin and washing filters, a partial clog is almost always lodged in the airway. Inspect the flexible swivel neck behind the cleaner head, the metal extension wand, and the inlet flap where dirt enters the canister. A dense clump of hair wedged in any of these junctions restricts airflow and cuts suction.
What happens if I use the vacuum before the filter is completely dry?
Operating a vacuum with a damp filter pulls moisture directly into the high-speed electric motor. This water can rust motor bearings, cause electrical shorts, and permanently break the machine. Damp filter fibers also trap fresh dust instantly, turning into a muddy crust that ruins suction and creates sour mildew odors that are difficult to eliminate.


How to Refinish a Fiberglass Pool

How Do You Keep Raccoons Out of Your Pool?

How to Fix Cyanuric Acid in Your Pool

How to Shape a Pool Cue Tip to Stop Miscues

Best Far Infrared Sauna Sauna Heats: Top Picks of 2026

11 Best Far Infrared Sauna Carbon Fiber Heaters of 2026 For Balanced Full-Body Heat

11 Best Carbon Far Infrared Sauna of 2026 For Even Heat

10 Best Bluetooth Speaker For Sauna of 2026 For Heat and Steam


