
How to Clean an Animal Vacuum Canister Safely

Most pet owners assume a foul-smelling vacuum bin can simply soak in hot, soapy water. Doing that can destroy the machine, because only the bare clear plastic sleeve should touch water. The inner cone-shaped air spinners and motor sections must stay completely dry. Washing the wrong parts traps moisture inside, which turns pet dander into cement and breeds mildew. To do it safely, unclip the outer bin, rinse it under cold water, and let it air-dry for a full 24 hours.
The process depends on your specific vacuum style. Upright vacuums usually release the canister with a simple latch, while cordless stick models require sliding the clear shell off an inner metal screen. You also need to watch for tiny electrical pins and rubber seals that cannot handle soaking. Here is how to take the bin apart, clear out trapped fur, and put everything back together without losing suction.
Steps to Release and Strip the Animal Vacuum Canister
Emptying pet fur from a bagless vacuum is rarely as simple as pressing a button. Dog hair and cat dander weave into a dense, felted ring around the cylinder. Forcing or twisting parts without releasing the proper catches will snap the small tabs that keep your machine sealed.
Before touching any latches, unplug the vacuum or slide the rechargeable battery pack off the handle. Removing power stops accidental starts and protects internal connections from static.
Follow these steps to take the clear bin apart safely:
- Carry the vacuum outdoors or hold it inside a large trash bag. Reason: Pet dander and static hair float into the air as soon as the trapdoor opens.
- Press the bin release lever over your trash can to drop the bottom flap. Reason: This dumps the heavy bulk of dry hair and litter before you handle the bin directly.
- Locate the secondary release latch along the runner track. Reason: Most pet vacuums use a two-stage latch so the clear plastic dust bin does not slide off during regular cleaning.
- Slide the clear plastic dust bin down and off the housing. Reason: Separating the outer plastic sleeve isolates the washable bin from the motor and internal wiring.
- Place the motor housing on a flat surface away from water. Reason: Keeping the motor upright stops loose dirt from falling back into the fan blades.
- Check the bin rim for metal electrical pins. Reason: Some stick vacuums run power through the canister frame to drive the spinning brush roller in the floor nozzle, and those pins must stay dry.
Washing the Clear Plastic Dust Bin with Cool Water
The clear plastic dust bin is the only part of the canister assembly you should ever submerge or rinse under a faucet. Pet dander carries natural body oils that coat the clear walls in a dull, grey film. That oily layer traps pet odors, which is why a vacuum can smell like a dog crate once the motor warms up.
Rinse the empty bin under running cool or lukewarm tap water. Never use hot water. High heat softens thin polycarbonate plastic, warping the shape so it no longer slides onto the tracks or latches shut.
Keep the bin out of your dishwasher. Dishwasher heating cycles and harsh detergents warp the plastic, ruin rubber gaskets, and turn clear walls cloudy. Instead, add a few drops of mild dish soap to a soft microfiber cloth to break down pet grease safely.
Wipe the inside and outside walls gently. Pay close attention to the bottom rim where the trapdoor clicks shut, as dander often cakes along that lower lip. Rinse thoroughly until no soap bubbles remain, since dried soap film attracts fresh hair like a magnet.
When stubborn odors cling to carpet fibers even after vacuuming, your carpet pile may need wet extraction. You can check the Bissell SpotClean ProHeat Pet 2513W carpet cleaner to tackle deep pet stains and ground-in odors that dry vacuums leave behind.
Clearing Fur and Dander from the Shroud and Cyclone Cones
Inside the clear bin sits the inner core of the vacuum. This assembly includes the shroud (a metal or plastic screen that stops fur from entering the motor) and the cyclone (the cone-shaped air spinner inside the bin that separates fine dust from the airstream). Pet hair frequently binds around this core into a dense mat.
Never wash the cyclone assembly with water. The cyclone cones contain narrow channels that generate spinning vortexes. If water enters these passages, it mixes with trapped dander to create thick mud. When that mud dries, it hardens like plaster, blocking airflow and ruining vacuum suction permanently. Moisture can also seep into the motor.
Clear the shroud and cyclone assembly using dry methods instead:
- Tap the assembly gently inside your trash can. Reason: Light vibration drops packed dander cakes out of the mesh holes without cracking plastic seams.
- Sweep the shroud with a clean, dry paintbrush or soft utility brush. Reason: Soft bristles dislodge fur from tiny perforations without scratching the screen.
- Tease away trapped hair rings using a wooden toothpick. Reason: Fur wraps tightly in the narrow groove between the shroud and the cyclone body, and a blunt tool pulls it free without scratching surfaces.
- Wipe the outside screen with a barely damp microfiber cloth if greasy dander remains. Reason: A well-wrung cloth removes surface grease without allowing water droplets to enter the internal cones.
- Buff the screen dry with a clean towel immediately. Reason: Drying the metal immediately stops dust from clumping into sludge during your next cleaning run.
Drying Rules to Stop Mold and Motor Damage
Reassembling a vacuum canister while damp can destroy your machine. When you start an animal vacuum, the motor pulls air at high speed directly through the bin. Standing water droplets get sucked straight into the motor windings, risking electrical shorts, rusted bearings, or sudden motor failure.
Moisture also encourages mold growth. Dampness mixed with warm pet dander produces foul mildew smells that blow through the exhaust filter every time you vacuum. Use this checklist before putting your unit back together:
- Allow at least 24 hours of natural air drying: Even when the flat plastic walls look dry, moisture lingers in hinge joints, corner grooves, and spring latches.
- Place the bin upside down on a clean dish towel or drying rack: Inverting the bin lets water drain freely onto the towel instead of pooling in bottom corners.
- Keep parts in an airy room with steady room temperature: Good air circulation speeds up drying without stressing the plastic material.
- Avoid all artificial heat sources: Do not use hair dryers, clothes dryers, ovens, or direct summer sun, because high heat twists plastic and ruins latch alignment.
- Do a paper towel check before assembly: Press a dry paper towel into the rim crevices and rubber seal tracks. If the paper picks up any moisture, wait another 12 hours.
Reassembling the Bin and Checking Rubber Gaskets for Full Suction
Once every part is completely dry, reassembly requires careful alignment. Vacuums rely on airtight seals to produce suction. If a part sits crooked by even a fraction of an inch, outside air leaks in, and the machine will struggle to pull fur from carpets.
Inspect the flexible rubber seal (the gasket around the rim and bottom door) before latching parts together. Pet fur often slips beneath these rubber strips during normal use. Hair trapped under a gasket prevents the rubber from laying flat against the plastic rim. Wipe the rubber gaskets clean with a dry cloth and press them firmly into their tracks to create a tight seal.
Line up the clear bin with the guide tracks on the vacuum body. Slide the bin along the runner tracks without forcing it. You should feel smooth travel followed by a firm, audible click as the catch locks into place. If you meet heavy resistance, pause and realign the tracks rather than pushing hard, which can snap plastic tabs.
Close the bottom trapdoor until the latch clicks. Give the door a light pull to confirm it stays firmly shut under tension. If it slips open, check for trapped pet fur around the hinge or latch spring.
Turn the vacuum on and place your hand over the suction inlet to verify airflow. If suction feels strong, your seals are seated correctly. If your living space also faces wet pet messes or mud that dry vacuuming cannot solve, a dedicated machine like the Bissell SpotClean Pet Pro 2458 carpet cleaner can extract wet stains directly from deep carpet pile.
When to Replace Canister Parts or Add Cleaning Attachments
Even with careful cleaning, pet vacuums face heavy wear. Coarse cat litter, small pebbles, and hard debris can score the inner walls of the clear plastic dust bin. While light surface marks are harmless, deeper physical damage requires replacing the part rather than washing it.
Inspect the bin for hairline cracks around the upper latches, hinge pins, and bottom rim. Cracks leak air pressure, reducing the pulling power at the floor nozzle. Replace the bin if the latch spring snaps, if the trapdoor falls open on its own, or if the rubber gasket becomes torn or brittle.
Specialized detailing attachments also simplify canister maintenance. Narrow crevice tools, flexible lint attachments, and stiff mini-brushes reach deep into the shroud gaps to strip felted fur without water. When pet hair wraps around the internal cyclone base, a narrow cleaning tool pulls the strands away quickly without scratching plastic surfaces.
Before ordering replacement dust bins or cleaning tools, check your vacuum model number on its data rating label. This label is usually located under the battery pack, below the handle, or on the underside of the vacuum body. Confirm your canister latch style and listed dimensions so your replacement parts fit securely.

- VC Score9.4
BCP Score is a ranking system developed by bestcleanerproducts.com. BCP Score has no relationship or impact from any manufacturers or sales agent websites. Learn more
- BrandZPSOX

- VC Score9.0
BCP Score is a ranking system developed by bestcleanerproducts.com. BCP Score has no relationship or impact from any manufacturers or sales agent websites. Learn more
- BrandPetOde

- VC Score9.0
BCP Score is a ranking system developed by bestcleanerproducts.com. BCP Score has no relationship or impact from any manufacturers or sales agent websites. Learn more
- BrandSealegend
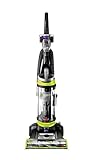
- VC Score9.0
BCP Score is a ranking system developed by bestcleanerproducts.com. BCP Score has no relationship or impact from any manufacturers or sales agent websites. Learn more
- BrandBissell

- VC Score9.0
BCP Score is a ranking system developed by bestcleanerproducts.com. BCP Score has no relationship or impact from any manufacturers or sales agent websites. Learn more
- BrandTweruna

- VC Score8.6
BCP Score is a ranking system developed by bestcleanerproducts.com. BCP Score has no relationship or impact from any manufacturers or sales agent websites. Learn more
- BrandEureka

- VC Score8.6
BCP Score is a ranking system developed by bestcleanerproducts.com. BCP Score has no relationship or impact from any manufacturers or sales agent websites. Learn more
- BrandVataim

- VC Score8.6
BCP Score is a ranking system developed by bestcleanerproducts.com. BCP Score has no relationship or impact from any manufacturers or sales agent websites. Learn more
- BrandBYOFI
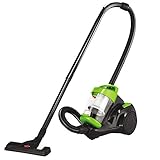
- VC Score8.6
BCP Score is a ranking system developed by bestcleanerproducts.com. BCP Score has no relationship or impact from any manufacturers or sales agent websites. Learn more
- BrandBissell
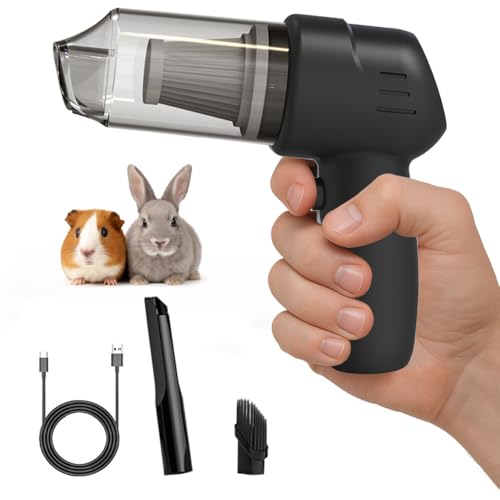
- VC Score8.4
BCP Score is a ranking system developed by bestcleanerproducts.com. BCP Score has no relationship or impact from any manufacturers or sales agent websites. Learn more
- BrandHicoolmam
Last update on 2026-10-01 / Affiliate links / Images, Product Titles, and Product Highlights from Amazon Product Advertising API
FAQs
Can I wash the entire plastic canister with soap and water?
No, you should only wash the detached clear plastic dust bin. The cyclone cones, electrical pins, and motor housing must stay dry. Submerging the entire unit will ruin internal electronics and create mud inside the cyclone channels.
Can water touch the cyclone cones inside the vacuum?
Water should not touch the cyclone cones. Moisture inside the small vortex channels combines with pet dander to form a hardened crust that permanently restricts airflow. Wet air paths also risk drawing moisture into the motor fan.
How do I clear packed pet fur off the inner metal screen?
Use a dry, soft-bristled brush or clean paintbrush to sweep hair away from the mesh holes. Gently tap the assembly over a trash bin to shake out packed dander. For hair wedged in tight seams, use a wooden toothpick to hook it out safely.
How long must the canister dry before using it again?
Leave the washed clear bin to air-dry for at least 24 full hours. Moisture often hides in hinge corners and gasket grooves long after the main walls feel dry. Running the vacuum too early can pull water into the motor and cause mildew.
What gets rid of lingering pet odors inside the plastic dust bin?
Wash the clear bin using cool water and mild dish soap to cut through oily pet dander films. Wipe the walls with a soft microfiber cloth, rinse completely, and let the bin dry in an airy spot. Avoid scented air fresheners or bleach, which can damage the plastic.


How to Refinish a Fiberglass Pool

How Do You Keep Raccoons Out of Your Pool?

How to Fix Cyanuric Acid in Your Pool

How to Shape a Pool Cue Tip to Stop Miscues

Best Far Infrared Sauna Sauna Heats: Top Picks of 2026

11 Best Far Infrared Sauna Carbon Fiber Heaters of 2026 For Balanced Full-Body Heat

11 Best Carbon Far Infrared Sauna of 2026 For Even Heat

10 Best Bluetooth Speaker For Sauna of 2026 For Heat and Steam


