
How to Clean an Absolute Vacuum Without Water Damage

Cleaning an Absolute stick vacuum means washing the dust filters and soft roller bar under cold tap water while keeping every motorized piece completely dry. The one rule that changes how each piece gets cleaned is whether it carries an electric current. Clear plastic bins and bare plastic tools can handle a gentle wipe, but the motor housing and carpet heads have delicate wiring hidden inside.
How you handle the job depends on the floor head you use and how much time you give the parts to dry. Soft fluffy rollers can soak and rinse clean, but direct-drive carpet brushes only need their wrapped hair cut away. More importantly, every washed piece must air-dry for at least 24 hours in a warm spot with good airflow before snapping back together. Putting a damp part back on invites mold and can ruin the motor for good. Here is how to clean each section safely from top to bottom.
Water Destroys the Motor and Direct-Drive Cleaner Heads
Cordless stick vacuums use a battery and motor packed tightly into the main handle. That compact design makes them light and easy to steer, but it also means electrical wires run through almost every major connection. Metal pins pass electrical power from the handle, down through the long metal suction tube, and right into the motor that spins the floor nozzle. If water enters those electrical pathways, the circuit board shorts out, the battery can fail, and the motor will burn out permanently.
Before you turn on the faucet or grab a cleaning spray, you must know which parts can safely touch water and which parts must stay completely dry. Washing the wrong piece is the quickest way to ruin an expensive vacuum.
Here are the parts that can be safely washed with plain water:
- Washable dust screens: Both the central cone filter and the rear exhaust filter screen can be washed under running water.
- Soft roller bars: The fluffy, fabric-covered roller bar designed for hard floors can be rinsed clean once you slide it out of its motorized plastic casing.
Here are the parts that must stay completely dry at all times:
- The main handle and motor body: This housing holds the trigger, the digital screen, the battery pack, and the motor fan. Never spray it with water or submerge it.
- The cone dust separator: The cluster of plastic and metal cones attached to the front of the handle uses air currents to drop dust into the bin. Fine drywall dust and pet dander pack tightly inside these narrow chambers. If you rinse the separator, that fine powder turns into sticky sludge, clogs the internal air holes, and creates permanent foul odors.
- Direct-drive carpet floor nozzles: The floor head with stiff bristles has an electric motor mounted directly inside the plastic housing. Getting this head wet will corrode the drive gears, ruin the electrical bearings, and short out the motor.
- The long metal suction tube: The extension tube looks like a simple metal pipe, but it contains insulated wiring and metal pin connectors at both ends. Water trapped inside the connector sleeves will cause electrical shorts when you snap the vacuum back together.
- The clear dust bin: Many models feature electrical contact pins or delicate spring latches along the runner of the clear canister. Submerging the canister in a sink can trap moisture inside the latch springs and transfer water straight into the motor inlet.
Keep in mind that stick vacuums are built strictly for dry debris. If you accidentally sweep through wet kitchen spills or pet accidents, moisture gets pulled straight past the dust cup and into the spinning motor. For wet messes and deep carpet stains, a dedicated carpet cleaner designed for deep extraction handles liquids safely without risking motor damage.
Wipe the Clear Bin Instead of Soaking It
Over time, fine dust coats the inside of the clear plastic canister. It creates a foggy, gray film that makes the vacuum look dirty even when it is empty. It is tempting to submerge the canister in a sink full of warm, soapy water, but running water can ruin the silicone seals and trap moisture against the connection pins. Cleaning the bin with dry cloths and a barely damp rag keeps it clear without causing electrical issues.
- Empty the dry debris: Hold the vacuum low over a trash can. Press the red bin release runner down firmly to drop the bottom flap open. Shake the canister gently so hairballs and dirt drop straight down into the bag.
- Slide the canister off the machine: Locate the secondary release tab on the metal runner track (often a small red lever or button near the hinge). Press this catch while sliding the clear plastic bin forward off its track. Set the motor handle aside on a dry table.
- Clear the cone dust separator: Take a soft-bristled brush or an old, dry toothbrush and gently whisk away the clingy gray dust gathered around the exterior metal shroud of the cone dust separator. Tap the side of the separator lightly with your palm to knock loose debris from the internal cones. Never push sharp wire, butter knives, or metal picks into the tiny holes.
- Wipe out the clear plastic canister: Take a microfiber cloth and mist it lightly with tap water until it is barely damp. Wring it out thoroughly so not a single drop of liquid squeezes free. Wipe the inside walls of the plastic bin to pull away static dust. Follow up immediately with a dry cloth to buff away streaks.
- Clean the rubber seals: Use a dry cotton swab or dry cloth to clean the red rubber sealing ring at the top of the bin and the rubber gasket around the bottom flap. Grit trapped in these seals causes air leaks that weaken overall suction.
- Check for complete dryness: Look into the bottom corners and latch crevices of the bin. If you see any trace of condensation, let the bin sit upside down on a countertop for at least two hours before sliding it back onto the motor track.
Rinse Dust Screens in Cold Water Without Soap
When your vacuum loses suction, starts whining with a higher pitch, or pulses power on and off in short bursts, the washable dust screen is packed with fine particles. Cordless vacuums automatically pulse the motor to warn you that airflow is restricted. Washing the filter screens restores full suction and prevents the motor from overheating.
- Remove the filters from the housing: Depending on your specific model, you may have one combined filter or two separate screens. Twist the rear exhaust cap counterclockwise to pop off the back filter, or pull the central cone filter straight up and out from the center of the dust separator.
- Tap out the dry powder first: Before putting the filter under the faucet, tap it firmly against the inside wall of a trash can. Rotate it and tap several times. Knocking out the dry cake of dust first stops it from turning into mud when water hits the pleated paper.
- Rinse under cold running tap water: Hold the filter under a cold tap. Let the water run through the open center so it pushes dirt outward through the pleats. Never use hot water, dish soap, bleach, or laundry detergents. Harsh cleaners degrade the flexible rubber seals and dissolve the protective glue holding the pleated layers together.
- Flush and gently squeeze the foam: Cup your hands around the filter, fill the hollow cavity with cold water, and cover both ends with your palms. Shake the filter gently for a few seconds, then dump the cloudy water out. Repeat this step three or four times until the runoff water flows completely clear. Gently squeeze the foam layer with your fingers to press out trapped silt, but do not twist or wring the pleats.
- Flick away standing water: Hold the plastic frame firmly and shake it vigorously over the sink. This flings the heavy water droplets out from deep inside the pleats, which dramatically speeds up air-drying.
Wash your dust screens at least once every month. If you vacuum fine construction dust, vacuum every day, or have multiple shedding pets, wash them every two weeks to maintain peak suction and keep the motor running cool.
Cut Tangled Hair Free from Floor Nozzles Safely
Long human hair and pet fur love to wrap tightly around the spinning brush roller. As hair builds up, it creeps past the plastic shields and winds tightly around the end drive spindle. This creates heavy friction, slows down the roller speed, strains the small drive belt, and drains your battery in half the normal time. Clearing this hair restores your vacuum's carpet-cleaning performance.
- Disconnect the floor head: Press the quick-release button that connects the floor nozzle to the long metal suction tube. Lay the floor head upside down on a flat work surface or a folded towel.
- Unlock the end cap: Look at the side or bottom of the cleaner head for the locking screw or plastic release latch. Many models use a coin slot. Insert a coin or flat tool, turn it a quarter turn counterclockwise until it clicks, and pull the end cap away.
- Identify your roller style:
- Soft roller bar (hard floor head): This roller is covered in soft, velvety felt and colored nylon strips. Slide it straight out of the housing. You can wash this specific roller under cold running tap water. Rinse away grime, gently squeeze the wet fibers in your hands, and stand it upright on its flat plastic end to dry.
- Bristle roller bar (carpet head): This roller has stiff rows of spiral bristles and a metal bearing at the tip. Do not wash this roller in water. Water can seep into the internal metal bearings, causing rust, squealing noises, and seized bearings. Clean this roller dry.
- Slice through hair wraps: Find the recessed groove that runs lengthwise down the plastic core of the bristle roller. Slide a pair of scissors or a small seam ripper down that groove to cut through the hair bands. Do not yank the hair with your bare hands, as pulling hard can rip the stiff bristle tufts out of their slots. Once cut, the hair unwraps easily.
- Clear the drive spindle and clear throat: Look inside the empty floor head cavity. Hair frequently binds around the geared drive cog where the roller connects. Use tweezers or needle-nose pliers to pick these tightly wrapped hair loops away from the spinning gear. Check the clear plastic intake throat for trapped coins, cardboard scraps, or gravel, and shake them free.
- Slide the dry roller back in: Slide the roller bar back onto its drive cog, align the end cap, and twist the coin latch clockwise until it locks flat with the outer plastic casing.
When sticky food spills or pet mud transfer onto your carpet, the spinning brush roller will collect that gummy residue and spread it around your rooms. For sticky, set-in messes, using a dedicated machine for spot clean deep stain removal handles the sticky mess at the carpet root so your stick vacuum rollers stay clean and dry.
Dry Every Wet Part for Twenty-Four Full Hours
The single most dangerous mistake you can make while cleaning an absolute cordless vacuum is putting a filter or roller bar back onto the machine while it is still damp. Even a tiny amount of moisture trapped deep inside the thick foam filter will be sucked straight into the vacuum motor the second you press the power trigger.
When damp air hits the high-speed motor, three bad things happen immediately:
- Electrical failure: Water droplets short out the internal motor coils and digital speed sensors, permanently killing the vacuum.
- Bearing corrosion: Moisture strips the lubricant from the steel motor bearings, causing the machine to emit a high-pitched scream before seizing up.
- Mildew odors: Damp dust trapped inside the dark, warm motor housing creates mold and bacteria. This produces a sour dog smell or musty basement odor every single time you turn on the vacuum. Once mold begins growing inside the sealed motor assembly, getting rid of that smell is nearly impossible.
Always follow these strict drying rules after washing any washable component:
- Give it a full day: Allow all washed parts to air-dry for at least 24 full hours. If you live in a humid area or clean during winter, wait up to 36 or 48 hours.
- Choose the right drying spot: Place your filters and soft roller bars on a dry towel in a warm room with steady airflow. Setting them near an open window, in a gentle breeze from a ceiling fan, or near an air conditioner vent speeds up safe drying.
- Keep away from extreme heat: Never place your vacuum filters on hot heating radiators, on top of a stove, under a blow dryer on high heat, or inside a clothes dryer. Extreme heat warps the molded plastic frame and shrinks the delicate filter fibers, ruining the airtight seal.
- Perform the cool-touch check: Before putting the filter back into the vacuum, press your thumb firmly into the thickest part of the foam core. If the material feels cool against your skin, that coolness means water is still evaporating from deep inside the fibers. Leave it on the counter until it feels completely room temperature and bone dry.
When you snap the dry pieces back into place, listen for a crisp, loud click from every latch and connection point. A loose filter seal or a slightly crooked canister latch allows suction air to escape, causing the motor to work twice as hard to pick up dirt.
Special Cleaning Tools and Thin Hoses Simplify Upkeep
Keeping an absolute cordless stick vacuum clean does not require expensive gear, but a few simple maintenance tools make dealing with hair and fine dust much faster. Standard household scissors are often too bulky to slide beneath tightly wrapped hair loops without gouging the plastic roller core. Investing in a small two-in-one vacuum cleaning tool makes roller maintenance simple and safe.
These compact maintenance tools feature a small hook with a protected, recessed razor blade on one side and a stiff nylon brush on the other. The safety hook slides easily underneath tightly wound pet hair without scratching the roller tube or snipping your fingers, slicing the hair bundle in a single downward pull. The small brush end works well for whisking fine powder out of the silicone canister seals and clearing lint from the intake mesh.
Narrow flexible hose attachments are another practical accessory for stick vacuum owners. Standard wide floor nozzles cannot reach down into clothes dryer lint traps, under tight refrigerator coils, or deep into the narrow corners of the vacuum bin runner. Long, skinny rubber nozzle extensions flex around tight angles to pull out packed lint and trapped dust clumps that choke your machine's airflow.
Before purchasing any cleaning tool kit or attachment hose, verify compatibility with your stick vacuum's specific connector style. Handheld cordless vacuums use quick-release click buttons that vary in diameter and latch shape across different model generations. Ensuring the attachment matches your machine's latch mechanism ensures an airtight fit that protects your vacuum's suction performance.

- VC Score10.0
BCP Score is a ranking system developed by bestcleanerproducts.com. BCP Score has no relationship or impact from any manufacturers or sales agent websites. Learn more
- BrandMajosta
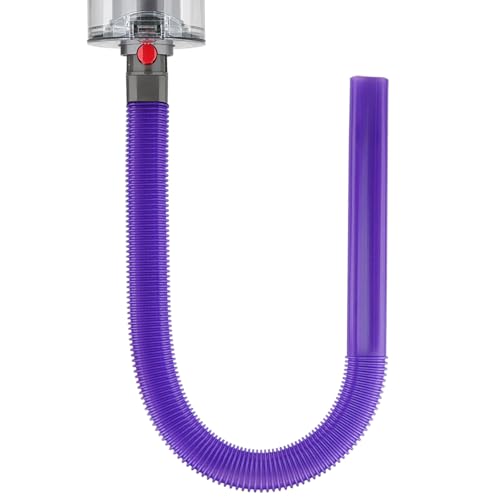
- VC Score9.0
BCP Score is a ranking system developed by bestcleanerproducts.com. BCP Score has no relationship or impact from any manufacturers or sales agent websites. Learn more
- BrandFullclean

- VC Score9.0
BCP Score is a ranking system developed by bestcleanerproducts.com. BCP Score has no relationship or impact from any manufacturers or sales agent websites. Learn more
- BrandPetOde

- VC Score9.0
BCP Score is a ranking system developed by bestcleanerproducts.com. BCP Score has no relationship or impact from any manufacturers or sales agent websites. Learn more
- BrandWAONIQ
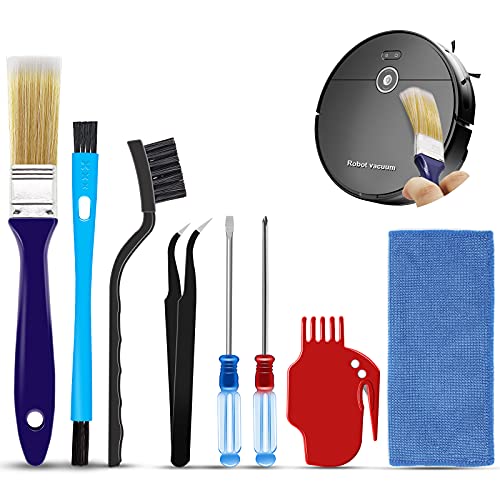
- VC Score9.0
BCP Score is a ranking system developed by bestcleanerproducts.com. BCP Score has no relationship or impact from any manufacturers or sales agent websites. Learn more
- BrandMidukit

- VC Score8.8
BCP Score is a ranking system developed by bestcleanerproducts.com. BCP Score has no relationship or impact from any manufacturers or sales agent websites. Learn more
- BrandHolikme

- VC Score8.8
BCP Score is a ranking system developed by bestcleanerproducts.com. BCP Score has no relationship or impact from any manufacturers or sales agent websites. Learn more
- BrandSealegend

- VC Score8.8
BCP Score is a ranking system developed by bestcleanerproducts.com. BCP Score has no relationship or impact from any manufacturers or sales agent websites. Learn more
- BrandBissell

- VC Score8.6
BCP Score is a ranking system developed by bestcleanerproducts.com. BCP Score has no relationship or impact from any manufacturers or sales agent websites. Learn more
- BrandVataim
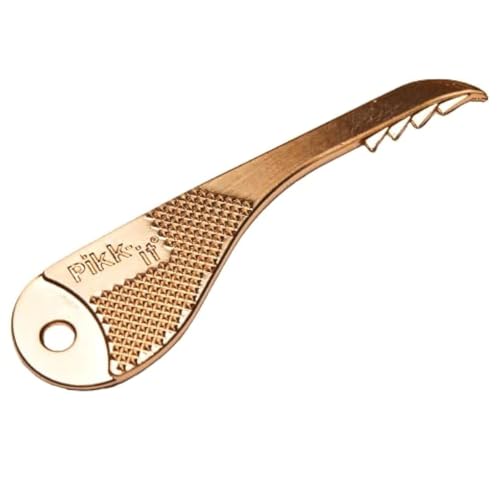
- VC Score8.6
BCP Score is a ranking system developed by bestcleanerproducts.com. BCP Score has no relationship or impact from any manufacturers or sales agent websites. Learn more
- BrandPikk-it
Last update on 2026-10-02 / Affiliate links / Images, Product Titles, and Product Highlights from Amazon Product Advertising API


How to Refinish a Fiberglass Pool

How Do You Keep Raccoons Out of Your Pool?

How to Fix Cyanuric Acid in Your Pool

How to Shape a Pool Cue Tip to Stop Miscues

Best Far Infrared Sauna Sauna Heats: Top Picks of 2026

11 Best Far Infrared Sauna Carbon Fiber Heaters of 2026 For Balanced Full-Body Heat

11 Best Carbon Far Infrared Sauna of 2026 For Even Heat

10 Best Bluetooth Speaker For Sauna of 2026 For Heat and Steam


