
How to Change a Vacuum Head Without Damaging Parts

Inspect the joint where the head connects to the tube before pulling or twisting. Finding the fastener first prevents cracked plastic tabs, since releasing the attachment usually requires pressing a release latch, twisting a tight push-in joint, or pinching a metal spring clip. Once that lock lets go, the old nozzle slides straight off so the replacement can slide smoothly into its spot.
The right method shifts depending on the style of machine and how its parts connect. Upright and cordless stick cleaners often use push buttons, heavy shop wands rely on snug slip fits, and outdoor pool poles hold heads with small spring clips. Trapped grit or hard water scale can also jam these seams tight, turning an easy swap into a stubborn tug of war. Here is how to figure out your connection type, free stuck parts gently, and fit the new head securely.
Identifying Your Vacuum Connection Type
Before pulling or twisting anything, check the joint connecting the vacuum head to the wand or pole. Vacuum attachments rely on three main connection designs: click-release buttons, push-in tight joints (also called friction fits), and spring butterfly clips. Pulling a click-lock head without pressing the hidden latch snaps the plastic tabs, while twisting a locking clip shears off internal alignment ribs.
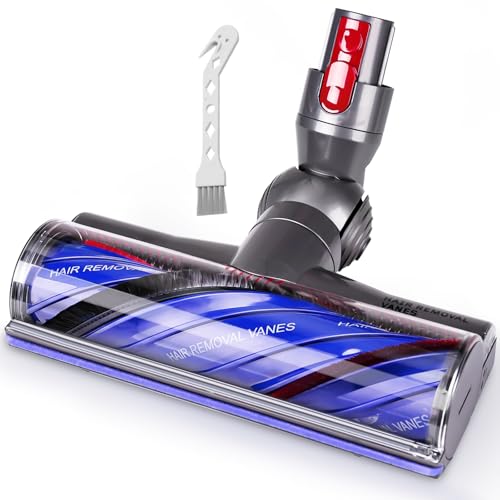
Stick vacuums and modern uprights typically use click-release mechanisms. You will spot a raised plastic button at the seam where the floor nozzle meets the extension tube. Manufacturers often mold this button in a contrasting color, such as red, gray, or purple. In motorized heads, this joint also conceals delicate metal contact pins that transfer power down the wand to spin the roller brush.
Canister vacuums, utility shop vacs, and traditional uprights almost universally use push-in tight joints. These connections have no mechanical levers or buttons. The opening of the floor attachment is slightly tapered, narrowing toward the inside. Pressing the straight wand into the opening creates an airtight friction seal, and motor suction pulls it even tighter during use.
Pool vacuum heads use an entirely different setup engineered for underwater use. A pool head attaches to an aluminum telescoping pole using a spring clip, commonly known as a butterfly clip or V-clip. This flexible V-shaped clip rests inside the mounting neck, and its two spring-loaded prongs pop through holes in the pole. Above the pole mount, a rotating hose connector swivels freely so the ribbed vacuum hose moves without kinking as you sweep the pool floor.
Step-by-Step Guide to Changing Vacuum Heads
Every connection style requires a specific motion to release the old tool and secure the new one. Forcing parts in the wrong direction risks bending wands or stripping plastic latches. Follow these steps for your specific equipment.
Click-Release Cordless and Stick Vacuums
If you use a lightweight cordless model (such as those featured in our guide on what is the lightest cordless vacuum cleaner in 2026), swapping attachments is a regular part of cleaning bare floors and rugs.
- Turn off the vacuum motor and detach the battery pack or pull the wall plug. Shutting down the power protects your fingers from moving parts.
- Place the floor head flat on the floor for stability. Grip the lower end of the wand and place your thumb over the release latch on the tool neck.
- Press the release button down firmly until the locking catch clears the slot.
- Pull the wand straight backward out of the floor head. Avoid rocking the wand side to side, as tilting it can bend or snap the electrical contact prongs inside the housing.
- Align your replacement head with the bottom of the wand, ensuring the plastic guide tracks line up with the matching grooves.
- Slide the wand straight into the neck until you hear a solid click. Pull lightly on the head without touching the button to confirm the latch has locked.
Push-In Friction Joints on Canister and Shop Vacuums
Friction attachments rely on static grip, so pulling them straight apart often feels like fighting a stubborn seal. A twisting action breaks the surface grip immediately.
- Switch off the power and unplug the vacuum from the wall outlet to drop all suction.
- Grip the extension tube with one hand a few inches above the joint. Grasp the neck of the floor tool firmly with your other hand.
- Twist your hands in opposite directions while pulling gently apart. The twisting motion breaks the friction bond between the two tapered sleeves without stressing the plastic.
- Wipe the outside rim of the wand with a dry cloth to clear away grit, lint, or fine dust before mounting the next tool.
- Align the new floor nozzle with the wand at your preferred angle.
- Push the wand firmly into the attachment neck while giving it a quarter turn. This combined motion creates an airtight wedge that stays attached during vigorous cleaning.
Pool Vacuum Heads on Telescoping Poles
Swapping a pool vacuum head is best done on the pool deck to avoid dropping small hardware into the water.
- Lift the vacuum assembly out of the pool and lay the pole and head flat on the ground.
- Locate the spring butterfly clip prongs protruding through the two holes near the base of the pole.
- Squeeze both clip pins inward simultaneously using your thumb and index finger until they sit flush with the pole surface.
- Slide the pole away from the vacuum head handle with a steady backward pull. If the butterfly clip slides out of the handle tube, slide it back into the internal groove so the spring legs push outward.
- Hold the rotating hose connector at the base of the vacuum head and twist the flexible hose end connector back and forth to slide the hose off the neck.
- Position the handle tube of the new pool head inside the open end of your pole. Depress the spring clip pins and slide the pole forward until the pins snap cleanly through the holes.
- Press your 1-1/4-inch or 1-1/2-inch pool vacuum hose firmly onto the rotating hose connector until it forms a snug fit.
How to Free a Jammed or Stuck Vacuum Head Safely
Over time, drywall dust, pet hair, sand, and pool calcium settle into the microscopic gaps between the wand and the attachment neck. This trapped grit acts like sandpaper, locking the two pieces together.
When an attachment refuses to budge, grabbing metal pliers or prying with a screwdriver is tempting. Avoid metal tools. Metal teeth bite into soft plastic, crushing the collar, creating deep gouges, or cracking the neck. Once the collar cracks, the vacuum loses airtight suction, and the attachment will continually fall off during cleaning.
Instead of forcing the part, use gentle mechanical methods and mild temperature changes to break the bond. Work through this practical checklist to loosen a stuck vacuum head:
- Push before you pull: Push the wand slightly deeper into the attachment neck before attempting to twist or pull it out. This slight forward motion shifts trapped dirt particles and breaks the vacuum lock.
- Warm the outer collar: Warm the outer plastic sleeve using a household hair dryer on a low warmth setting for twenty to thirty seconds. The gentle heat causes the outer plastic collar to expand slightly while the inner tube stays cooler, releasing its tight grip. Keep the hair dryer moving so you do not warp the plastic.
- Tap the joint line: Tap gently around the seam where the two pieces meet using the rubber handle of a screwdriver or the heel of your shoe. Light vibrations shatter crusty dirt bonds and shake loose fine grit lodged between the tubes.
- Lubricate with soapy water: Apply two drops of mild liquid dish soap mixed with a tablespoon of warm water around the edge of the joint. Let the soapy mixture seep down into the seam for two minutes to provide slickness against dry dust. Avoid petroleum sprays, because oils degrade plastic and attract more dirt.
- Use rubber grip pads: Wrap a rubber jar-opening pad or thick rubber bands around each side of the connection. Wearing rubber-palmed work gloves gives you strong rotational leverage so you can twist the stuck parts free without slipping.
Choosing the Right Replacement Head and Size Adapters
When replacing a worn-out floor tool, matching the mechanical connection and sizing is essential. Vacuum attachments are not universally interchangeable across all designs, but standard sizing categories make choosing the right replacement relatively easy.
For indoor and shop vacuums, measurement comes down to internal diameter (the measurement across the inside opening of the tool neck) or outer diameter (the measurement across the outside of the wand). Most standard household canister and upright attachments use a 1-1/4-inch fitting, which equals roughly 32 millimeters. Many specialized floor tools use a slightly larger 1-3/8-inch (35 millimeter) fitting. Utility wet-dry shop vacuums commonly step up to 1-7/8-inch or 2-1/2-inch openings to handle coarse wood chips and garage debris. If an aftermarket floor tool does not fit your existing wand, a multi-step universal adapter solves the mismatch. These inexpensive plastic step cones slide directly between your wand and the tool neck, converting a wider hose down to fit a standard 1-1/4-inch accessory snugly.
Selecting the right replacement head also means matching the tool to the specific floor or surface you clean:
- Hardwood and delicate floors: Select a bare-floor nozzle lined with soft natural horsehair or synthetic bristles. These heads allow strong airflow while gliding smoothly across timber, tile, and laminate, preventing scratches from stiff plastic wheels.
- Carpets and area rugs: Opt for a floor head with an internal spinning brush roller or an air-driven turbine tool. The rotating bristles reach into carpet fibers to lift embedded hair and fluff that suction alone leaves behind.
- Vinyl liner and fiberglass pools: Use a smooth bristle-bottom head, such as a weighted triangle or butterfly shape. The edge brushes hold the plastic body off the delicate surface, preventing punctures, scrapes, or liner tears.
- Plaster, concrete, and gunite pools: Choose a heavy wheeled vacuum head equipped with built-in weights. The smooth rolling wheels navigate rough concrete surfaces without dragging, while the integrated weight keeps the head resting firmly on the floor instead of floating toward the surface.
Before purchasing a replacement pool head, verify that it includes a standard spring butterfly clip handle designed to accept standard pool extension poles. A built-in rotating hose connector that swivels 360 degrees is equally valuable, as it keeps your 1-1/4-inch or 1-1/2-inch hose moving smoothly without kinking during sweeping.

- VC Score9.2
BCP Score is a ranking system developed by bestcleanerproducts.com. BCP Score has no relationship or impact from any manufacturers or sales agent websites. Learn more
- BrandPool Supply Town

- VC Score9.2
BCP Score is a ranking system developed by bestcleanerproducts.com. BCP Score has no relationship or impact from any manufacturers or sales agent websites. Learn more
- BrandHappy Tree

- VC Score9.2
BCP Score is a ranking system developed by bestcleanerproducts.com. BCP Score has no relationship or impact from any manufacturers or sales agent websites. Learn more
- BrandTunaMax

- VC Score8.8
BCP Score is a ranking system developed by bestcleanerproducts.com. BCP Score has no relationship or impact from any manufacturers or sales agent websites. Learn more
- BrandEZ SPARES

- VC Score8.8
BCP Score is a ranking system developed by bestcleanerproducts.com. BCP Score has no relationship or impact from any manufacturers or sales agent websites. Learn more
- BrandANBOO

- VC Score8.6
BCP Score is a ranking system developed by bestcleanerproducts.com. BCP Score has no relationship or impact from any manufacturers or sales agent websites. Learn more
- BrandOTTWL

- VC Score8.6
BCP Score is a ranking system developed by bestcleanerproducts.com. BCP Score has no relationship or impact from any manufacturers or sales agent websites. Learn more
- BrandAZYM

- VC Score8.6
BCP Score is a ranking system developed by bestcleanerproducts.com. BCP Score has no relationship or impact from any manufacturers or sales agent websites. Learn more
- BrandGHAMADE
- VC Score8.4
BCP Score is a ranking system developed by bestcleanerproducts.com. BCP Score has no relationship or impact from any manufacturers or sales agent websites. Learn more
- BrandLhhTing

- VC Score8.4
BCP Score is a ranking system developed by bestcleanerproducts.com. BCP Score has no relationship or impact from any manufacturers or sales agent websites. Learn more
- BrandJoaSinc

- VC Score8.2
BCP Score is a ranking system developed by bestcleanerproducts.com. BCP Score has no relationship or impact from any manufacturers or sales agent websites. Learn more
- BrandVACEXT

- VC Score7.4
BCP Score is a ranking system developed by bestcleanerproducts.com. BCP Score has no relationship or impact from any manufacturers or sales agent websites. Learn more
- BrandAOQIVIS
Last update on 2026-10-01 / Affiliate links / Images, Product Titles, and Product Highlights from Amazon Product Advertising API
FAQs
How do I know if my replacement vacuum head is fully locked in place?
For a stick vacuum with a click release, listen for an audible click and give the head a gentle tug away from the wand without touching the release button. If the tool stays firmly seated, the locking pin is safely engaged. For a push-in friction joint, verify that the wand has pushed at least one inch into the neck and remains firmly upright without wobbling when placed against the floor.
Can I wash a vacuum head with water after taking it off?
Simple plastic floor nozzles, horsehair bare-floor brushes, and pool vacuum heads can be safely rinsed with warm water and mild dish soap. But you must never wash or submerge motorized floor heads that contain electric drive motors or wiring pins. For motorized attachments, unclip the spinning brush roller to wash it separately, and wipe the outer plastic body clean using a lightly damp microfiber cloth only.
Why does my pool vacuum head keep floating up or flipping over after I attach it?
A pool vacuum head flips or floats when air remains trapped inside the corrugated vacuum hose or when the head lacks sufficient built-in weights. Submerge the vacuum head and the entire length of hose in the pool to flood them with water before connecting the hose cuff to your skimmer suction port. For vinyl liner pools, choosing a weighted head featuring a built-in pressure-release vent also prevents excessive suction from lifting or tilting the tool off the bottom.


How to Refinish a Fiberglass Pool

How Do You Keep Raccoons Out of Your Pool?

How to Fix Cyanuric Acid in Your Pool

How to Shape a Pool Cue Tip to Stop Miscues

Best Far Infrared Sauna Sauna Heats: Top Picks of 2026

11 Best Far Infrared Sauna Carbon Fiber Heaters of 2026 For Balanced Full-Body Heat

11 Best Carbon Far Infrared Sauna of 2026 For Even Heat

10 Best Bluetooth Speaker For Sauna of 2026 For Heat and Steam


