
How to Change a V8 Vacuum Battery in Five Minutes

Three small screws hold the battery in place. Take off the clear dirt canister, take out one screw on the back handle and two on the base, then slide out the old power pack. Pop the fresh unit straight in and tighten the screws back down. That is all it takes to bring a dead stick vacuum back to life, with no complicated wiring needed.
Before loosening anything, check that the motor is actually dead rather than cutting out from a clogged dust filter. A pulsing motor usually means trapped dirt is choking the airflow, not a dead power cell. Make sure the machine is truly a V8 model, since other generations use different fittings, and grab a small cross-head screwdriver that fits snugly so you do not strip the soft plastic threads. Here is exactly where to turn each screw and how to finish the swap safely.
Quick Check: Dead Battery Versus a Clogged Airway
Before you take your machine apart, make sure your battery is truly worn out. Cordless stick vacuums often mimic a dead power pack when they actually suffer from restricted airflow. Squeezing the trigger on a vacuum that runs for one or two seconds, makes a pulsing or stuttering sound, and suddenly shuts off usually points to an airflow block rather than a bad battery cell. The motor pulses intentionally to tell you that air cannot pass freely through the internal cyclone or filters.
To rule out a simple blockage, wash the central pre-filter and the rear exhaust filter under cold tap water. Let both filters dry completely in a warm room for at least 24 hours before putting them back. Next, inspect the entry nozzle where the wand attaches to the main canister, looking for trapped wads of pet hair, dry leaves, or packed dust. If the vacuum still pulses after cleaning and drying both filters, check the internal flap inside the inlet to confirm it swings freely.
A failed battery behaves very differently from an airflow clog. When the lithium cells inside the pack wear out, the vacuum starts normally without pulsing, but it dies after ten to thirty seconds of cleaning. In other cases, pulling the trigger causes the battery light to flash red continuously, or the vacuum refuses to wake up at all even after sitting on the wall charger overnight. When that happens, the cells have reached the end of their usable life and need a replacement.
Knowing whether your pack is actually spent saves you time and unneeded expense. If you find that the cells are truly dead, exploring how much a new battery for a cordless vacuum costs in 2026 will help you decide whether a fresh battery pack makes economic sense for your cleaning routine. Replacing the pack yourself is simple, inexpensive, and restores original cleaning power in just a few minutes.
Tools and Workspace Setup for the Swap
Swapping a cordless vacuum battery does not require electrical skills or complex shop equipment. The entire swap takes less than ten minutes at your kitchen table. You only need a couple of basic household items to complete the job cleanly and safely.
- A small cross-shaped screwdriver (Phillips #1 or PH1): Do not use a standard household #2 screwdriver. A #2 tip is too wide to seat deep into the narrow plastic screw wells, which can strip the soft screw heads. An eyeglass screwdriver is also a poor choice because its handle is too thin to provide adequate turning grip.
- A small bowl or magnetic tray: The three mounting screws are small and can easily roll off a table or disappear into high-pile carpet. Keep a small dish nearby to hold them as you remove them.
- A clean, flat workspace: Set up on a clean table or workbench with bright overhead lighting. Avoid working over deep carpets or cluttered countertops where loose screws can get lost.
- A dry microfiber cloth: Having a cloth handy lets you wipe away stray dust and debris around the battery cradle while the vacuum is open.
Step-by-Step V8 Vacuum Battery Replacement
Follow these numbered steps to swap out the old power pack safely without damaging your machine.
-
Disconnect the charger and remove all attachments. Unplug the charging cable from the back of the handle, and press the red quick-release buttons to remove the long metal extension wand and any motorized floor nozzle.
Reason: Stripping the vacuum down to its handheld motor body makes it lightweight, easy to balance on your table, and eliminates the risk of an accidental trigger squeeze while you handle tools. -
Release and slide off the clear plastic dirt canister. Pull the red bin release lever on top of the cyclone upward until the bottom flap pops open. Pull the red lever firmly upward a second time while pressing the red bin-release catch located along the bottom metal runner, then slide the clear plastic dirt canister completely off the metal shroud.
Reason: The clear plastic dirt canister physically covers the front two battery screws, so you cannot reach them with a screwdriver until the canister is completely off the machine. -
Remove the single screw on the back of the handle. Position the handheld motor body on its side. Locate the small screw positioned high up on the rear spine of the handle, directly beneath the charging port socket, and remove it by turning counterclockwise.
Reason: This single upper fastener secures the vertical spine of the battery pack directly into the vacuum handle grip. -
Remove the two screws on the underside mounting plate. Turn the motor body over so the base is facing you. Locate the two small screws sitting side by side on the flat front tongue of the battery pack, just below where the canister usually sits, and remove both of them.
Reason: These two lower screws anchor the heavy bottom battery block securely to the suction motor housing. -
Slide the old battery pack down and away. Hold the vacuum handle with one hand and grasp the rectangular battery pack with your other hand. Pull the battery straight down toward the base of the handle until it slides out of its guide tracks.
Reason: The battery connects to the internal motor through flat metal sliding pins, and pulling straight down disconnects these electrical terminals without bending the internal contacts. -
Slide the new battery pack into position. Line up the plastic guide rails of your replacement battery with the matching grooves on the bottom of the vacuum handle. Push the battery pack straight up until it sits flush against the handle and the three screw holes align perfectly.
Reason: Aligning the molded tracks prevents the internal electrical terminal prongs from bending or jamming during installation. -
Drive the three screws back in by hand. Place the rear handle screw into its hole first and turn it clockwise until snug, then install the two underside screws into the front base plate. Stop turning as soon as you feel firm resistance.
Reason: Tightening these fasteners gently by hand prevents you from stripping out the fragile plastic threads molded inside the motor casing. -
Slide the clear plastic dirt canister back onto the cyclone track. Line up the canister guides with the metal tracks on the cyclone body, slide the canister upward until you hear it click into place, and push the bottom flap closed until it snaps shut.
Reason: The canister must be fully seated to create an airtight seal for proper suction and to shield the front battery screws from dirt during everyday vacuuming.
Costly Mistakes to Avoid When Changing the Battery
While changing this battery is straightforward, rushed installations can ruin delicate plastic parts. Keep these simple precautions in mind as you work.
- Avoid overtightening the screws: The screw threads on your vacuum are cut into soft molded plastic, not steel. Turning a screw with too much force will strip the plastic hole instantly. Once stripped, the screw will spin loosely, leaving the battery loose and causing intermittent power cutouts during use. Turn until the screw sits snug against the housing, then stop.
- Never use a power drill or electric screwdriver: Motorized drivers deliver high rotational speed and torque before you can react. Always use a manual hand screwdriver so you can feel the exact tension of the threads.
- Confirm the factory model code before buying: Many stick vacuums look nearly identical on the outside, but their battery shapes and locking clips differ. Look at the printed label on the bottom of your original battery pack. A standard V8 model displays the factory code SV10 (or SV25 on select newer editions). If the label displays SV03, SV04, or SV11, you have a V6 or V7 vacuum, and a V8 battery will not fit.
- Do not force the battery into its slot: If the replacement pack does not slide in smoothly, do not strike it or force it into place. Pull it back out and check the plastic channels for stray dirt, shipping tape, or bent guide tabs.
First Charge and Daily Battery Care
Modern lithium-ion replacement packs require sensible charging habits to deliver long-term runtime. Caring for the battery correctly from day one helps prevent premature cell degradation.
Always give your replacement battery a complete, uninterrupted charge before running the vacuum for the first time. Even though replacement packs usually arrive with a partial charge for safe shipping, completing a full initial charge allows the internal battery management board to balance all internal cells evenly. Leave the vacuum plugged in until the charging indicator lights turn solid or shut off completely.
Heat is the primary enemy of lithium-ion cells. If you run your vacuum on high suction mode (max mode) to clean a thick rug, the battery cells will feel warm to the touch. Never plug the vacuum directly into the wall charger while the pack is still hot from heavy use. Allow the unit to rest at room temperature for fifteen to twenty minutes so the internal cells can cool down before connecting power. Charging hot cells places heavy stress on the battery chemistry and shortens its lifespan.
Store your vacuum in an area with stable household temperatures. Avoid mounting the charging dock inside uninsulated garages, cold porches, or sunny laundry rooms. Keeping your vacuum between 60 and 80 degrees Fahrenheit maintains cell health and ensures maximum suction performance whenever you pick it up to clean.
Choosing the Right Replacement Battery or Power Adapter
When selecting a power source for your stick vacuum, you can choose between direct-fit replacement battery packs and power-tool battery conversion adapters. Understanding how each option works makes finding the best match for your home simple.
Direct-fit replacement batteries are molded to match the exact dimensions of your original equipment. They slide straight into the factory rails, screw down using the three original screw locations, and dock naturally in your existing wall-mounted charging station. When picking a direct-fit pack, confirm that it matches the SV10 factory code and includes built-in protection against short circuits, overcharging, and overheating. Packs with higher milliamp-hour ratings hold more energy, giving you longer cleaning time between charges without altering the balance of the machine in your hand.
Power-tool battery adapters offer a flexible alternative if you already own cordless drill or saw batteries. These adapters screw onto the bottom of your vacuum handle just like a regular battery, but they feature an open receiver slot on the bottom that accepts standard 18-volt or 20-volt tool batteries. This setup allows you to swap fresh tool packs instantly when one runs low, completely eliminating charging downtime. Keep in mind that heavy power-tool packs add noticeable weight to the handle.
For homeowners who find their stick vacuum tiring to maneuver overhead or along stairs, looking into what is the lightest cordless vacuum cleaner in 2026 can help you decide whether a standard lightweight replacement pack or a lighter overall cleaning setup fits your home best.

- VC Score9.8
BCP Score is a ranking system developed by bestcleanerproducts.com. BCP Score has no relationship or impact from any manufacturers or sales agent websites. Learn more
- BrandApexilyfe

- VC Score9.2
BCP Score is a ranking system developed by bestcleanerproducts.com. BCP Score has no relationship or impact from any manufacturers or sales agent websites. Learn more
- BrandBoetpcr

- VC Score9.0
BCP Score is a ranking system developed by bestcleanerproducts.com. BCP Score has no relationship or impact from any manufacturers or sales agent websites. Learn more
- BrandQUASYREALIM

- VC Score8.8
BCP Score is a ranking system developed by bestcleanerproducts.com. BCP Score has no relationship or impact from any manufacturers or sales agent websites. Learn more
- BrandSwidan

- VC Score8.8
BCP Score is a ranking system developed by bestcleanerproducts.com. BCP Score has no relationship or impact from any manufacturers or sales agent websites. Learn more
- BrandOYLIETORA

- VC Score8.6
BCP Score is a ranking system developed by bestcleanerproducts.com. BCP Score has no relationship or impact from any manufacturers or sales agent websites. Learn more
- BrandJJXNDO

- VC Score8.6
BCP Score is a ranking system developed by bestcleanerproducts.com. BCP Score has no relationship or impact from any manufacturers or sales agent websites. Learn more
- BrandMorpilot
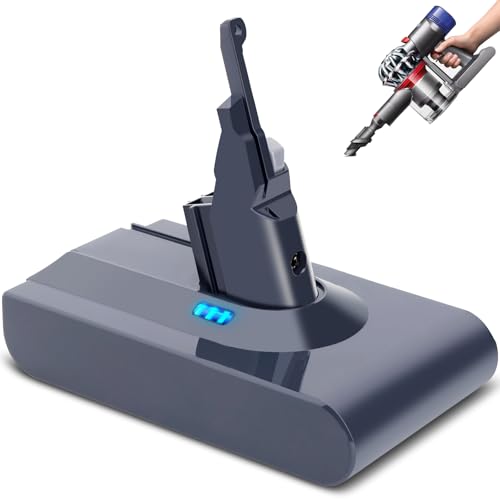
- VC Score8.6
BCP Score is a ranking system developed by bestcleanerproducts.com. BCP Score has no relationship or impact from any manufacturers or sales agent websites. Learn more
- BrandTacerny

- VC Score8.6
BCP Score is a ranking system developed by bestcleanerproducts.com. BCP Score has no relationship or impact from any manufacturers or sales agent websites. Learn more
- BrandKeenstone

- VC Score8.6
BCP Score is a ranking system developed by bestcleanerproducts.com. BCP Score has no relationship or impact from any manufacturers or sales agent websites. Learn more
- BrandLiLeading
Last update on 2026-10-01 / Affiliate links / Images, Product Titles, and Product Highlights from Amazon Product Advertising API
FAQs
How can I verify that my vacuum is an SV10 model?
Look at the sticker on the underside of your current battery pack, right beneath where the vacuum rests on a table. The label lists the model number, serial number, and factory code, where you will see either SV10 or SV25 printed clearly. If the sticker has worn off, you can confirm your model by checking the filter layout: V8 models feature a central cone pre-filter on top and a screw-off round HEPA filter on the back of the motor.
Do I have to remove the dust bin every time I charge the vacuum?
No, you only need to remove the clear plastic dirt canister when replacing the battery pack. During normal daily use, the charging plug inserts straight into the rear port on the handle without touching the canister. The canister only needs to come off during maintenance to uncover the two front mounting screws hidden behind its sliding frame.
Why does my new battery stop running after a few seconds on max suction?
Max mode draws heavy electrical current, and if your filters have fine dust trapped inside them, the vacuum will pull a vacuum lock and shut off to protect the motor. If the vacuum runs well on normal suction but cuts out immediately on max mode, wash both filters thoroughly and let them dry for a full day. Also verify that your replacement battery was charged to 100 percent before use, as a partially charged pack cannot supply the high peak power needed for max mode.
Can I leave the cordless vacuum on its wall charger all the time?
Yes, you can safely leave your vacuum plugged into the charging dock when it is not in use. Modern replacement packs and chargers feature smart charging chips that switch to a tiny maintenance trickle once the cells reach full capacity. Just be sure the charging area stays at comfortable room temperature and is away from direct sunlight or space heaters.


How to Refinish a Fiberglass Pool

How Do You Keep Raccoons Out of Your Pool?

How to Fix Cyanuric Acid in Your Pool

How to Shape a Pool Cue Tip to Stop Miscues

Best Far Infrared Sauna Sauna Heats: Top Picks of 2026

11 Best Far Infrared Sauna Carbon Fiber Heaters of 2026 For Balanced Full-Body Heat

11 Best Carbon Far Infrared Sauna of 2026 For Even Heat

10 Best Bluetooth Speaker For Sauna of 2026 For Heat and Steam


