
How Do You Change the Battery on a Stick Vacuum?

Replacing a dead stick vacuum battery is usually as simple as pressing a quick-release latch or removing a few small screws near the handle. The exact steps depend on how the power pack attaches to the body of the machine. Once the old pack slides free, a fresh one slips directly into the same slot to restore full cleaning runtime.
Before starting, make sure the charger is unplugged and the motor has cooled down completely. Some models let you click the battery free with one hand, while others require a standard screwdriver to loosen hidden fasteners around the grip. Matching the exact model code on the rating label guarantees the new metal contact points line up without cracking delicate plastic tabs. Here is how to identify your setup and swap the pack safely.
The Short Version
- Disconnect power first: Unplug the charging cable from your vacuum and let the motor cool down completely before you touch or loosen any parts.
- Spot your battery style: Check your vacuum handle to see if the pack unlatches with a push-button release clip or if it is held in place by two or three small cross-head screws.
- Match the specs precisely: Check the rating label on your vacuum to confirm the exact model code, voltage rating, and metal contact point alignment before buying a replacement pack.
- Charge fully before cleaning: Place the newly installed pack on the charger until the indicator light shows a complete charge, and take the old battery to a certified local drop-off bin instead of the trash.
Identify Your Battery Type: Click-In Latch Versus Screw-Mounted Housing
Cordless stick vacuums use two main battery styles: a tool-free click-in pack or a screw-mounted pack. Knowing which design you have saves time and keeps you from tugging on plastic tabs that are held by hidden fasteners.
A click-in battery sits on the base or spine of the handle and uses an external release button. You press the button with your thumb, pull the pack down or backward, and it pops free in one smooth movement. Manufacturers use this design so owners can swap a depleted battery for a freshly charged pack while cleaning large rooms. If you prefer a modular setup that minimizes weight in hand during long cleaning sessions, learning what is the lightest cordless vacuum cleaner can show you how different brands balance battery placement against the overall weight of the frame.
A screw-mounted battery looks like a seamless part of the vacuum handle. The battery housing (the outer plastic shell that protects the internal battery cells) joins flush against the motor body. When you look closely at the grip and the bottom plate, you will see two or three small, deep screw holes. These screws anchor the pack directly to the motor frame. The vacuum cannot release the battery until those screws are taken out. This style is very common on lightweight vacuums because securing the battery with screws reduces bulky plastic latches and keeps the handle slim.
To identify your type, run your fingers along the seam where the battery block meets the motor body. If you feel a raised button with a battery or arrow icon, you have a click-in model. If the seam is smooth and you spot small screw recesses along the base of the handle, your vacuum requires a screwdriver for the swap.
How to Replace a Click-In Stick Vacuum Battery
Replacing a click-in battery takes less than two minutes and requires no hand tools. Work over a flat, clean surface like a kitchen table or counter so the machine does not slip from your grip.
- Unplug the machine and power down: Disconnect the vacuum from its charging cord or wall dock. Make sure the power trigger or slide switch is in the off position. If you just finished vacuuming, let the machine sit for ten minutes so the internal motor parts and battery pack cool to room temperature.
- Find and press the release latch: Hold the vacuum handle firmly with one hand. Place your other hand on the battery pack. Press the release button down completely. On some models, this latch pulls backward toward the grip rather than pushing inward.
- Slide the old pack along its guide rails: Keep the release latch pressed down as you slide the battery out. The pack rides along molded plastic channels. Pull straight back or straight down depending on your model. Never twist or rock the battery from side to side, because forceful twisting can bend or snap the plastic guide rails.
- Slide the new battery into place: Line up the ridges on your new battery pack with the matching grooves on the vacuum handle. Push the battery forward until you hear and feel a crisp, solid click. That sound confirms the spring-loaded latch has locked over the plastic catch.
- Check the physical fit: Give the battery pack a firm, gentle tug without pressing the release button. The pack should remain solidly seated in the handle housing without rattling, shifting, or showing uneven gaps along the seam.
How to Replace a Screw-In Stick Vacuum Battery
A screw-mounted battery takes a little extra care because you are working with small fasteners set into plastic. Rushing this job can strip the screw heads or crack the handle frame, so take your time and use the right screwdriver.
- Gather your tools and prep the work area: You need a small cross-head screwdriver (usually a size #1 or #0 Phillips, or a small Torx driver depending on your brand). Place a soft towel or magnetic tray on your table. This keeps the tiny screws from rolling off onto the floor.
- Clear the vacuum body: Unplug the charger. Remove the long metal wand and any floor nozzle or motorized head. Empty the clear dust bin and take it off the machine if your model allows it. Removing the bin clears your view and gives your hands room to reach the front screws.
- Locate all the mounting screws: Look for the recessed screws holding the battery housing to the handle. Most models use three screws. You will typically find one screw located at the top rear of the handle grip, and two screws placed directly beneath the base plate near the front edge of the battery. Shine a flashlight down the recesses so you can see the screw heads clearly.
- Back out each screw carefully: Seat your screwdriver firmly into the screw head. Push inward with steady, direct pressure and turn counterclockwise. Because the screws bite into soft plastic threads, turning the tool loosely will strip the cross pattern on the screw head. Set each loosened screw safely into your tray.
- Slide the old battery free: Hold the vacuum handle with one hand and grasp the battery block with the other. Pull the battery downward and slightly forward away from the grip. The internal metal contact point (terminal) will disengage smoothly as the pack slides free. If the pack resists, stop and check the housing. Do not pry the plastic open with a knife or flat screwdriver. A stuck pack almost always means one hidden screw remains fastened.
- Seat the new pack and hand-tighten the screws: Align the new battery with the handle base. Slide it into position until the plastic sits flush against the handle and the internal metal contact point snaps into place. Drop the screws into their holes. Turn your screwdriver clockwise until the screw is snug. Stop as soon as you feel firm resistance. Overtightening will strip the plastic screw holes, which prevents the battery from locking tightly in the future.
Compatibility Checklist: Matching Model Codes, Voltage, and Terminals
Buying the wrong replacement pack is the most common reason a repair fails. Two vacuum batteries may share the exact same outer dimensions while using completely different electrical connectors or internal voltages. Review this checklist before ordering any new battery pack.
- Confirm the exact model number: Never purchase a battery based solely on the brand name or vacuum color. Look at the silver or white manufacturer data sticker located under the battery base, behind the dust bin, or on the handle. Match the complete model code, including any letters at the end. Different revisions of the same stick vacuum often use incompatible battery slots.
- Check the voltage rating: Look at the voltage printed on your original battery housing (such as 21.6V, 22.2V, or 25.2V). Your replacement battery must match this voltage number exactly. Installing a pack with the wrong voltage can burn out the vacuum motor, destroy the internal speed controller, or cause the machine to shut down after two seconds of runtime.
- Understand the runtime capacity: The energy capacity of a rechargeable lithium battery (Li-ion) is printed in mAh (milliampere-hours). A higher mAh number means the pack stores more electricity and gives you longer cleaning runtime between charges. Installing a battery with a higher mAh rating is completely safe for your vacuum, provided the voltage, physical shape, and connector pins match.
- Inspect the metal contact points: When your new pack arrives, hold it next to the old one before attempting installation. Inspect the terminal (the metal contact point where electricity passes into the motor). Count the metal pins, note their spacing, and compare the plastic alignment tabs. If the pins or tabs look different, do not force the pack into the machine.
- Compare replacement costs: Brand-name replacement batteries usually cost more than third-party options, but both can restore your vacuum to like-new runtime when matched properly. If you want to know what to budget for the repair, review how much a new battery for a cordless vacuum costs before finalizing your purchase.
First Charge and Safe Disposal of the Old Battery
How you treat the new battery during its first day makes a major difference in how many years of service it provides. At the same time, handling your old pack responsibly prevents real fire hazards in your neighborhood.
A fresh rechargeable lithium battery (Li-ion) ships from the manufacturer in a partially charged state to keep the cells stable during transit. Do not install the new pack and immediately run the vacuum on maximum suction power. Instead, connect the vacuum to its charger and allow it to charge completely without interruption. Wait until the charging lights turn solid or switch off entirely according to your vacuum manual. This uninterrupted first charge balances the voltage across all internal cells and calibrates the protection circuitry.
For routine cleaning, avoid running the battery until the vacuum motor dies completely. Modern lithium packs last much longer when recharged after regular use rather than being drained down to zero percent. If the battery feels warm after a heavy cleaning session on thick carpets, let the pack sit for fifteen minutes to cool down before plugging it into the wall.
Never toss your old vacuum battery into your regular household trash can or curbside recycling bin. When old lithium batteries are crushed or punctured by garbage trucks or municipal waste sorting machinery, they can spark and ignite dangerous chemical fires. Prepare the old battery for recycling by covering its metal contact point (terminal) with a small strip of electrical tape or clear packing tape. This covers the conductive metal and prevents accidental short circuits inside transport bins.
Drop the taped battery off at an authorized recycling location. Most large home improvement centers, hardware stores, and consumer electronics retailers maintain free drop-off bins near their front entrances through national recycling programs. You can also contact your city or county waste management authority to locate their nearest household hazardous waste collection site.
What to Look for in a Compatible Replacement Battery
When shopping for a replacement power pack or modular vacuum attachment, always verify compatibility with your specific model line. A quality replacement pack should feature durable housing made from impact-resistant plastic, precise guide rails that slide into the handle without binding, and thick internal wiring that handles heavy motor draw.
Look for replacement packs that clearly list built-in circuit protection against short circuits, overcharging, and motor overheating. Matching the physical footprint of your original pack ensures your vacuum continues to fit onto its wall-mounted storage bracket and charging station without awkward angles or loose connections. Checking these physical and electrical requirements guarantees your stick vacuum delivers strong, reliable suction across all your floors.

- VC Score9.0
BCP Score is a ranking system developed by bestcleanerproducts.com. BCP Score has no relationship or impact from any manufacturers or sales agent websites. Learn more
- BrandAIDTIPS

- VC Score9.0
BCP Score is a ranking system developed by bestcleanerproducts.com. BCP Score has no relationship or impact from any manufacturers or sales agent websites. Learn more
- BrandBissell
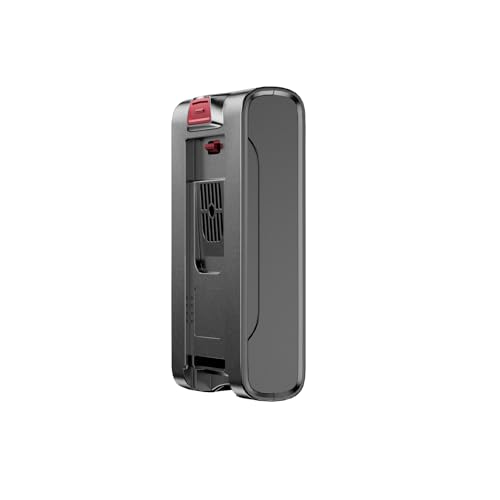
- VC Score9.0
BCP Score is a ranking system developed by bestcleanerproducts.com. BCP Score has no relationship or impact from any manufacturers or sales agent websites. Learn more
- BrandThryveo
- VC Score8.8
BCP Score is a ranking system developed by bestcleanerproducts.com. BCP Score has no relationship or impact from any manufacturers or sales agent websites. Learn more
- BrandBissell
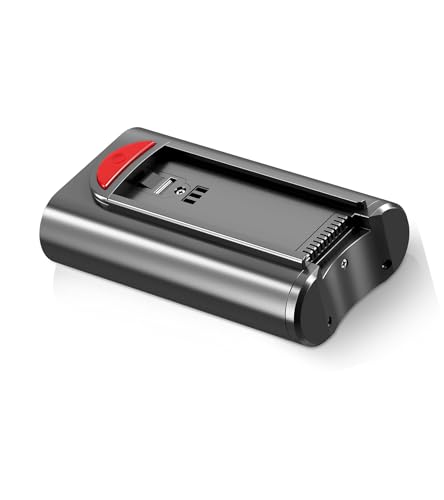
- VC Score8.6
BCP Score is a ranking system developed by bestcleanerproducts.com. BCP Score has no relationship or impact from any manufacturers or sales agent websites. Learn more
- BrandKARDV

- VC Score8.4
BCP Score is a ranking system developed by bestcleanerproducts.com. BCP Score has no relationship or impact from any manufacturers or sales agent websites. Learn more
- BrandFieety

- VC Score8.4
BCP Score is a ranking system developed by bestcleanerproducts.com. BCP Score has no relationship or impact from any manufacturers or sales agent websites. Learn more
- BrandJUNWOOD

OUYFHK Cordless Vacuum Cleaner Replaceable Battery(22.2V 2200mAh) for A27 Red/Pink/Violet
View on Amazon- VC Score8.2
BCP Score is a ranking system developed by bestcleanerproducts.com. BCP Score has no relationship or impact from any manufacturers or sales agent websites. Learn more
- BrandOUYFHK

- VC Score7.4
BCP Score is a ranking system developed by bestcleanerproducts.com. BCP Score has no relationship or impact from any manufacturers or sales agent websites. Learn more
- BrandSimple Plus+

- VC Score7.2
BCP Score is a ranking system developed by bestcleanerproducts.com. BCP Score has no relationship or impact from any manufacturers or sales agent websites. Learn more
- BrandYONNDER

- VC Score6.6
BCP Score is a ranking system developed by bestcleanerproducts.com. BCP Score has no relationship or impact from any manufacturers or sales agent websites. Learn more
- BrandNuYupo
Last update on 2026-10-01 / Affiliate links / Images, Product Titles, and Product Highlights from Amazon Product Advertising API
FAQs
Why will my stick vacuum not turn on right after installing a new battery?
Most replacement lithium packs ship in a dormant sleep state to prevent short circuits during shipping. Plugging the vacuum into your wall charger for ten to fifteen minutes wakes up the internal control board and activates the pack. Also check the handle seam to ensure the battery is seated completely against the internal metal contact points.
Can I upgrade to a battery with a higher capacity than my original one?
Yes, you can safely install a battery with a higher runtime capacity rating, which is measured in mAh. A higher capacity rating provides more cleaning minutes per charge without damaging your motor. You simply need to confirm that the voltage rating, outer plastic housing, and metal terminal pins match your specific vacuum model.
How do I know if my vacuum problem is the battery or the wall charger?
Plug your charger into a known working electrical outlet and attach the vacuum. If the status light on the vacuum or charging block remains completely dark and stays cold to the touch after an hour, the charger or its thin power cord may have failed. If the charging indicator blinks an error code or lights up normally but the vacuum dies within seconds of pulling the trigger, the battery pack has worn out and needs replacement.
What should I do if a screw is stripped in the battery housing?
Place a wide, flat rubber band over the stripped screw head, then press your screwdriver down firmly into the rubber before turning slowly counterclockwise. The rubber fills the worn metal grooves and gives the tool enough grip to back the screw out. Avoid drilling the fastener out, because spinning metal bits create heat that easily melts the delicate plastic handle frame.


How to Refinish a Fiberglass Pool

How Do You Keep Raccoons Out of Your Pool?

How to Fix Cyanuric Acid in Your Pool

How to Shape a Pool Cue Tip to Stop Miscues

Best Far Infrared Sauna Sauna Heats: Top Picks of 2026

11 Best Far Infrared Sauna Carbon Fiber Heaters of 2026 For Balanced Full-Body Heat

11 Best Carbon Far Infrared Sauna of 2026 For Even Heat

10 Best Bluetooth Speaker For Sauna of 2026 For Heat and Steam


