
How to Change a Cordless Vacuum Battery Safely

Swapping out a cordless vacuum battery usually takes just a few minutes by pressing a quick-release latch or removing two or three small screws along the handle. The exact method comes down to how the frame holds the power pack. Many stick cleaners let the old block slide right off with a simple button press, while others keep the unit tucked safely behind the grip.
What changes for your machine depends on matching the exact voltage on the rating sticker, locating any hidden screws, and choosing between an original manufacturer part or an aftermarket pack. Forcing a stubborn clip or sliding in the wrong voltage can crack the casing or damage the motor. Checking these details first ensures the swap goes smoothly and brings back full suction.
The Short Version
- Identify your battery style: Look at the handle base. A colored push button means the battery unlatches by hand. Small screw holes mean you need a screwdriver.
- Check the rating label: Find the factory sticker on the vacuum body to verify your exact model number and system voltage before ordering a replacement.
- Unplug before working: Disconnect the vacuum from the charging cord, slide the old battery out smoothly along its tracks, clean off trapped dust, and secure the replacement.
- Charge fully before first use: Let the new battery sit on the wall charger until indicator lights confirm a full charge before turning the motor on.
Checking Your Vacuum: Click-in Latch Versus Screw-in Pack
Cordless vacuums power their motors with rechargeable lithium packs, but manufacturers attach them in two distinct ways. One design allows instant removal, while the other is fastened into the frame. Identifying your setup prevents you from forcing parts that are not meant to move.
A click-in battery uses a latch (a push-button clip that locks the battery in place) built into the handle base. Pressing this button releases the pack so it slides away freely. Many stick vacuums use this setup so you can swap packs mid-cleaning without interrupting your work.
A screw-in battery sits inside a cavity in the handle or motor housing. It relies on two or three small screws to hold the pack against internal electrical connections. You find these on older stick vacuums or compact handheld units where the battery was designed to stay put until it wears out.
Use this quick checklist to confirm which style sits on your vacuum:
- Look for a colored button: Search the base of the handle. A bright button with a release icon indicates a tool-free click-in pack.
- Check the seam lines: Inspect where the battery meets the vacuum body. A wide finger gap or sliding track means it slides out.
- Scan for screw recesses: Turn the vacuum over. If you see two or three deep holes with metal screw heads inside, you have a screw-in pack.
Never try to pry a battery off with a knife or flat tool. If the pack does not slide easily after pressing a button, stop. A hidden screw is likely holding it in place, and forcing the shell will crack the plastic housing.
How to Swap a Click-in Cordless Vacuum Battery
Changing a click-in battery is a quick, tool-free repair. You can complete the entire swap in less than two minutes once you have the correct replacement part in hand.
- Disconnect from power: Unplug the charging cable from the wall or lift the vacuum away from its wall dock. Make sure the power switch is off so the motor cannot start accidentally.
- Remove the wand: Press the quick-release catch on the extension tube and set the wand and floor nozzle aside. Working with just the handheld motor unit makes the vacuum much easier to handle.
- Press the battery release latch: Grip the handle firmly. Use your other hand to press the latch (a push-button clip that locks the battery in place) at the base of the grip.
- Slide the dead battery out: While holding the latch down, pull the battery pack forward along its guide channels. It should glide out smoothly without heavy force.
- Inspect the metal terminals: Look into the empty slot on the handle. Examine the terminal (metal contact points where the battery connects) prongs for built-up dust or lint. Wipe away dry debris with a soft, clean cloth. Never use water or liquid cleaners on these contacts.
- Slide the new battery into place: Line up the guide rails on your new pack with the grooves inside the handle. Push the battery forward until you hear a clear click. Give it a gentle tug to confirm that the latch has locked.
How to Replace a Screw-in Battery Pack Safely
Replacing a screw-in pack requires basic hand tools and patience. Taking your time prevents stripped screw heads and keeps the plastic casing intact.
- Set up a padded workspace: Place a clean towel or silicone mat over a table. Cordless vacuums roll easily on their sides, and a soft surface stops the machine from sliding while catching loose screws.
- Disconnect electrical power: Unplug the vacuum from its wall charger. Never loosen screws or open the casing while connected to an outlet.
- Detach the dust canister: On many stick vacuums, front screws sit behind the dirt cup. Press the bin release lever, remove the clear canister, and set it aside.
- Pick the correct screwdriver: Most vacuum housings use small Phillips screws. Pick a driver that fits snugly with zero wobble so you do not strip the soft metal head.
- Remove the retaining screws: Most setups rely on two or three screws: one at the rear of the grip and one or two underneath the base. Turn counterclockwise with firm downward pressure and put the screws in a small dish.
- Slide the old pack out: Grasp the battery block firmly and ease it out along its internal tracks. If you feel resistance, stop and inspect the handle for any hidden screw you missed.
- Align and seat the replacement battery: Hold the new pack so the terminal (metal contact points where the battery connects) matches the receiving prongs inside the handle. Slide it in until the screw holes line up flush.
- Reinstall the screws by hand: Insert each screw and turn clockwise with a manual screwdriver until snug. Do not overtighten, because excessive force strips the plastic threads.
Confirming the Exact Replacement Battery Before Buying
The most common mistake when fixing a cordless vacuum is ordering a pack that looks identical online but carries the wrong voltage or connector shape. Checking your vacuum rating sticker ensures you get the right part on your first try.
Turn your vacuum over and look for the factory rating label. You can find this sticker on the bottom of the handle, under the battery bay, or on the spine behind the dust canister. This label shows your exact model number and system voltage.
Voltage matching is critical. If your vacuum label states 21.6V, you must buy a replacement built for that exact rating. Installing a 25.2V pack into an 18V or 21.6V system will overwhelm the circuit board and burn out the motor. Installing an underpowered pack means the vacuum will shut off when the spinning brush roller encounters carpet.
You will also see a rating listed in mAh (battery capacity that controls run time). Think of this number like the size of a fuel tank. A 2500mAh battery holds more energy and runs longer between charges than a 2000mAh battery, even though both deliver the same safe voltage. Choosing a higher capacity is fine as long as the voltage and physical shape match your machine.
Decide whether you want an OEM (original brand-name part) or a third-party replacement. An original factory battery guarantees a precise fit and charger compatibility, but it carries a higher price tag. Third-party options cost less, but verify that they carry recognized safety marks like UL listings. If you are debating whether an older machine is worth saving, check how much a new battery for a cordless vacuum costs in 2026 before buying.
Also keep physical weight in mind with high-capacity packs, as extra cells add weight beneath your wrist. If you already find your vacuum tiring to lift, look into what makes the lightest cordless vacuum cleaner models easy to carry so you can balance runtime against cleaning comfort.
Initial Charging and Safe Lithium Battery Disposal
How you handle your new battery during its first few hours determines how long it will last over the coming years. New lithium packs leave the factory with roughly thirty to fifty percent charge for storage safety, meaning they are not ready for a full cleaning session straight out of the box.
Slide the new battery into your vacuum, plug in the original wall charger, and let the unit charge completely without interruption. Wait until the charging indicator lights show a solid green light or shut off entirely, signaling that the internal cells have fully balanced. Avoid running the new battery down to zero percent during your first few cleanings, as deep discharges put unnecessary stress on fresh lithium cells.
Handling your worn-out battery safely is just as important as installing the new one. Never toss a dead lithium battery into your household trash can or curbside recycling cart. Garbage trucks crush waste, and a crushed lithium pack can ignite and cause severe fires.
Prepare the dead battery by covering its terminal (metal contact points where the battery connects) with strips of electrical tape. This prevents exposed metal from touching other metal surfaces and shorting out. Take the taped battery to a dedicated recycling kiosk at a local home improvement center, hardware retailer, or municipal collection drop-off.
Choosing Standalone Packs and Vacuums with Detachable Batteries
When shopping for extra battery packs or replacing a worn stick vacuum, prioritize designs engineered for quick battery maintenance. The most practical cordless vacuums make swaps effortless by placing an accessible release latch directly on the exterior casing.
Look for machines that clearly display their battery part numbers on the rating label and in the manual. Avoid models that completely seal the lithium cells inside an inaccessible glued shell, which forces you to discard an entire working machine when the battery degrades. A vacuum with a modular, click-in power pack lets you keep a spare battery on the charger, effectively doubling your cleaning time across larger rooms.

UML0 N8 Cordless Vacuum Cleaner,Lightweight Stick Vacuum with Powerful Suction,2200mAh
View on Amazon- VC Score10.0
BCP Score is a ranking system developed by bestcleanerproducts.com. BCP Score has no relationship or impact from any manufacturers or sales agent websites. Learn more
- BrandUML0

- VC Score10.0
BCP Score is a ranking system developed by bestcleanerproducts.com. BCP Score has no relationship or impact from any manufacturers or sales agent websites. Learn more
- BrandSVHT

- VC Score10.0
BCP Score is a ranking system developed by bestcleanerproducts.com. BCP Score has no relationship or impact from any manufacturers or sales agent websites. Learn more
- BrandKQAHA

- VC Score10.0
BCP Score is a ranking system developed by bestcleanerproducts.com. BCP Score has no relationship or impact from any manufacturers or sales agent websites. Learn more
- BrandAlloyMove

- VC Score9.0
BCP Score is a ranking system developed by bestcleanerproducts.com. BCP Score has no relationship or impact from any manufacturers or sales agent websites. Learn more
- BrandHonki
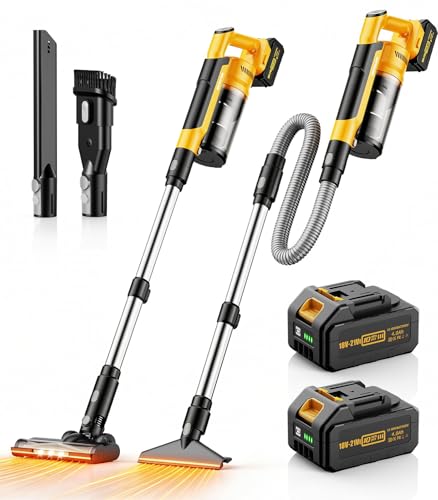
- VC Score8.8
BCP Score is a ranking system developed by bestcleanerproducts.com. BCP Score has no relationship or impact from any manufacturers or sales agent websites. Learn more
- Brandqimedo

- VC Score8.8
BCP Score is a ranking system developed by bestcleanerproducts.com. BCP Score has no relationship or impact from any manufacturers or sales agent websites. Learn more
- BrandRueqior

- VC Score8.6
BCP Score is a ranking system developed by bestcleanerproducts.com. BCP Score has no relationship or impact from any manufacturers or sales agent websites. Learn more
- BrandCHEBIO
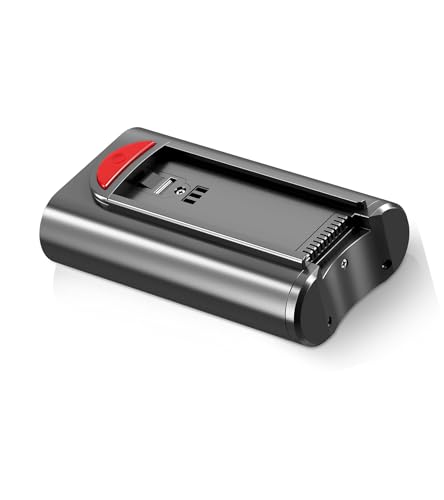
- VC Score8.4
BCP Score is a ranking system developed by bestcleanerproducts.com. BCP Score has no relationship or impact from any manufacturers or sales agent websites. Learn more
- BrandKARDV

- VC Score8.2
BCP Score is a ranking system developed by bestcleanerproducts.com. BCP Score has no relationship or impact from any manufacturers or sales agent websites. Learn more
- BrandVacmaster
Last update on 2026-10-01 / Affiliate links / Images, Product Titles, and Product Highlights from Amazon Product Advertising API
FAQs
Why won't my cordless vacuum turn on after installing a brand-new battery?
Most replacement batteries ship with only a partial storage charge and need several hours on the wall charger before powering a motor. If the vacuum remains unresponsive after a full charge, confirm that the pack clicked all the way into its track. Also check the metal contact pins to make sure no dust or packing tape blocks the connection.
Can I leave my cordless vacuum plugged into the charger all the time?
Modern cordless vacuums use smart charging circuits that stop the electrical flow once the battery reaches full capacity. Leaving the unit docked in its wall cradle is generally safe and keeps the machine ready for daily cleanups. If you plan to leave home for several weeks or put the vacuum into storage, unplug the charger and keep the machine in a cool, dry area.
Will a replacement battery with a higher mAh rating damage my vacuum motor?
A higher mAh rating will not harm your vacuum motor as long as the voltage matches your original battery specification. Think of mAh as the size of your fuel tank rather than electrical strength. A pack with higher capacity simply powers the motor for a longer cleaning session before needing another charge.
How many years should a cordless vacuum battery normally last?
A typical lithium cordless vacuum battery lasts between two and four years under regular household use, which translates to roughly three hundred to five hundred complete charge cycles. Using maximum suction boost mode constantly or charging in high heat degrades the cells much faster. Sticking to standard suction for daily messes helps preserve battery runtime over several years.


How to Refinish a Fiberglass Pool

How Do You Keep Raccoons Out of Your Pool?

How to Fix Cyanuric Acid in Your Pool

How to Shape a Pool Cue Tip to Stop Miscues

Best Far Infrared Sauna Sauna Heats: Top Picks of 2026

11 Best Far Infrared Sauna Carbon Fiber Heaters of 2026 For Balanced Full-Body Heat

11 Best Carbon Far Infrared Sauna of 2026 For Even Heat

10 Best Bluetooth Speaker For Sauna of 2026 For Heat and Steam


