
How to Change a Vacuum Hose Without Cracking Plastic

Most owners assume swapping a split vacuum hose takes heavy tools or brute muscle to yank it loose. That belief usually leads to cracked plastic, because the real fix requires only pressing the release latch or turning the collar counterclockwise to slip the hose free. Once the damaged line slides out, pushing the replacement home until it clicks firmly into place seals the airflow and restores full suction.
The exact method depends on the connection style your machine uses. Upright vacuums often route a lower duct into the floor nozzle, canisters usually rely on springy side buttons, and utility vacuums use snug push-in joints or cuffs that screw on backwards. The job also shifts if you bought a full replacement assembly rather than bare hose tubing that requires reusing your existing fittings. Spotting how your connection locks keeps you from forcing stuck latches and cracking the housing.
Identifying Vacuum Hose Connection Types
To change a vacuum hose without cracking fragile plastic housings, you must identify how your machine locks parts together. Forcing plastic parts in the wrong direction snaps molded locking clips instantly, turning an inexpensive repair into a ruined housing.
The first design is the push-button clip. One or two raised plastic tabs sit on the sides of the plastic end ring (the hard collar bonded to the flexible hose). Pressing these tabs pushes internal catches out of their slots in the vacuum port so the hose pulls free. If grit packs into the gaps, the tabs can bind, but prying them with screwdrivers will snap the brittle plastic.
The second design is the twist-lock collar, also known as a bayonet fitting. The plastic end ring features a rotating collar with guide pins that slide into L-shaped channels inside the vacuum port. Twisting the collar a quarter turn moves the pins to the channel exit, allowing the hose to slide straight out.
The third design is the snug push-in joint, often called a friction fit. Standard on utility shop vacuums and extension wands, the tapered plastic connector wedges into the inlet using smooth surface friction. Fine drywall dust can make friction joints stick, requiring a firm twisting pull to separate.
The fourth design is the threaded plastic end ring. Here, the ribbed hose screws into the hard collar. Almost all brands design this joint so it screws on backwards (a reverse thread). Twisting the hose clockwise loosens it from the collar, while turning counterclockwise tightens it. Turning counterclockwise to remove it will tear the inner wire ribs.
How to Remove a Damaged Vacuum Hose Step by Step
Follow these steps in order to detach your vacuum hose safely without cracking aged plastic clips or snapping internal mounting tabs:
- Unplug the machine from the electrical outlet. Reason: Disconnecting power prevents accidental motor starts and protects internal switch wiring while your hands work near the inlet ports.
- Clear away dirt, grit, and pet hair around the joint seams. Reason: Trapped debris jams release latches and prevents locking clips from sliding smoothly.
- Brace the main vacuum body firmly with your free hand. Reason: Holding the machine steady prevents tipping and avoids snapping stress on delicate plastic mount brackets.
- Disengage the lock by depressing both release tabs or rotating the collar counterclockwise. Reason: Balanced pressure pulls the locking wedges clear of the port rim without bending the plastic sideways.
- Pull the plastic end ring straight out from the receiver port. Reason: Pulling straight prevents the rigid collar from wedging at an angle, which is the most common cause of cracked intake housings.
- Detach the lower suction tube if your machine is an upright model. Reason: Upright designs route air through a lower duct, and pulling from the handle without releasing the floor nozzle bracket will tear the hose.
- Unscrew the damaged flexible hose from the plastic end ring if saving your original fittings. Reason: Turning the ribbed hose clockwise disengages reverse threads cleanly without breaking the molded handle or machine collar.
If your vacuum is an aging cordless stick model where hoses or ports are cracking from brittle plastic, you might consider whether repairing individual parts makes sense or if checking what is the lightest cordless vacuum cleaner in 2026 offers a more comfortable, hassle-free replacement.
Sizing a Replacement Hose and Connector Diameters
Confirming physical dimensions before ordering prevents loose fittings, whistling air leaks, or lost suction. Check these critical dimensions before buying:
- Measure the inside diameter of the vacuum port and wand. Standard household vacuums in the United States typically use 1-1/4-inch fittings, while utility shop vacuums rely on 1-1/2-inch, 1-7/8-inch, or 2-1/2-inch openings. Measure across the inner rim of the plastic receiver to find the true size.
- Measure the outside diameter of your existing plastic end ring. Metric vacuum brands often measure 32 mm or 35 mm on the outer lip of the connector. A 32 mm fitting can feel close to a 1-1/4-inch fitting, but it will slip free under motor suction without an adapter.
- Confirm whether your hose carries electrical wiring. If your vacuum handle features power switches or drives a spinning brush roller in the floor nozzle, you need a wired factory replacement hose rather than a hollow plastic tube.
- Decide between a complete assembly or raw flexible tubing. A complete assembly arrives with the machine connector and handle grip already attached. Raw replacement hose is simply a coil of ribbed tubing, which costs less but requires transferring your original plastic end rings.
- Check the hose length for your cleaning tasks. Most built-in upright stretch hoses reach between 6 and 10 feet when extended, while utility canister and shop vac hoses range from 10 to 16 feet for reaching up stairs without moving the base.
Attaching the Replacement Hose to the Body and Wand
Installing your new vacuum hose correctly guarantees an airtight seal that restores full suction power across all cleaning tools.
If you are installing raw flexible hose onto your original plastic end rings, prepare the ends first. Clean all dried debris from the inner channels of the old collar. If the new hose is stiff, dip the plastic end into warm water for thirty seconds to make the vinyl pliable. Turn the hose counterclockwise into the plastic end ring because the threads screw on backwards. Continue rotating until the wire core seats firmly against the internal shoulder of the collar.
If you have a complete replacement assembly, connect the pieces in this sequence:
- Inspect the receiving port for proper gasket seating. Ensure the rubber O-ring or flat foam seal inside the machine intake rests flat in its groove.
- Align the guidance ribs on the plastic end ring with the inlet slots. Match raised arrows or molded notches on the collar with the cutouts on the vacuum intake.
- Press the connector straight into the housing until it clicks. Push directly forward with moderate palm pressure until the spring clips snap into place or the twist-lock collar rotates into its stop.
- Connect the upper handle to the extension wand or floor nozzle. Push the tapered handle tube straight into the wand opening, twisting a quarter turn if it relies on a snug push-in joint.
- Route the hose through the storage clips on upright models. Guide the ribbed hose into the lower cord hooks or frame channel so it cannot drag against the spinning brush roller underneath.
Checking for Air Leaks, Loose Fittings, and Poor Suction
Verifying the seal ensures your vacuum motor does not overheat or lose pickup power at the floor nozzle. Use this quick checklist to confirm a tight fit:
- Perform a palm suction check over the open end. Remove any attached wand, turn on the vacuum, and place your flat palm over the open hose cuff. The vacuum should grab your palm firmly. If suction feels weak, air is leaking through a loose collar or an unseated tab.
- Listen for high-pitched whistling around connection points. Move your ear along the joint where the hose meets the vacuum body while the motor runs. A distinct whistle indicates air squeezing through a gap between the plastic end ring and the machine intake.
- Inspect rubber O-rings and internal gaskets. If you hear air escaping, disconnect the hose and confirm that the rubber sealing ring inside the receiver port is clean and seated flat without pinches.
- Verify full airflow through the floor nozzle. Reattach the floor nozzle and confirm debris lifts easily. On uprights, confirm the internal diverter flap switches airflow to the hose without leaking back to the spinning brush roller.
- Tug gently at maximum reach to verify latch security. Pull the hose out to your normal cleaning distance. The plastic end ring should stay locked inside the vacuum port without backing out.
Finding the Right Replacement Hose or Adapter Solution
When an original factory replacement hose is discontinued or out of stock, universal hoses and adapter kits offer a dependable fix. Look for a replacement hose built with crushproof ribbed plastic. Crushproof hoses bounce back into shape if stepped on, whereas cheap thin-wall hoses crack and collapse under motor suction.
A multi-piece adapter set is equally helpful when connecting non-standard tools. Many aftermarket kits include stepped plastic or flexible silicone adapters that step down or expand across standard sizes, such as converting a 2-1/2-inch shop vac port down to a 1-1/4-inch household wand or a 1-3/8-inch European connector. Soft, flexible plastic cuffs stretch slightly over rigid plastic ports to create a friction seal without requiring metal hose clamps.
Before purchasing any universal hose or adapter kit, verify three details. First, measure the exact inner and outer diameters of your vacuum intake. Second, confirm whether your machine requires a rotating hose connector to prevent the line from kinking during use. Third, check whether your vacuum head tools require special alignment notches or locking buttons. When evaluating older battery-powered models, keep overall upkeep expenses in mind, including how much is a new battery for a cordless vacuum in 2026, before buying specialized replacement parts.

- VC Score9.0
BCP Score is a ranking system developed by bestcleanerproducts.com. BCP Score has no relationship or impact from any manufacturers or sales agent websites. Learn more
- BrandCen-Tec Systems

- VC Score9.0
BCP Score is a ranking system developed by bestcleanerproducts.com. BCP Score has no relationship or impact from any manufacturers or sales agent websites. Learn more
- BrandUQGVML

- VC Score8.8
BCP Score is a ranking system developed by bestcleanerproducts.com. BCP Score has no relationship or impact from any manufacturers or sales agent websites. Learn more
- BrandSealegend

- VC Score8.6
BCP Score is a ranking system developed by bestcleanerproducts.com. BCP Score has no relationship or impact from any manufacturers or sales agent websites. Learn more
- BrandAJWXWO

- VC Score8.6
BCP Score is a ranking system developed by bestcleanerproducts.com. BCP Score has no relationship or impact from any manufacturers or sales agent websites. Learn more
- BrandOVO
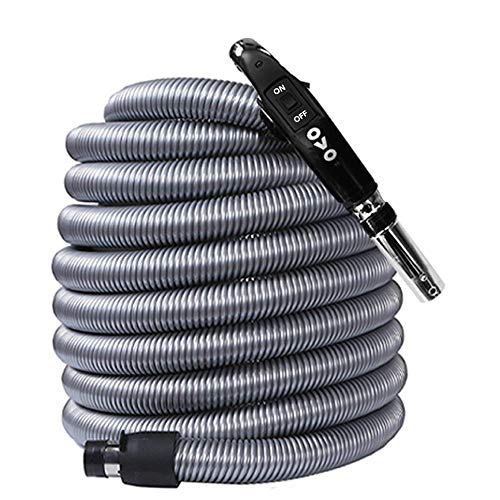
- VC Score8.4
BCP Score is a ranking system developed by bestcleanerproducts.com. BCP Score has no relationship or impact from any manufacturers or sales agent websites. Learn more
- BrandOVO

- VC Score8.4
BCP Score is a ranking system developed by bestcleanerproducts.com. BCP Score has no relationship or impact from any manufacturers or sales agent websites. Learn more
- Brandpalart

- VC Score8.4
BCP Score is a ranking system developed by bestcleanerproducts.com. BCP Score has no relationship or impact from any manufacturers or sales agent websites. Learn more
- Brandiouxvt

- VC Score8.0
BCP Score is a ranking system developed by bestcleanerproducts.com. BCP Score has no relationship or impact from any manufacturers or sales agent websites. Learn more
- Brandsmcca

- VC Score7.4
BCP Score is a ranking system developed by bestcleanerproducts.com. BCP Score has no relationship or impact from any manufacturers or sales agent websites. Learn more
- BrandAbvsdu
Last update on 2026-10-01 / Affiliate links / Images, Product Titles, and Product Highlights from Amazon Product Advertising API
FAQs
How do I remove a vacuum hose if there is no release button?
If you see no visible buttons or clips, your vacuum hose either uses a twist-lock collar or a snug push-in joint held by friction. Try turning the plastic end ring a quarter turn counterclockwise to see if internal guide pins slide free. If the fitting does not rotate, grasp the hose collar firmly and twist it back and forth slightly while pulling straight away from the vacuum body to break the surface friction.
Which way do I twist a threaded hose end to remove it?
Almost all vacuum manufacturers design flexible hose cuffs with reverse threads that screw on backwards. To remove the ribbed hose from the hard plastic end ring, twist the hose clockwise while holding the collar stationary. Turning counterclockwise will tighten the hose further and can tear the inner wire ribs.
Can I replace just the split hose and keep my original plastic end rings?
Yes, you can replace only the damaged flexible tubing if your original plastic end rings and handle cuffs are still in good structural shape. Measure the inside diameter of your old ribbed hose, purchase matching bulk replacement hose, unscrew the old tubing from the reverse-threaded cuffs, and thread the new tube into place.
Why does my new vacuum hose whistle or pop out during use?
A whistling sound means air is leaking past a loose connection, usually caused by a missing rubber O-ring or an improperly seated locking tab. If the hose pops free while cleaning, the plastic end ring is either the wrong diameter or the locking clips have not snapped completely into the receiving slots. Remove the hose, clear any trapped dust, and push firmly until you hear a clear click.


How to Refinish a Fiberglass Pool

How Do You Keep Raccoons Out of Your Pool?

How to Fix Cyanuric Acid in Your Pool

How to Shape a Pool Cue Tip to Stop Miscues

Best Far Infrared Sauna Sauna Heats: Top Picks of 2026

11 Best Far Infrared Sauna Carbon Fiber Heaters of 2026 For Balanced Full-Body Heat

11 Best Carbon Far Infrared Sauna of 2026 For Even Heat

10 Best Bluetooth Speaker For Sauna of 2026 For Heat and Steam








