
How to Change the Filter on a Stick Vacuum

Switch off the machine, remove the battery, and unlatch the dust canister to reach the filter housing. Cutting the power keeps the motor from accidentally starting while your fingers are inside, letting you safely remove the clogged insert and seat a fresh filter firmly into place. Snapping the pieces back securely restores full suction and keeps stray dust out of your room.
The exact process depends on how the vacuum opens and where the filters sit. Some dust cups drop open with a push-button release, while others twist off like a jar lid. Many designs also carry two filters: an inner washable foam sponge inside the bin and a pleated cartridge tucked behind the handle or exhaust vent. Prying stiff plastic can snap delicate tabs or cause air leaks that weaken airflow. Here is how to find each compartment, release the clips safely, and get your vacuum running like new.
Where is the filter hidden on a stick vacuum?
Stick vacuums pack a motor, a dirt bin, and an airflow pathway into a slim, handheld frame. Because space is tight, manufacturers tuck filters into tight pockets around the body. Depending on the design of your machine, you might have one, two, or even three filters working at the same time.
The first common spot is directly inside the clear dust bin. When you pop open the dirt cup, you will usually see a central plastic cone that spins debris. Inside or right above that cone sits the pre-motor filter, which looks like a small inner sponge or foam cup. This sponge catches coarse hair, carpet fluff, and large crumbs before they can slam into the motor fan.
The second location sits directly on top of the motor housing or just below the handle. This spot typically holds a pleated fine-dust filter, which looks like an accordion-folded paper ring encased in a plastic frame. Its job is to capture microscopic pet dander, pollen, and fine sheetrock dust that slipped past the primary sponge.
The third location is at the very rear of the machine behind the exhaust vents. This back air vent cover unsnaps or twists counterclockwise to reveal an exhaust filter. This final barrier cleans the air one last time right before it blows out into your room.
Reaching these spots requires finding the release points without forcing the plastic. Most stick vacuums rely on either a push-button latch or a twist-to-unlock channel. If a plastic piece does not budge under gentle finger pressure, stop immediately. Look around the seams for a small padlock icon, an arrow, or a recessed thumb switch that unlocks the housing.
How do you remove and install the new filter?
Replacing your filter takes only a few minutes when you follow the right sequence. Rushing the job can crack delicate plastic clips or allow stray grit to dump straight into the motor cavity. Follow these steps to complete the swap safely.
- Cut the power completely. Unplug the charging cord from the wall or slide the battery pack off the handle. If you have a corded stick vacuum, pull the plug from the wall outlet so the motor cannot turn on accidentally while your fingers are inside.
- Empty the dirt canister over a trash bin. Press the dust bin release button to swing the bottom door open. Tap out the loose dirt and pet hair so debris does not spill backward into the clean airflow channels when you pull the filter out.
- Detach the canister from the main motor body. Many modern stick vacuums let you unclip the clear canister with a single click. Removing the canister gives you a clear grip on both ends of the filter assembly and prevents accidental twisting of the main handle.
- Unseat the old filter assembly. If your filter sits inside the bin, grasp the plastic rim or fabric pull tab firmly. Pull straight up with steady pressure, or twist a quarter turn to the left if the housing has locking notches. Lift the inner sponge or foam cup out of its plastic carrier cage.
- Inspect the empty chamber. Shine a flashlight into the housing cavity. Wipe away any loose dust clinging to the plastic walls using a dry cloth. Never spray liquid cleaners or push wet rags into the empty motor opening.
- Orient and seat the fresh filter. Match the guide tabs on the new filter with the slots on the vacuum housing. Press down evenly along the outer rim until the filter sits completely flush. If the filter sits crooked, air will leak around the sides and drag dirt directly into the motor fan.
- Lock the compartments back together. Snap the canister or top cover back into place. You should hear a distinct, sharp click when the latch engages. Give the pieces a gentle tug to verify they are locked tight before turning on the machine.
Should you wash your filter or replace it entirely?
Not every dirty filter needs to go into the trash bin. Many modern stick vacuums feature parts meant for routine washing, while others use strictly single-use paper elements. Knowing the difference saves you money while protecting your suction power.
An inner sponge or foam cup is almost always washable. You can rinse these foam pieces under a slow stream of cold tap water until the water runs clear. Never use laundry detergent, dish soap, or hot water, as harsh chemicals break down the cellular structure of the sponge and cause it to crumble.
A pleated fine-dust filter requires a closer look. If the pleats are made of thick synthetic fiber and the rim features a small water-tap symbol, you can rinse it gently from the inside out to push dirt backward out of the folds. However, if the pleats feel like stiff cardboard or pressed paper, water will destroy the fibers and turn the sheet into mush. Paper cartridges must only be tapped clean against the side of a trash can until you discard them.
Use this quick checklist to decide whether your current filter can be saved or needs immediate replacement:
- Look for physical tears: If the foam has chunks missing, or if the pleated paper has holes larger than a pinhead, replace it right away. Small tears let sharp grit blast into the motor.
- Check the rubber gasket: The flexible seal around the rim must feel soft and pliable. If the rubber is cracked, stiff, or warped, it will leak air, and you need a new filter.
- Smell the material: If a washed and dried filter still smells sour, moldy, or like burnt hair, bacteria has colonized deep in the fibers. No amount of rinsing will eliminate the smell; toss it out.
- Gauge the discoloration: When dark gray grime remains baked into the folds after a thorough rinse, the microscopic pores are permanently clogged. Swap it for a fresh unit.
- Count the months: Even with regular rinsing, high-use households with pets should replace foam and pleated filters every six to twelve months.
Why must a washed filter dry for 24 hours?
Putting a damp filter back into a stick vacuum is the fastest way to destroy the machine permanently. It might feel dry to the touch on the outside after an hour on the counter, but the thick core of a sponge or the deep valleys of pleated fabric trap water droplets for much longer.
Stick vacuum motors spin at exceptionally high speeds to generate powerful lift in a compact frame. When you turn on the vacuum with a wet filter in place, that immense suction pulls moisture out of the material and atomizes it into a fine mist. That damp air passes directly over the high-speed motor windings, leading to immediate electrical shorts, scorched wiring, and rusted bearings.
Moisture also creates a thick barrier that ruins air movement. The moment wet filter material meets fine household dust, the dust turns into a muddy paste. That mud dries into a solid, concrete-like crust across the air pores. Once that happens, the vacuum cannot pull air through the system, causing the motor to overheat and shut down within minutes.
Always let your washed pieces air-dry for at least 24 full hours. Lay them flat on a clean dry towel in a warm, well-ventilated room with plenty of natural air movement. Keep them away from high-heat sources like ovens, hair dryers, or direct placement on hot radiators, as intense heat warps the plastic frames and melts synthetic fibers.
Why is suction still weak after changing the filter?
If you installed a brand-new filter and your stick vacuum still whines loudly or leaves crumbs on the carpet, the airflow blockage is happening somewhere else along the line. A clean filter cannot pull air through a clogged system.
Check these common trouble spots to bring your machine back to full strength:
- Inspect the floor nozzle: Flip the floor head over and look closely at the spinning brush roller. Strands of long hair and thread wrap around the roller ends, locking the bearings and stalling the sweep. Clear out the intake throat directly behind the roller where bulky debris tends to jam.
- Look down the extension wand: Detach the long metal or plastic tube and look straight through it toward a bright light. Clumps of pet hair, dry leaves, and small dropped toys easily wedge in the narrow neck. Push a broom handle through the tube to dislodge stubborn blockages.
- Examine the plastic cone that spins debris: The cyclone assembly inside the clear bin features tiny mesh screens and airflow holes. If fine powdery dust coats these holes, suction drops sharply. Wipe the cone clean with a dry microfiber rag.
- Check the sealing gaskets: When you put the filter and dust cup back together, make sure the flexible rubber seals did not fold over or slip out of their grooves. A pinched seal lets room air leak inside, destroying the vacuum seal needed to lift dirt.
- Evaluate battery strength: If you use one of the lightest cordless vacuum cleaners, smaller battery packs naturally lose peak voltage over years of routine cleaning. When a battery weakens, the motor cannot achieve full operating speed. Check how much a new battery for a cordless vacuum costs before assuming the whole unit is dead.
What should you check before buying replacement filters?
Replacement vacuum filters are built to exact millimeter tolerances, so universal options rarely exist. Even within the same brand family, two stick vacuums released just one year apart often use different latch styles, frame depths, and rim shapes. Taking a few seconds to verify your details ensures you get parts that fit securely on the first try.
Start by locating the silver or white manufacturer label on your machine. This sticker usually sits underneath the battery dock, on the bottom of the handheld motor body, or behind the dust canister. Note the exact model number, including any trailing letters or digits. Matching that exact string against the compatibility list of a replacement part prevents buying a filter that is just slightly too wide to lock into place.
Look for multi-packs that bundle both the pre-motor foam cups and the pleated exhaust cartridges together. Buying sets of two, four, or six gives you an active rotation system. When you wash one set, you can immediately snap a dry backup set into the vacuum, eliminating any downtime during household chores.

- VC Score10.0
BCP Score is a ranking system developed by bestcleanerproducts.com. BCP Score has no relationship or impact from any manufacturers or sales agent websites. Learn more
- BrandTC-JUNESUN

- VC Score10.0
BCP Score is a ranking system developed by bestcleanerproducts.com. BCP Score has no relationship or impact from any manufacturers or sales agent websites. Learn more
- BrandPUREBURG

- VC Score9.4
BCP Score is a ranking system developed by bestcleanerproducts.com. BCP Score has no relationship or impact from any manufacturers or sales agent websites. Learn more
- Brandisinlive

- VC Score9.4
BCP Score is a ranking system developed by bestcleanerproducts.com. BCP Score has no relationship or impact from any manufacturers or sales agent websites. Learn more
- BrandKaulolado
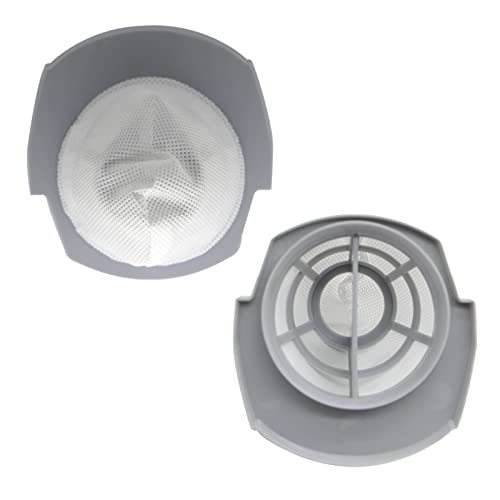
- VC Score9.4
BCP Score is a ranking system developed by bestcleanerproducts.com. BCP Score has no relationship or impact from any manufacturers or sales agent websites. Learn more
- BrandAolleteau

- VC Score9.2
BCP Score is a ranking system developed by bestcleanerproducts.com. BCP Score has no relationship or impact from any manufacturers or sales agent websites. Learn more
- BrandVacmaster

- VC Score9.2
BCP Score is a ranking system developed by bestcleanerproducts.com. BCP Score has no relationship or impact from any manufacturers or sales agent websites. Learn more
- BrandiSingo

- VC Score9.2
BCP Score is a ranking system developed by bestcleanerproducts.com. BCP Score has no relationship or impact from any manufacturers or sales agent websites. Learn more
- BrandSgizoku

- VC Score8.6
BCP Score is a ranking system developed by bestcleanerproducts.com. BCP Score has no relationship or impact from any manufacturers or sales agent websites. Learn more
- BrandAmazon Basics

- VC Score8.2
BCP Score is a ranking system developed by bestcleanerproducts.com. BCP Score has no relationship or impact from any manufacturers or sales agent websites. Learn more
- BrandEureka

- VC Score8.2
BCP Score is a ranking system developed by bestcleanerproducts.com. BCP Score has no relationship or impact from any manufacturers or sales agent websites. Learn more
- BrandLINNIW
Last update on 2026-10-01 / Affiliate links / Images, Product Titles, and Product Highlights from Amazon Product Advertising API
FAQs
How often should you replace a stick vacuum filter?
Most households should install a completely new filter every six to twelve months. If you have multiple shedding pets, vacuum up fine construction dust, or clean daily, you may need a fresh filter every three to four months. Routinely tapping out dry dust between cleanings helps extend the working life of the material.
Can you run a stick vacuum without the filter?
Never run a stick vacuum without its filter installed, even for a few seconds. Without that protective barrier, abrasive grit, hair, and hard debris will fly straight into the high-speed motor fan. This can shatter the plastic fan blades, burn out the motor windings, and void your manufacturer warranty.
Why does the vacuum smell like dust after a change?
A dusty smell right after installing a new filter usually points to fine debris trapped in the clear canister seals or the extension wand. It can also happen if the new filter is not seated completely flat, allowing dusty air to blow past the edge of the seal. Remove the filter, wipe down all mating surfaces with a dry cloth, and reseat it firmly.
Can you speed up filter drying with a hair dryer?
Do not use a hair dryer, microwave, or clothes dryer to speed up the drying process. The intense, concentrated heat from these appliances will warp the rigid plastic housing and melt synthetic filter fibers. Allow the pieces to dry naturally on a towel at room temperature for a full 24 hours.


How to Refinish a Fiberglass Pool

How Do You Keep Raccoons Out of Your Pool?

How to Fix Cyanuric Acid in Your Pool

How to Shape a Pool Cue Tip to Stop Miscues

Best Far Infrared Sauna Sauna Heats: Top Picks of 2026

11 Best Far Infrared Sauna Carbon Fiber Heaters of 2026 For Balanced Full-Body Heat

11 Best Carbon Far Infrared Sauna of 2026 For Even Heat

10 Best Bluetooth Speaker For Sauna of 2026 For Heat and Steam








