
How to Change a V7 Vacuum Battery in 5 Minutes

Three tiny screws release the whole battery pack. Once you remove those three screws, the old pack slides straight down and off the handle. You just slip the fresh unit into the base, press it flush, and secure the fasteners back in. The entire swap takes only a few minutes on a flat table, reviving a machine that cuts out after seconds without touching any internal wiring.
A clean job depends on a few small details. Sliding the clear dirt canister off first gives you a straight shot at the two front fasteners. Using the right small cross-head screwdriver (size PH1) keeps you from stripping the shallow heads, which can trap the old pack inside the handle. Your exact fit also shifts slightly if you choose a standard replacement or a power tool battery adapter. Here is how to swap the pack safely without cracking the plastic casing.
A Small Cross-Head Screwdriver Protects the Soft Screws
You only need one tool to swap out the power pack on your cordless stick vacuum: a small cross-head screwdriver. The screws holding the handle and battery together have very shallow slots. Using the wrong size can strip the metal in a single turn, leaving you with a stuck screw inside a plastic shell.
A number 1 cross-head screwdriver (often marked as PH1) fits these factory screws correctly. Standard household screwdrivers are usually size PH2, which is too wide to sit deep enough in the recess. If you try to force a wide bit, the tip will slide out and chew away the cross pattern. Precision screwdrivers made for eyeglasses are usually too narrow, which can also gouge the center of the screw head.
- Unplug the charging cable: Never work on the vacuum while it is connected to the wall dock or charging cord.
- Remove the cleaning wand: Press the quick-release catch to detach the metal wand and motorized floor nozzle so the main body sits flat.
- Set down a soft towel: Work over a clean table covered with a hand towel to prevent the smooth plastic from rolling around and getting scratched.
- Use a small dish for screws: The three screws are tiny and bounce easily off hard countertops. A shallow dish or magnetic parts tray keeps them from vanishing onto the floor.
- Pick a driver with a magnetic tip: A magnetic tip makes pulling the screws out of their deep plastic wells simple and stops them from dropping into internal motor vents.
Taking sixty seconds to set up your workspace keeps the tiny hardware safe. Once your table is ready and the vacuum is unplugged, you can take off the dirt canister and uncover all three mounting points.
Remove the Dirt Canister to Reach All Three Screws
Many vacuum owners struggle with this repair simply because they cannot find the screws. One screw sits out in the open on the back of the grip, but the other two hide completely behind the dirt canister. Trying to reach around the clear plastic bin will only scratch the clear plastic and ruin the screw heads.
- Empty the dirt canister: Hold the vacuum over a trash can. Pull straight up on the red release lever on top of the cyclone assembly until the red runner lifts and the bottom trapdoor drops open. Let the dust fall out.
- Release the canister from the body: Look near the hinge of the open bottom door. You will see a small red clip or catch on the runner track. Press this red tab while pulling the clear dirt canister straight down toward the bottom of the machine. The clear bin will slide completely off its metal track.
- Set the canister aside: Place the canister and the central cyclone unit away from your work surface so you have plenty of room to handle the motor housing.
- Locate the rear handle screw: Turn the vacuum handle toward you. Right below the charging port at the upper back curve of the handle, you will see the first small cross-head screw sitting inside a rounded recess.
- Locate the two front base screws: Look at the front face of the battery, right where the clear canister used to sit. You will see two small cross-head screws resting side by side in the plastic lower lip. These hold the front of the battery firmly against the motor frame.
Once the clear canister is out of the way, all three screws are directly in front of you. You do not need to pry or force any tabs to see them. With a clear view of each screw head, you are ready to loosen them safely.
Slide the Old Battery Down and Align the Pins
Taking out the old pack and putting in the new one takes less than three minutes when you follow the right sequence. The battery housing does not pop open. Instead, the entire bottom section slides down away from the handle as a single self-contained unit.
- Back out the three screws: Place your PH1 cross-head screwdriver straight into the rear handle screw. Apply firm downward pressure so the bit stays seated, and turn counter-clockwise until the screw is loose. Pull the screw out and put it into your tray. Repeat this exact process for the two front base screws.
- Check for free movement: Do not use a pry tool or screwdriver blade to wedge the casing apart. Once all three screws are out, the battery is held only by friction against the molded guide tracks.
- Slide the old pack downward: Hold the vacuum grip firmly with one hand. Grasp the battery block with your other hand and pull it straight down along the angle of the handle. It will slide smoothly out of the grip track.
- Inspect the metal connector pins: Look up into the hollow handle area where the battery was seated. You will see two flat metal connector pins. Check that these pins are straight, dry, and free of dust or pet hair before sliding the replacement in.
- Position the replacement battery: Line up the plastic guide ribs on your new battery with the matching channels inside the vacuum handle. Push the new pack straight up into the handle until the seams meet flush with no gap.
- Hand-tighten the screws: Drop the rear handle screw into place first. Turn it clockwise until it feels lightly snug, which holds the pack in place. Then drop the two front base screws into their holes and snug them down as well.
When the screws are back in, slide the clear dirt canister back up along its track until the red catch clicks shut, then close the bottom door. The physical replacement is complete, and the frame should feel as solid as it did when you first took it out of the box.
Gentle Tightening Prevents Cracked Plastic and Stripped Threads
The most common mistake during this repair is treating the vacuum like heavy machinery. Cordless vacuum bodies are made of molded plastic, and the screw bosses (the small hollow plastic pillars that receive the screws) can split easily if you turn them with too much force.
When you put the screws back in, use only the power of your fingers and wrist. Turn the screwdriver until you feel the head touch the plastic base, then give it a gentle quarter-turn until it stops. Never use an electric drill or battery-powered driver on these screws. Motorized tools spin too fast and create enough torque to strip the plastic threads instantly, leaving the screw spinning loosely forever.
If a screw does not turn smoothly right away, stop immediately. Turning a screw crookedly can cross-thread the plastic hole, which permanently ruins the grip. Back the screw out half a turn until you feel it drop into the original thread track with a faint click, then slowly turn it clockwise again. It should thread downward with very little resistance.
Another frequent issue happens when someone tries to force the replacement pack into place when it is slightly crooked. If the new battery feels jammed halfway up the handle, do not hit it or force it with your palm. Forcing a misaligned battery can bend the internal metal connector pins. If those pins bend flat or snap, the vacuum cannot draw power from the battery even if the pack is brand new. Pull the pack down, look inside the slot to confirm the pins are straight, and re-align the side tracks before sliding it up again.
Cooling Down Before Charging Extends Your New Battery Life
A fresh replacement battery needs the right care during its first few uses to ensure it delivers steady runtime. Modern lithium-ion packs do not have the memory issues of older rechargeable styles, but they are very sensitive to heat buildup and deep discharge.
- Run a full initial charge: Even though replacement packs arrive with some power for storage, plug the vacuum into the charger right after installing it. Leave it on the charger until the indicator light stops blinking and turns completely solid or turns off, depending on your model.
- Let the pack cool before charging: Never snap the vacuum onto the charging dock immediately after cleaning on high power. Running the machine warms up the internal cells. Charging a hot battery strains the internal chemicals and causes premature cell wear. Wait fifteen to twenty minutes for the pack to reach room temperature.
- Avoid leaving the vacuum in hot spots: Keep your machine mounted in a temperature-controlled room. Avoid sunny utility closets, unheated winter garages, or spots right next to floor heating registers.
- Rely on regular suction mode: Using high suction mode constantly drains the pack quickly and generates intense heat. Save maximum suction for short bursts on thick entry rugs, and use regular mode for bare floors to make the pack last for years.
If your stick vacuum has been acting weak or cutting out after only thirty seconds of cleaning, understanding how much a replacement cordless vacuum battery costs helps you decide if a simple battery swap makes financial sense. For homes with multiple levels, some owners even look into finding a lightweight cordless vacuum to use alongside their refurbished main stick cleaner.
Choose Between Direct Replacement Packs and Tool Battery Converters
When shopping for replacement hardware, you will find two primary solutions: direct-fit replacement battery packs and tool battery converters. Both options fix a vacuum that refuses to hold a charge, but they work quite differently in daily household use.
A direct-fit replacement battery looks and functions just like the factory pack that came with your vacuum. It slides directly into the handle, uses the exact same three screw points, and docks into your existing wall bracket without changes. When buying a direct replacement, verify your machine's exact model tag (such as the V7 or SV11 series). The shapes across cordless generations look similar online, but screw hole positions and electrical sockets change between versions.
A tool battery converter (also called an adapter) replaces the original battery casing with an open dock designed to accept slide-on power tool batteries. If you already keep standard eighteen-volt or twenty-volt lithium tool packs in your garage or workshop, this setup lets you swap fresh packs in seconds. You can run one pack on the vacuum while another charges in your garage.
Before purchasing an adapter, check that your specific power tool battery brand matches the converter dock. Confirm that the adapter fits your vacuum handle series cleanly and allows the spinning brush roller inside your motorized floor nozzle to spin without interruptions. Also verify that the converter housing provides enough physical clearance so you can still release the dirt canister door to empty debris without having to unmount the entire unit every time.

- VC Score9.4
BCP Score is a ranking system developed by bestcleanerproducts.com. BCP Score has no relationship or impact from any manufacturers or sales agent websites. Learn more
- BrandBoetpcr

- VC Score9.2
BCP Score is a ranking system developed by bestcleanerproducts.com. BCP Score has no relationship or impact from any manufacturers or sales agent websites. Learn more
- BrandYMWLKJ

- VC Score8.8
BCP Score is a ranking system developed by bestcleanerproducts.com. BCP Score has no relationship or impact from any manufacturers or sales agent websites. Learn more
- BrandSwidan

- VC Score8.8
BCP Score is a ranking system developed by bestcleanerproducts.com. BCP Score has no relationship or impact from any manufacturers or sales agent websites. Learn more
- BrandPWTLXES

- VC Score8.6
BCP Score is a ranking system developed by bestcleanerproducts.com. BCP Score has no relationship or impact from any manufacturers or sales agent websites. Learn more
- BrandJJXNDO

- VC Score8.6
BCP Score is a ranking system developed by bestcleanerproducts.com. BCP Score has no relationship or impact from any manufacturers or sales agent websites. Learn more
- BrandTPDL

- VC Score8.4
BCP Score is a ranking system developed by bestcleanerproducts.com. BCP Score has no relationship or impact from any manufacturers or sales agent websites. Learn more
- BrandTPDL
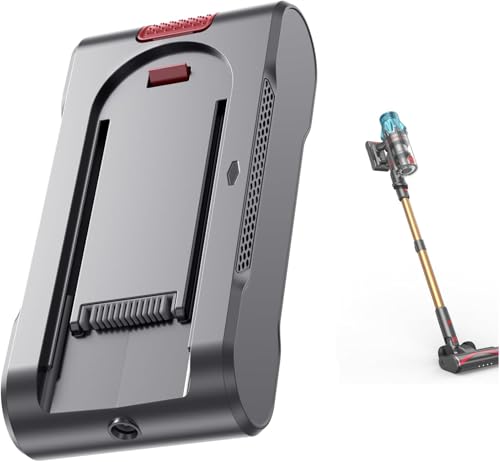
- VC Score8.4
BCP Score is a ranking system developed by bestcleanerproducts.com. BCP Score has no relationship or impact from any manufacturers or sales agent websites. Learn more
- BrandFieety

- VC Score8.4
BCP Score is a ranking system developed by bestcleanerproducts.com. BCP Score has no relationship or impact from any manufacturers or sales agent websites. Learn more
- BrandURUN

- VC Score7.8
BCP Score is a ranking system developed by bestcleanerproducts.com. BCP Score has no relationship or impact from any manufacturers or sales agent websites. Learn more
- BrandBonadget
Last update on 2026-10-01 / Affiliate links / Images, Product Titles, and Product Highlights from Amazon Product Advertising API


How to Refinish a Fiberglass Pool

How Do You Keep Raccoons Out of Your Pool?

How to Fix Cyanuric Acid in Your Pool

How to Shape a Pool Cue Tip to Stop Miscues

Best Far Infrared Sauna Sauna Heats: Top Picks of 2026

11 Best Far Infrared Sauna Carbon Fiber Heaters of 2026 For Balanced Full-Body Heat

11 Best Carbon Far Infrared Sauna of 2026 For Even Heat

10 Best Bluetooth Speaker For Sauna of 2026 For Heat and Steam








